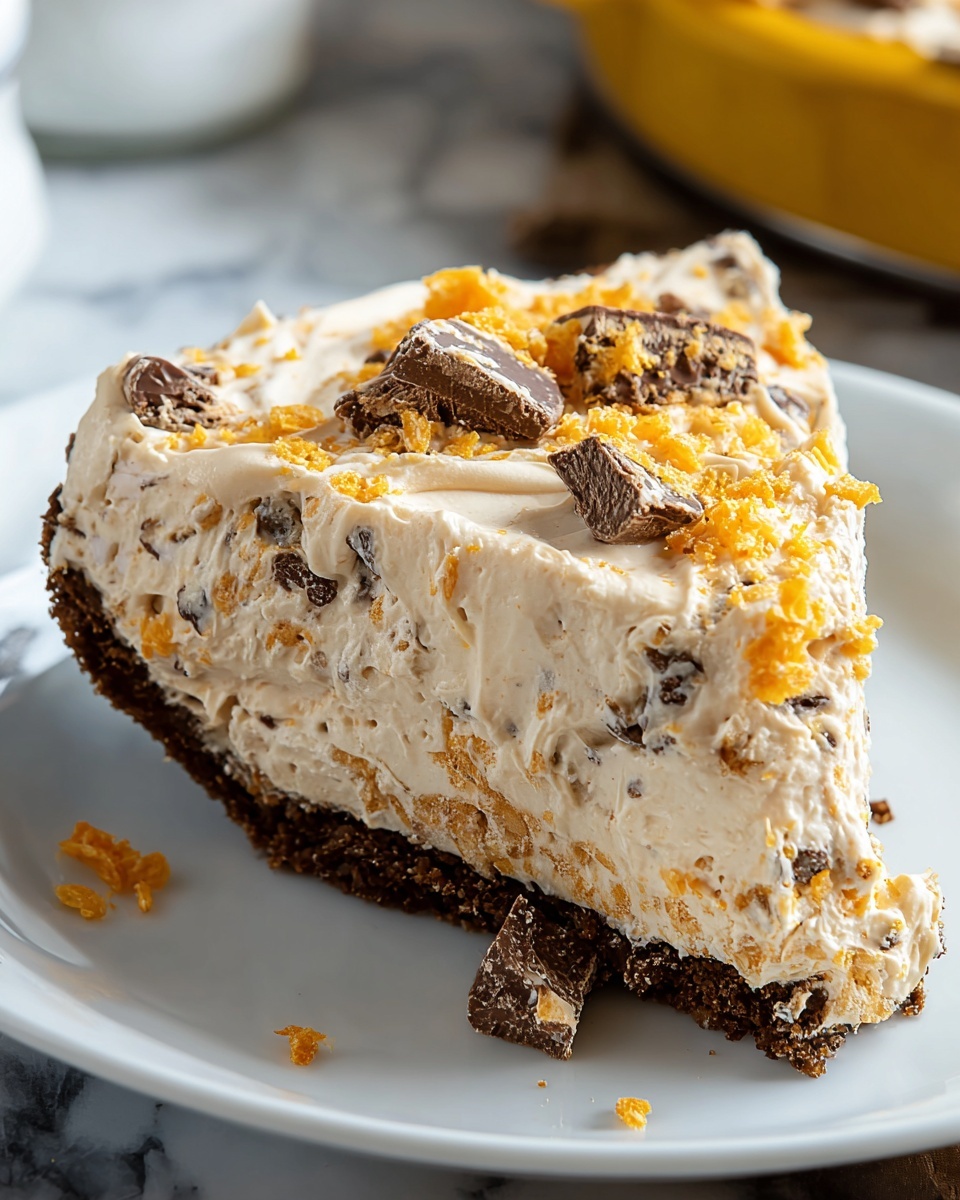
Butterfinger Pie Recipe
If you’re looking for a dessert that combines creamy, crunchy, and downright indulgent flavors, this Butterfinger Pie Recipe is absolutely worth trying. It’s one of those no-bake pies that feels decadent but is surprisingly easy to pull together, making it perfect for busy days or last-minute gatherings. The mix of cream cheese, peanut butter, and crushed Butterfinger bars always wins over any crowd I serve it to.
What makes this Butterfinger Pie Recipe stand out for me is how it balances those sweet, buttery candy bar bits with a smooth, fluffy filling in a chocolate crust. I love bringing this out at casual get-togethers or when I need a quick treat that feels homemade but requires minimal effort. Plus, you can make it ahead, so it’s a total win-win for any occasion.
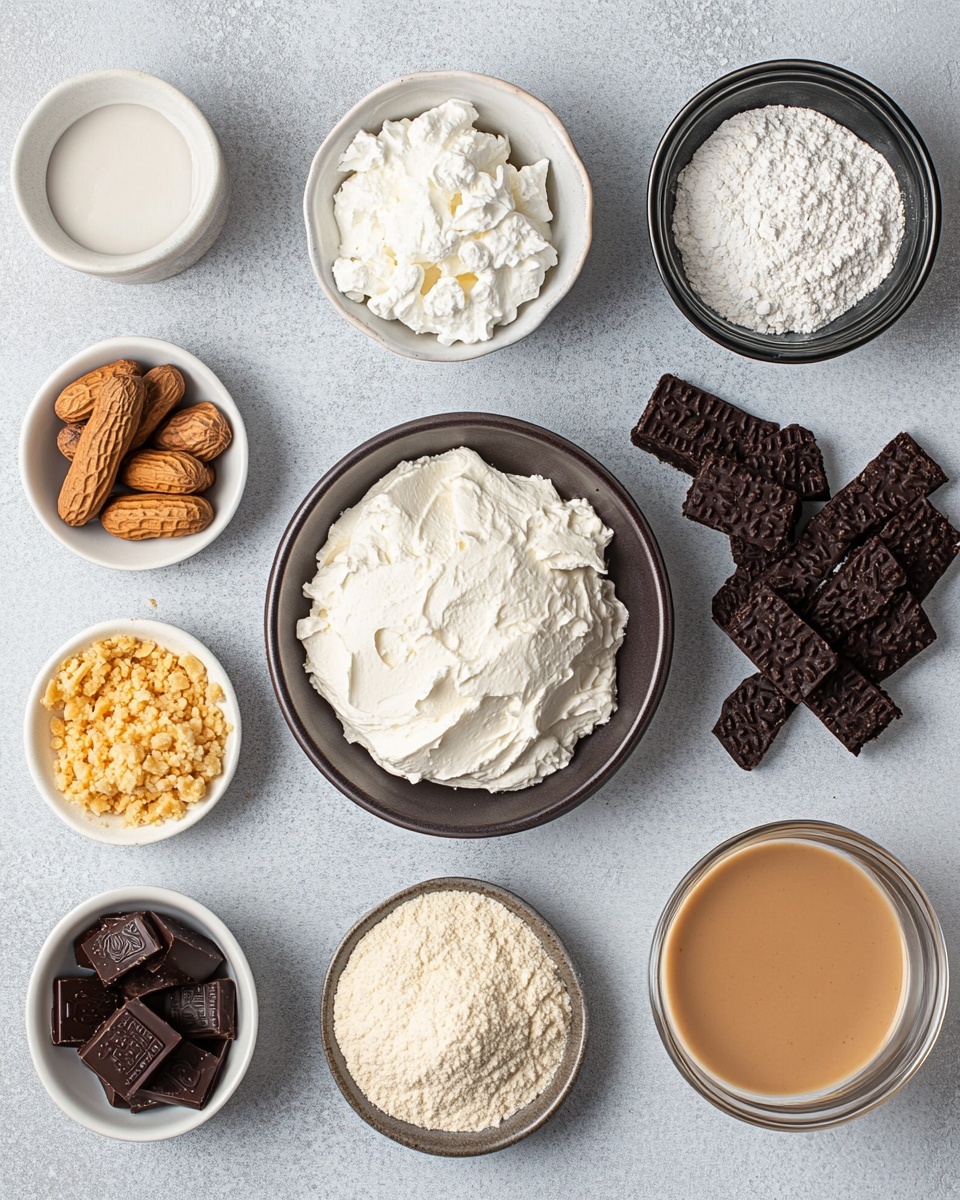
Ingredients You’ll Need
Every ingredient here plays a key role in building that luscious texture and flavor combo. I recommend grabbing a good quality peanut butter and fresh cream cheese for the best results. Also, don’t rush on thawing your Cool Whip—it makes folding so much smoother.
- Cream cheese: Room temperature cream cheese blends easily for that smooth, creamy base.
- Peanut butter: Creamy peanut butter adds a rich, nutty flavor and silky texture.
- Vanilla extract: A splash of vanilla amps up the sweetness and rounds out flavors.
- Powdered sugar: Sweetens the filling without any graininess.
- Butterfinger bars: Crushing these fun-sized candies gives you crunchy, peanut buttery bursts in every bite.
- Cool Whip: Thawed Cool Whip brings fluffiness and lightness that balances the richness perfectly.
- Chocolate or Oreo crust: I find the chocolate cookie crust complements the peanut butter and candy flavors so well.
Variations
I love making this Butterfinger Pie Recipe my own by playing around with the fillings or crust. Don’t hesitate to tweak the candy bars or nut butter to match your personal cravings—it’s all about what tastes best to you!
- Peanut butter swap: I’ve tried almond butter instead of peanut butter for a slightly different but still delicious twist.
- Candy bar substitutions: Sometimes I mix in Snickers or Reese’s chopped pieces along with Butterfinger for extra texture variety.
- Crust changes: A graham cracker crust works beautifully if you want a lighter base.
- Dairy-free option: Use dairy-free cream cheese and whipped topping to make this pie allergy-friendly.
How to Make Butterfinger Pie Recipe
Step 1: Whip up the creamy filling
Start by beating your softened cream cheese and creamy peanut butter together in a big bowl. I like to use an electric mixer on medium speed to make the mixture extra smooth. Adding in the vanilla extract here lifts the flavors right from the start. Make sure no lumps remain before moving on.
Step 2: Sweeten and fold in crunch
Gradually beat in the powdered sugar until everything looks silky and well combined. Then it’s time to gently fold in the crushed Butterfinger bars. Be careful not to overmix here—you want to keep those crunchy bits dispersed throughout the creamy filling.
Step 3: Lighten with Cool Whip and assemble
Fold in the thawed Cool Whip carefully; this step adds fluff without deflating the mixture. Once the filling is ready, spread it evenly into your prepared chocolate or Oreo crust. To finish, sprinkle the reserved crushed Butterfingers on top for extra texture and that wow factor.
Step 4: Chill and serve
Refrigerate the pie for at least 4 hours, or until firm enough to slice nicely. This wait is key because it lets the flavors marry and the filling set perfectly—trust me, it’s worth the patience!
How to Serve Butterfinger Pie Recipe
Garnishes
I like to keep things simple, topping the pie with a sprinkle of crushed Butterfinger bars to highlight that candy crunch. Sometimes, I add a drizzle of melted chocolate or a dollop of extra Cool Whip for a pretty presentation and extra indulgence.
Side Dishes
Since this pie is rich and sweet, I usually pair it with fresh fruit like strawberries or a tangy citrus salad to balance the flavors. A cup of strong coffee or a glass of cold milk also complements it wonderfully.
Creative Ways to Present
For special occasions, I’ve served the Butterfinger Pie Recipe in individual clear cups topped with mini candy pieces and whipped cream swirls—so fun for parties. You can also cut it into bars and plate with a drizzle of caramel sauce for a fancy twist that guests will rave about.
Make Ahead and Storage
Storing Leftovers
I usually keep leftovers covered tightly with plastic wrap in the fridge. The pie holds up well for about 3-4 days, making it a perfect make-ahead dessert if you want to plan for the week.
Freezing
Freezing Butterfinger Pie works fine if you wrap it well in foil and plastic wrap to avoid freezer burn. When I freeze it, I recommend thawing overnight in the fridge before serving so the texture stays creamy and fresh.
Reheating
This pie is best served chilled, so no reheating needed. Just slice directly from the fridge for the perfect creamy and crunchy texture every time.
FAQs
-
Can I use regular-sized Butterfinger bars instead of fun-sized?
Absolutely! Just chop the regular-sized bars into small pieces to match the texture of fun-sized ones. The key is to have evenly crushed pieces so the filling incorporates well.
-
Do I need to use a store-bought crust, or can I make my own?
You can definitely make your own chocolate or Oreo crust if you prefer—it’s a little more effort but adds a fresh homemade touch. Just make sure to let the crust chill and set before adding your filling.
-
Can I substitute Cool Whip with homemade whipped cream?
Yes, homemade whipped cream works great and makes the pie taste even fresher. Just whip your cream to soft peaks and fold gently into the filling mixture to keep the airy texture.
-
What if I don’t have an electric mixer?
You can still make this pie by hand, though it’ll take a bit more elbow grease to get the cream cheese and peanut butter smooth. Use a sturdy whisk or wooden spoon and be patient.
-
How long can I prepare the Butterfinger Pie Recipe in advance?
This pie keeps well for up to 4 days in the fridge, so I often make it a day or two before a party. Just remember to cover it tightly to prevent it from absorbing fridge odors.
Final Thoughts
This Butterfinger Pie Recipe has been one of my go-to desserts whenever I want to impress without stress. It’s the kind of sweet treat that instantly brings smiles and requests for seconds. I hope you’ll enjoy making and sharing it as much as I have—seriously, once you try it, Butterfinger Pie might just become your new favorite indulgence!
Print
Butterfinger Pie Recipe
- Prep Time: 15 minutes
- Cook Time: 0 minutes
- Total Time: 4 hours 15 minutes
- Yield: 8 servings 1x
- Category: Dessert
- Method: No-Cook
- Cuisine: American
Description
This Butterfinger Pie is a rich and creamy dessert combining the smoothness of cream cheese and peanut butter with the crunchy, chocolatey goodness of crushed Butterfinger bars. Set in a chocolate graham cracker crust and topped with Cool Whip, it’s a no-bake treat perfect for parties or quick indulgences.
Ingredients
Filling
- 1 (8-ounce) package cream cheese, room temperature
- 1/2 cup creamy peanut butter
- 2 teaspoons vanilla extract
- 1 1/2 cups powdered sugar
- 1 (12.5-ounce) bag fun-sized Butterfinger bars, crushed (reserve 2 bars to sprinkle on top)
- 1 (8-ounce) container Cool Whip, thawed
Crust
- 1 store-bought Oreo or chocolate graham cracker crust
Instructions
- Prepare the Creamy Base: Place the cream cheese and peanut butter in a large mixing bowl. Add the vanilla extract, then beat with an electric mixer until the mixture is completely smooth and creamy.
- Add Sweetness: Gradually beat in the powdered sugar until the mixture is evenly combined and smooth, ensuring no lumps remain.
- Incorporate Crunch: Gently fold the crushed Butterfinger bars into the cream cheese mixture, distributing the candy pieces evenly without breaking them up too much.
- Fold in Whipped Topping: Carefully fold in the thawed Cool Whip, blending until the filling is light and fluffy while retaining texture.
- Assemble the Pie: Spread the prepared filling evenly into the store-bought Oreo or chocolate graham cracker crust. Sprinkle the reserved whole or roughly chopped Butterfinger bars evenly on top to add extra crunch and visual appeal.
- Chill: Refrigerate the pie for at least 4 hours, or until set, allowing the flavors to meld and the filling to firm up before serving.
Notes
- For best results, use room temperature cream cheese to avoid lumps.
- You can substitute peanut butter with a natural peanut butter variant for a healthier option.
- Use a deep-dish crust if you prefer a thicker pie.
- Store leftovers refrigerated and consume within 3 days for freshness.
- To make it easier to slice, chill the pie overnight.
Keywords: Butterfinger Pie, no-bake pie, peanut butter pie, cream cheese dessert, easy pie recipe, chocolate candy pie