Cherries in the Snow Recipe
Let me tell you, this Cherries in the Snow Recipe is one of those timeless desserts that feels like a cozy hug after a long day. It’s creamy, light, and sweet with just the right pop of cherry – perfect for potlucks, holidays, or lazy weekend treats. I bet once you try it, you’ll find yourself reaching for it whenever you want something fuss-free but impressive.
What I love most about this Cherries in the Snow Recipe is that it’s surprisingly easy to pull together, yet looks fancy enough to wow guests. The combination of cream cheese, whipped topping, and fluffy angel food cake makes every bite feel like clouds with a burst of cherry goodness. Trust me, you’re going to want this recipe saved in your go-to dessert folder.
Ingredients You’ll Need
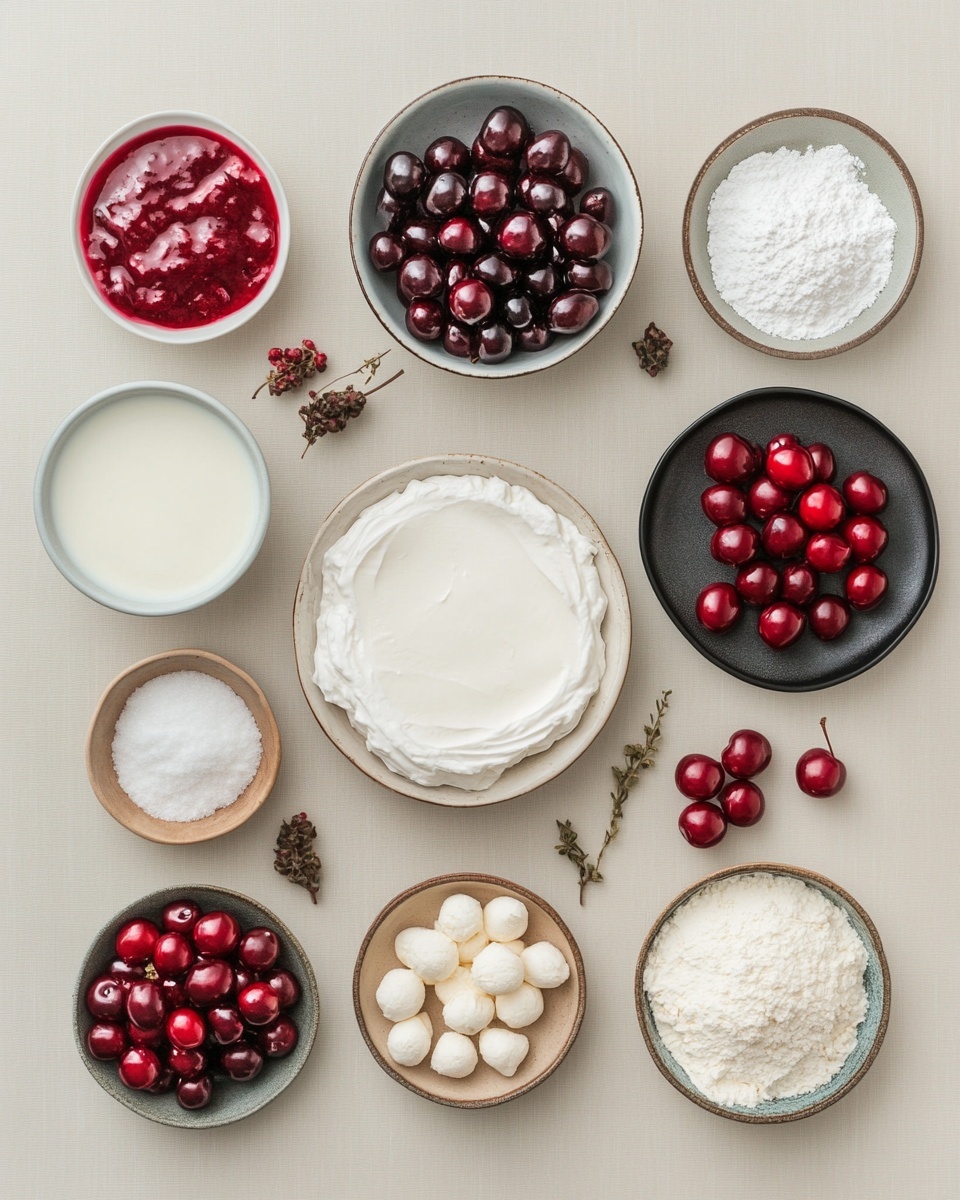
Each ingredient in this Cherries in the Snow Recipe plays a simple but essential role to get that perfect creaminess and texture, plus the cherries bring a refreshing tartness that balances it all out. When you’re shopping, try to pick the freshest cream cheese you can find and go for a quality canned cherry pie filling—it really makes a difference!
- Block style cream cheese: Make sure it’s at room temperature to keep your mixture smooth and creamy without lumps.
- Powdered sugar: Sift it before measuring to avoid clumps and keep your dessert silky.
- Whole milk: Adds just enough moisture to blend everything seamlessly—don’t substitute for skim or it might get watery.
- Vanilla extract: Just a touch enhances all those lovely flavors; you can use pure or imitation based on your pantry.
- Frozen whipped topping (Thawed): I always use Cool Whip for that light, airy texture, but fresh whipped cream can also work if you’re feeling fancy.
- Pre-baked angel food cake: Breaking it into pieces adds texture; store-bought is perfect to save time without skimping on flavor.
- Cherry pie filling: Go with your favorite brand—Comstock is my go-to for that perfect balance of sweetness and tartness.
Variations
I’ve found you can play around with this Cherries in the Snow Recipe in fun ways without losing any of its charm. Don’t hesitate to tailor it to your taste or what’s in your fridge—it makes it feel more homemade and personal that way.
- Use different fruit fillings: I once swapped in blueberry pie filling, and it was a hit at summer BBQs. You can try cherry-almond or even strawberry for seasonal twists.
- Make it lighter: Swap regular cream cheese for a reduced-fat version if you want a slightly healthier dessert, though it won’t be quite as rich.
- Fresh cherries: If cherry season hits while you’re craving this dessert, fresh pitted cherries tossed with a little sugar make an amazing fresh-tasting variation.
- Flavor boost: Adding a teaspoon of almond extract alongside vanilla adds a subtle nutty depth I adore.
How to Make Cherries in the Snow Recipe
Step 1: Beat the Cream Cheese and Sugar
Start by softening your cream cheese until it’s room temperature—this is key for smooth mixing. Using a hand mixer or stand mixer, beat the cream cheese until creamy. Then gradually add the sifted powdered sugar, mixing well after each addition to avoid lumps. You’ll want the mixture silky and sweet but not grainy. This is where a little patience pays off.
Step 2: Add Milk and Vanilla
Next, slowly pour in the whole milk and vanilla extract while beating on medium speed. This helps loosen the mixture and carry the flavors evenly. The texture should lighten and become perfectly scoopable—not runny, just creamy enough to spread and fold with ease.
Step 3: Fold in the Whipped Topping
Now, gently fold in the thawed whipped topping using a spatula. Don’t overmix here—you want to keep that airy fluffiness intact so the dessert stays light and cloud-like. This step always makes me smile because I love how the colors swirl together.
Step 4: Assemble with Angel Food Cake and Cherries
Tear your angel food cake into bite-sized pieces and layer them in your serving dish. Pour half of the cream cheese mixture over the cake, then spread half the cherry pie filling on top. Repeat these layers once more for a beautiful, tall dessert. Honestly, this layering looks stunning through a glass trifle bowl, which makes it perfect for showing off at parties.
Step 5: Chill and Serve
Cover your masterpiece with plastic wrap and chill it in the fridge for at least 4 hours, or overnight if you can wait that long. This resting time lets the flavors meld and the cake absorb a little of that creamy cherry magic. I always find it tastes even better the next day!
How to Serve Cherries in the Snow Recipe
Garnishes
I like to finish it off with a few fresh cherries or a sprig of mint on top for a pop of color and a fresh aroma. Sometimes, I sprinkle a little toasted almond slivers or shaved white chocolate to add a bit of crunch and elegance. These little touches really make the dessert feel special and festive.
Side Dishes
This dessert pairs wonderfully with a hot cup of coffee or a light herbal tea to balance the sweetness. If you’re serving it as part of a larger meal, some simple roasted nuts or a crisp green salad with a tangy vinaigrette can make a nice contrast and keep the meal balanced.
Creative Ways to Present
For special occasions, I’ve layered the Cherries in the Snow Recipe in individual parfait glasses—this gives everyone their own pretty portion and cuts down on serving fuss. Another fun idea is to spoon it into hollowed-out citrus halves like oranges for a citrusy twist and charming presentation at brunches.
Make Ahead and Storage
Storing Leftovers
After indulging, cover any leftovers tightly with plastic wrap or transfer them into an airtight container. I usually keep mine in the refrigerator, and it stays fresh and creamy for about 3 days. The flavors actually seem to deepen overnight, so it’s perfect to make ahead.
Freezing
Freezing this Cherries in the Snow Recipe isn’t my favorite because the whipped topping and cream cheese can change texture a bit after thawing. But if you want to freeze it, pop it in a sealed container and thaw it slowly in the fridge overnight. It works best if you plan to eat it within a week.
Reheating
This dessert is best enjoyed cold, so I don’t recommend reheating. Just let it thaw gently in the fridge if previously frozen, and serve it chilled. The creaminess is what makes it magic, so keep it cool!
FAQs
-
Can I use fresh cherries instead of canned pie filling?
Yes! Fresh cherries can be used, but you’ll want to pit and lightly sweeten them ahead of time to mimic the sweetness and syrup of the pie filling. Toss them with a bit of sugar and lemon juice, then let them sit so the juices come out. This makes for a fresher and lighter version of the dessert.
-
Is it necessary to use angel food cake?
While angel food cake adds a lovely light texture, you can substitute with sponge cake, pound cake, or even ladyfingers if you prefer. Just keep in mind that denser cakes may alter the texture somewhat, so adjust layering accordingly.
-
How long can I store Cherries in the Snow?
Stored in an airtight container in the refrigerator, it will stay fresh for about 3 days. After that, the texture may start to break down and the cake can get soggy.
-
Can I make this recipe dairy-free?
For a dairy-free version, you could try using dairy-free cream cheese and whipped topping alternatives. Just be mindful the texture and flavor will differ slightly. It’s worth experimenting if you have dietary restrictions!
-
Can I prepare this recipe ahead of time?
Absolutely! In fact, this Cherries in the Snow Recipe tastes better after chilling overnight. Preparing it a day ahead gives the flavors time to meld beautifully.
Final Thoughts
I honestly can’t recommend this Cherries in the Snow Recipe enough. It’s one of those desserts I keep coming back to because it’s straightforward, delicious, and always a crowd-pleaser. If you’re craving something special without the fuss, give this recipe a try—you’ll be amazed how something so simple can feel so indulgent. I’m excited for you to make it and share it with your favorite people!
Print
Cherries in the Snow Recipe
- Prep Time: 15 minutes
- Cook Time: 0 minutes
- Total Time: 3 hours 15 minutes (including chilling time)
- Yield: 8–10 servings 1x
- Category: Dessert
- Method: No-Cook
- Cuisine: American
Description
Cherries in the Snow is a delightful, no-bake layered dessert featuring creamy sweetened cream cheese and whipped topping, tender angel food cake pieces, and vibrant cherry pie filling. This simple yet elegant treat combines fluffy cake, rich creaminess, and juicy cherries, making it perfect for potlucks, family gatherings, or holiday celebrations.
Ingredients
Cream Cheese Mixture
- 12 ounces block style cream cheese, room temperature
- ¾ cup powdered sugar, sifted
- ⅓ cup whole milk
- ½ teaspoon vanilla extract
- 8 ounces frozen whipped topping, thawed (Cool Whip brand recommended)
Cake and Topping
- 1 pre-baked angel food cake, torn into ¾ – 1 inch pieces (approx. 15 ounces, 9-inch store-bought cake)
- 42 ounces cherry pie filling (2 cans of 21 ounces each, Comstock brand recommended)
Instructions
- Prepare Cream Cheese Mixture: In a large mixing bowl, beat the cream cheese until smooth and creamy. Gradually add sifted powdered sugar and continue to beat until well combined. Slowly pour in the whole milk and vanilla extract, mixing thoroughly to achieve a smooth consistency. Gently fold in the thawed whipped topping until evenly incorporated, creating a light, fluffy filling.
- Assemble Dessert: In a large serving dish or trifle bowl, layer torn pieces of angel food cake evenly across the bottom. Spoon half of the cream cheese mixture over the cake pieces, spreading gently to cover them. Add half of the cherry pie filling warmly or chilled, distributing evenly over the cream cheese layer.
- Repeat Layers: Repeat layering with the remaining angel food cake pieces, cream cheese mixture, and cherry pie filling, finishing with a generous layer of cherries on top. Smooth the top layer for an even, attractive finish.
- Chill and Serve: Cover the dessert with plastic wrap and refrigerate for at least 3 hours, or overnight, allowing the flavors to meld and the cake to soften slightly. Serve chilled for best texture and flavor.
Notes
- For best results, ensure the cream cheese is softened to room temperature before mixing to avoid lumps.
- Use a high-quality cherry pie filling for optimal flavor and texture.
- This dessert can be prepared a day in advance and stored in the refrigerator, making it convenient for entertaining.
- The angel food cake provides a light base, but you can substitute with pound cake if preferred.
- Keep the dessert covered in the refrigerator to prevent it from drying out.
Keywords: cherry dessert, no bake dessert, layered dessert, angel food cake dessert, easy cherry dessert, summer dessert, holiday dessert