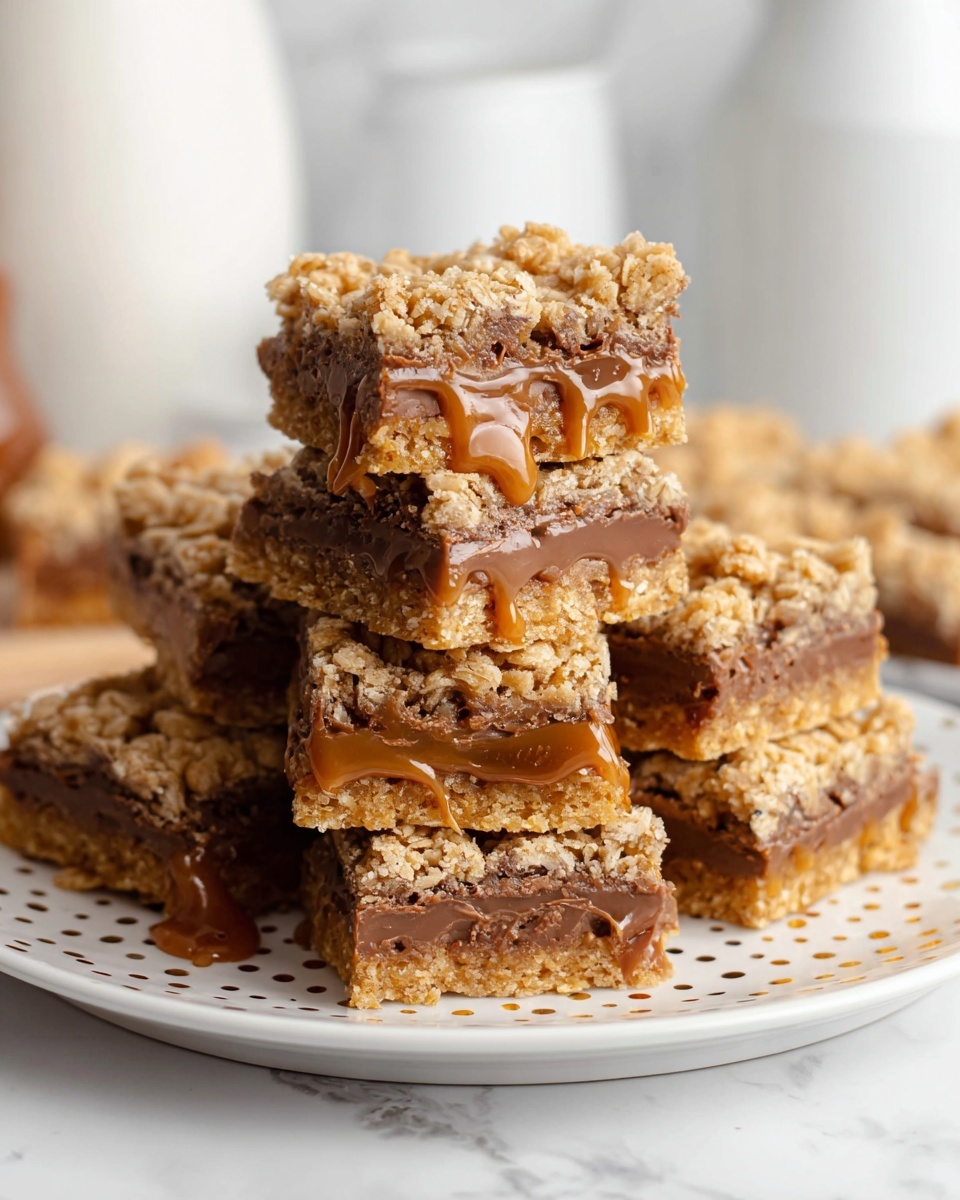
Chocolate and Caramel Carmelitas Recipe
If you’re on the hunt for a dessert that’s got the perfect balance of chewy, crunchy, gooey, and rich, this Chocolate and Caramel Carmelitas Recipe is absolutely worth trying. I remember the first time I made these—they were a delightful surprise, combining buttery oat bars with luscious caramel and melted chocolate in a way that just hits the spot. Whether you’re serving these at a casual get-together or just want a cozy treat to savor on a lazy afternoon, they never disappoint.
What makes this Chocolate and Caramel Carmelitas Recipe a standout is the way it brings together simple, wholesome ingredients into a truly indulgent bar cookie experience. The oat-based crust is sturdier than your typical cookie but still soft enough to complement that dreamy caramel and chocolate layer. Trust me, once you try making them, you’ll want to have a batch ready in your kitchen all the time.
Ingredients You’ll Need
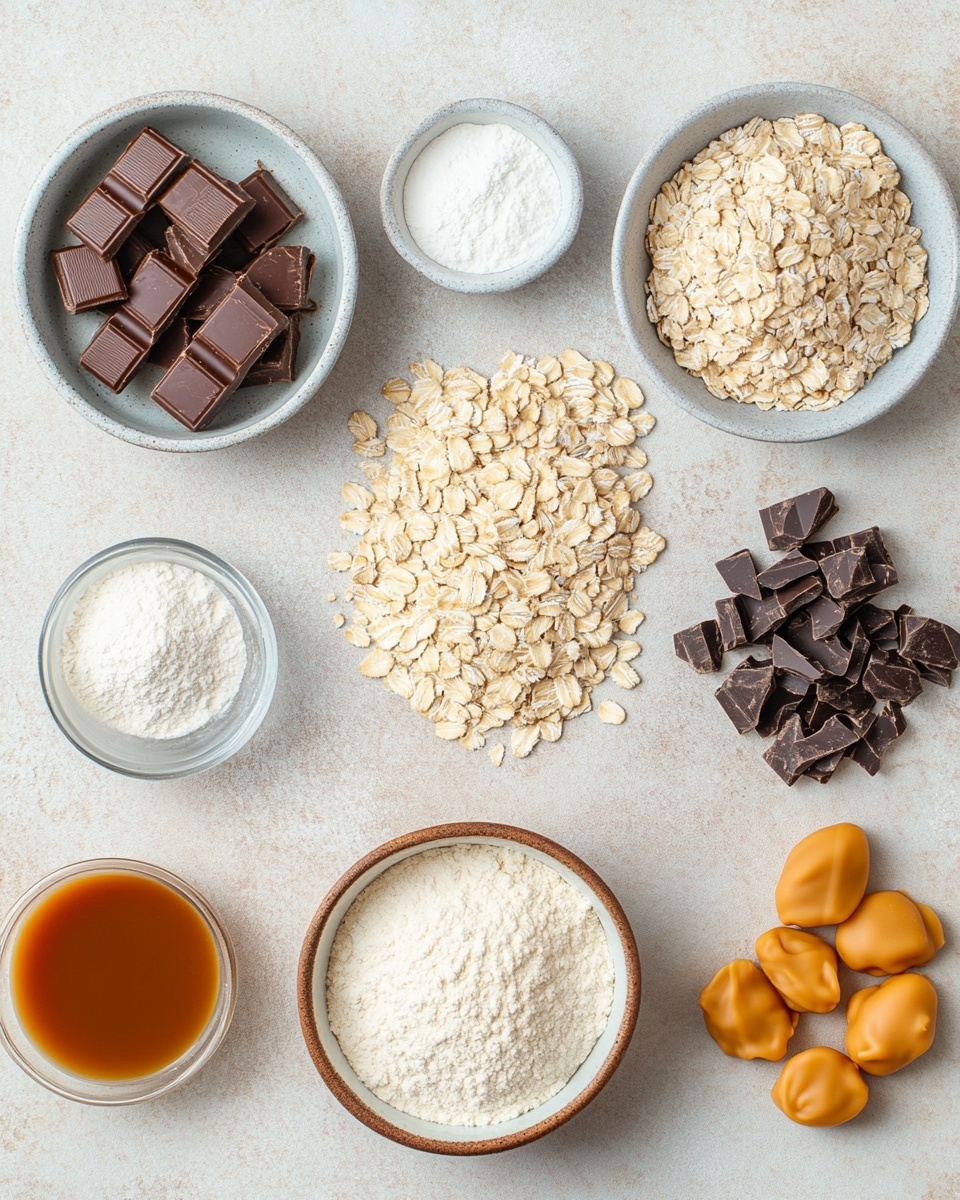
The ingredients for this recipe work harmoniously to build layers of flavor and texture. Having good quality caramel and chocolate will really elevate your final result, and the oats add a wonderful chewy contrast that makes these bars so satisfying.
- All purpose flour: Provides structure; I usually sift it to avoid lumps.
- Old fashioned oats: Adds chewiness and wholesome texture.
- Salted butter (melted): Melting it helps bind ingredients evenly.
- Light brown sugar (tightly packed): Gives just the right caramel-like sweetness.
- Pure vanilla extract: Enhances flavor depth; I recommend using good quality for best aroma.
- Baking soda: Adds a touch of lift and tenderness.
- Kosher salt: Balances sweetness perfectly.
- Milk chocolate chips: The creamy chocolate layer is a must! I prefer milk for its smooth melt.
- Individually wrapped caramels: For rich, melty caramel goodness; unwrap them before using.
- Heavy cream: Used to melt caramel smoothly, making that gooey center irresistible.
Variations
I love tweaking this Chocolate and Caramel Carmelitas Recipe depending on the occasion or mood. Don’t hesitate to customize—it’s such a versatile canvas for different flavors and textures.
- Walnut or pecan add-in: I often sprinkle chopped nuts over the oat base before adding caramel for a lovely crunch and nutty flavor.
- Dark chocolate chips: For a slightly more intense chocolate flavor, swapping milk for dark chips is a personal favorite.
- Sea salt topping: A pinch of flaky sea salt on top enhances the sweet-salty balance beautifully.
- Gluten-free adaptation: Using gluten-free oats and flour blends works well, just keep an eye on texture.
How to Make Chocolate and Caramel Carmelitas Recipe
Step 1: Prep the Oat Crust
Start by preheating your oven to 350°F (175°C). In a large mixing bowl, combine the all purpose flour, old fashioned oats, melted salted butter, light brown sugar, vanilla extract, baking soda, and kosher salt until it forms a crumbly dough. I like to use my hands or a sturdy spoon to ensure everything’s evenly blended without overmixing. Then, press about two-thirds of this mixture evenly into a greased 9×13-inch pan—they call this the base, and it sets the stage for those luscious layers on top.
Step 2: Create the Caramel Layer
Next, unwrap all the individually wrapped caramels and place them in a saucepan along with the heavy cream over low heat. Stir constantly until the caramels melt and the mixture is smooth and creamy—this usually takes about 5 minutes. Pour the warm caramel evenly over the oat crust you already pressed into the pan. Be careful not to burn the caramel, and if it feels too thick, a splash more cream can help loosen it up.
Step 3: Add the Chocolate and Remaining Crust
Before the caramel cools completely, sprinkle the milk chocolate chips over the top so they begin to soften and meld with the warm caramel layer. Finally, crumble the leftover oat crust mix over everything, distributing it to cover most of the chocolate chips. Don’t worry if it’s not perfect—the cracks and gaps are part of the charm.
Step 4: Bake and Cool
Bake your carmelitas in the oven for about 25-30 minutes or until the top is golden and fragrant. You’ll know they’re ready when the edges pull slightly away from the sides of the pan. Let them cool completely in the pan—this helps the caramel set up so the bars hold together when sliced. Patience here really pays off, trust me!
How to Serve Chocolate and Caramel Carmelitas Recipe
Garnishes
I love to sprinkle a pinch of flaky sea salt or even a light drizzle of extra melted chocolate on top just before serving. It adds that little touch of sophistication and balances the rich sweetness nicely. Sometimes, a dusting of powdered sugar adds a pretty, festive touch if I’m making these for guests.
Side Dishes
These bars are enough to stand on their own, but for a sweet pairing, I sometimes serve them with fresh berries or a scoop of vanilla ice cream. An espresso or strong coffee on the side really complements the caramel and chocolate flavors beautifully—definitely a combo I recommend trying.
Creative Ways to Present
For special occasions, I’ve used a cookie cutter to make petite bar shapes and wrapped each in parchment for gifting. Layering them on a wooden board with fresh mint leaves or edible flowers makes a stunning dessert display. Trust me, these little touches make your Chocolate and Caramel Carmelitas Recipe feel extra special and thoughtfully made.
Make Ahead and Storage
Storing Leftovers
Once completely cooled, I cut the carmelitas into bars and store them in an airtight container at room temperature. They keep beautifully for up to 5 days without losing their texture or flavor. If your kitchen is warm, a cool pantry spot or even the fridge works too—just bring them back to room temp before enjoying for the best softness.
Freezing
Yes, these freeze wonderfully! I wrap individual bars tightly in plastic wrap and place them in a freezer-safe container or bag. When I want a treat, I thaw them overnight in the fridge or for a few hours at room temperature. Freezing doesn’t affect the delicious chocolate and caramel layers, which is a lifesaver for busy weeks.
Reheating
If you prefer your Carmelitas a bit warm, I gently microwave a bar for about 15 seconds—or pop it in a low oven for just a few minutes. This softens the caramel and chocolate for that fresh-from-the-oven feel without melting into a mess. Just keep an eye on them so they don’t get too hot and lose their texture.
FAQs
-
Can I use store-bought caramel sauce instead of melting caramels?
You can, but melted individually wrapped caramels mixed with heavy cream tend to give a thicker, more luxurious caramel layer that sets nicely. Store-bought caramel sauce often has a thinner consistency and might soak into the oat crust more. If using sauce, try chilling the bars longer to firm up before slicing.
-
Are Chocolate and Caramel Carmelitas Recipe suitable for gluten-free diets?
They can be! Substitute the all purpose flour with a gluten-free blend and make sure your oats are certified gluten-free. Keep in mind the texture might vary slightly, but the overall deliciousness remains intact in my experience.
-
How do I prevent the caramel from burning while melting?
Use low heat and stir constantly to avoid scorching the caramel. Adding heavy cream as you melt the caramels helps smooth out the mixture and lowers the risk of burning. Patience and slow melting are key here!
-
Can I make this recipe vegan?
This recipe relies on butter, heavy cream, and milk chocolate, but you could experiment with vegan butter, coconut cream, and dairy-free chocolate chips. Keep in mind the texture and flavor might be a bit different, but it’s definitely worth a try if you want a vegan-friendly version.
-
What’s the best way to cut the bars without them crumbling?
Make sure the Carmelitas are completely cooled before slicing—this sets the caramel and chocolate layers. Use a sharp, serrated knife and wipe it clean between cuts to get neat edges. If bars feel too crumbly, chilling in the fridge for 30 minutes helps firm them up for easier cutting.
Final Thoughts
I honestly can’t recommend this Chocolate and Caramel Carmelitas Recipe enough if you’re in the mood for a dessert that’s both nostalgic and irresistibly indulgent. It’s one of those recipes I keep coming back to because it hits all the right notes—a crunchy but chewy base, that luscious caramel center, and a shiny chocolate top. Give it a try, perfect it with your personal touches, and I guarantee you’ll have a new favorite treat to share with friends and family.
Print
Chocolate and Caramel Carmelitas Recipe
- Prep Time: 15 minutes
- Cook Time: 30 minutes
- Total Time: 45 minutes
- Yield: 16 bars 1x
- Category: Dessert
- Method: Baking
- Cuisine: American
Description
This Carmelitas recipe features a delicious layered bar with a chewy oat and flour crust, topped with rich milk chocolate chips and gooey caramel made from individually wrapped caramels melted with heavy cream. Perfectly balanced with buttery, sweet, and slightly salty flavors, these bars make an irresistible treat for any occasion.
Ingredients
Dry Ingredients
- 1½ cups all purpose flour
- 1½ cups old fashioned oats
- 2 teaspoons pure vanilla extract
- 1 teaspoon baking soda
- ½ teaspoon kosher salt
Wet Ingredients
- 1 cup salted butter, melted
- ¾ cup light brown sugar, tightly packed
Chocolate and Caramel Layer
- 1½ cups milk chocolate chips
- 11 ounces individually wrapped caramels
- ½ cup heavy cream
Instructions
- Preheat Oven: Preheat your oven to 350°F (175°C) and line a 9×13 inch baking pan with parchment paper or lightly grease it to prevent sticking.
- Prepare Crust Mixture: In a large mixing bowl, combine the all purpose flour, old fashioned oats, baking soda, kosher salt, and light brown sugar. Mix the dry ingredients well.
- Add Wet Ingredients: Pour the melted salted butter and vanilla extract into the dry ingredients. Stir everything together until fully combined into a consistent dough.
- Press Crust Layer: Press about two-thirds of the dough evenly across the bottom of the prepared baking pan to form the base crust layer.
- Melt Caramel Sauce: In a microwave-safe bowl, combine the individually wrapped caramels (unwrapped) and heavy cream. Microwave in 20 to 30-second increments, stirring between each, until the caramels are completely melted and smooth.
- Add Chocolate Chips and Caramel: Sprinkle the milk chocolate chips over the crust layer evenly. Then pour and spread the warm caramel sauce over the chocolate chips carefully, making sure it covers them well.
- Top with Remaining Crust: Crumble the remaining one-third of the dough over the caramel and chocolate layers. Gently press to slightly adhere but maintain a crumbly texture.
- Bake the Carmelitas: Bake in the preheated oven for 25-30 minutes, or until the top crust is golden brown and the caramel has set slightly.
- Cool and Slice: Remove the baking pan from the oven and allow the bars to cool completely at room temperature before cutting into squares. This helps the layers firm up properly.
Notes
- Ensure caramel is melted slowly to avoid burning for a smooth sauce.
- Press the bottom crust firmly for better structure but keep the top crust crumbly for texture contrast.
- Use salted butter as it balances the sweetness well; if using unsalted butter, add a pinch more salt to dough.
- Store in an airtight container at room temperature for up to 3 days or refrigerate for longer freshness.
- For easier slicing, chill the bars after cooling.
Keywords: Carmelitas, caramel bars, chocolate caramel bars, oat bars, dessert bars, easy baking recipe