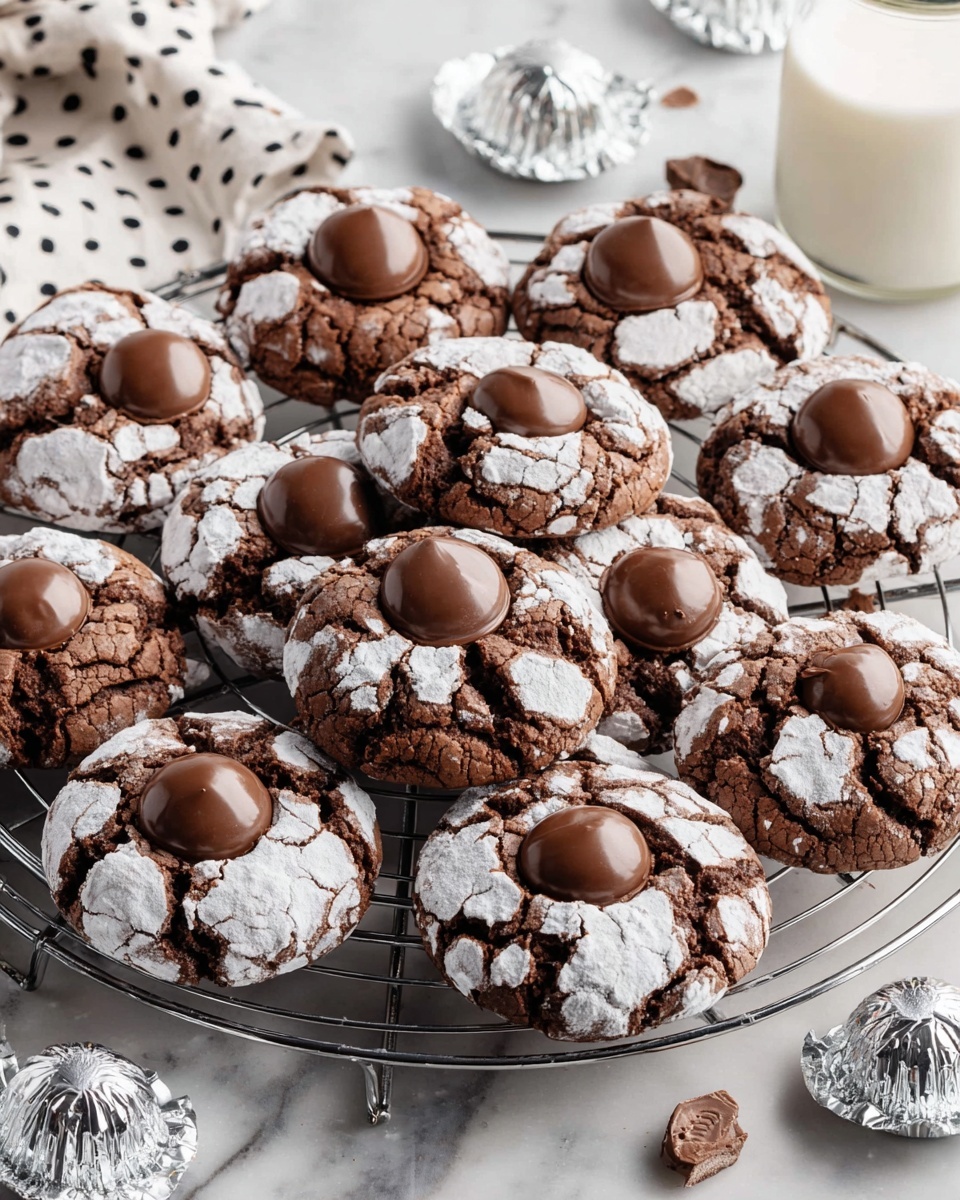
Chocolate Puddles Recipe
If you’re anything like me and have a soft spot for rich, gooey chocolate treats, this Chocolate Puddles Recipe will become your new obsession. These chocolatey bites are not quite cookies, not quite brownies—they have this irresistibly tender texture with melty chocolate centers that make them perfect for any occasion, from cozy nights in to festive gatherings. Trust me, once you get a taste, you’ll be hooked!
What I love most about this Chocolate Puddles Recipe is how straightforward the ingredients are, yet they come together into a dessert that feels special and a little unexpected. Plus, they’re topped with a little Hershey’s Kiss hiding right in the middle—how cute is that? These treats work wonders when you want something easy to make but impressive enough to share. I remember making a batch for a last-minute friend visit, and they were gone within minutes. You’ll want to try it too, I promise!
Ingredients You’ll Need
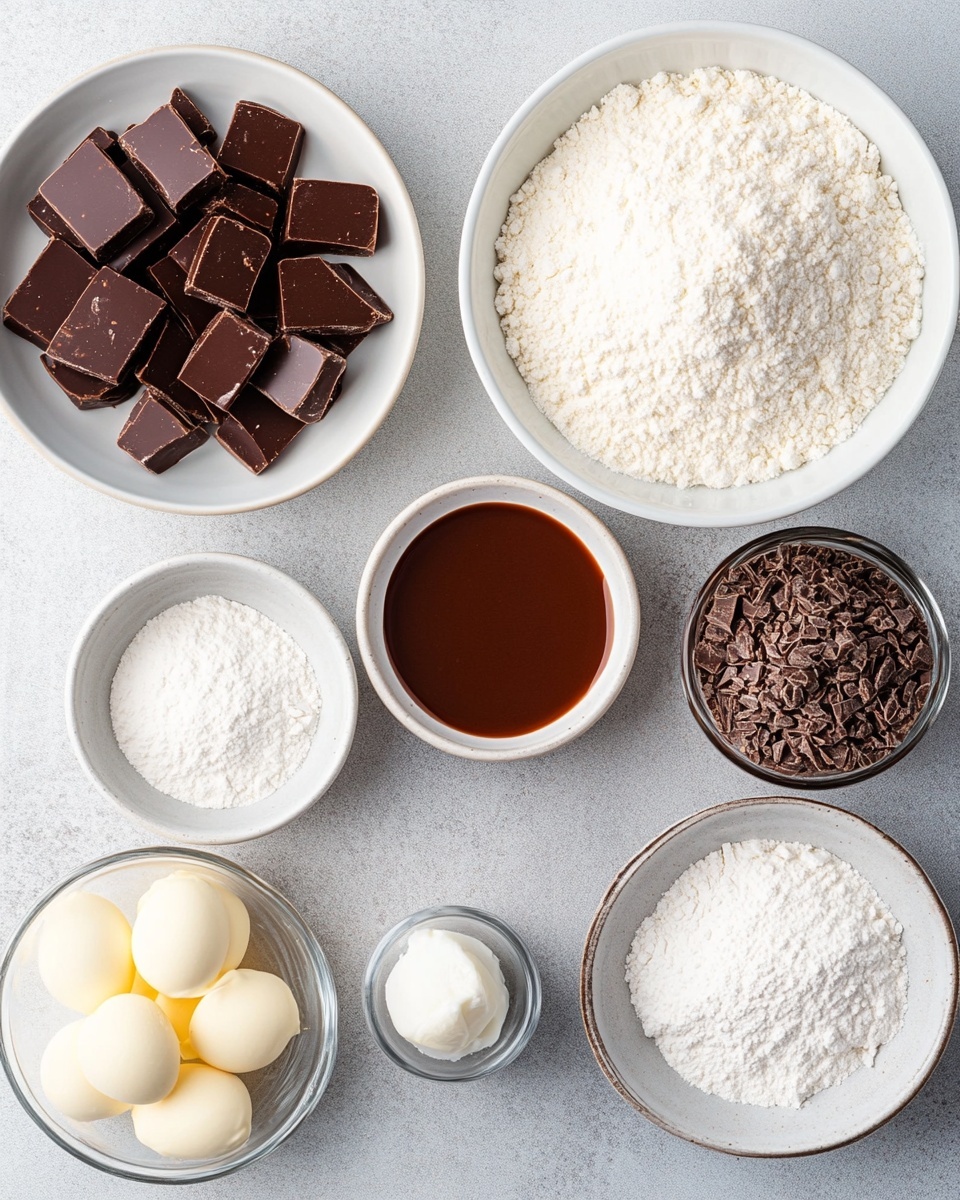
Every ingredient here plays a key role in achieving that perfect texture and flavor combo. Plus, you likely have many of these staples in your pantry already, which is half the fun of whipping up this Chocolate Puddles Recipe anytime the craving hits.
- All-purpose flour: The base that gives structure without weighing them down.
- Cocoa powder: Choose natural unsweetened for that deep chocolate flavor.
- Baking soda: Helps with a bit of lift and chewiness.
- Baking powder: Adds tenderness—don’t skip this one!
- Cornstarch: A little secret for extra softness and that gentle “puddle” texture.
- Salted butter: Keeps things rich and balances the sweetness—softened to room temp for easy mixing.
- Granulated sugar: Adds sweetness and a slight crunch.
- Light brown sugar: Gives moisture and a touch of caramel flavor.
- Large eggs: Make sure they’re room temperature for better mixing and fluffiness.
- Vanilla extract or peppermint extract: Vanilla is classic, but peppermint is a fun twist if you’re feeling festive.
- Powdered sugar: For dusting that final pretty, snowy touch.
- Hershey’s Kisses: The star of the show—soft chocolate melts perfectly inside.
Variations
I always like to tinker with this Chocolate Puddles Recipe depending on the season or who I’m baking for. The beauty is in the versatility, so don’t be shy about making it your own!
- Mint Chocolate Puddles: Swap vanilla for peppermint extract like I do around the holidays—it adds such a refreshing twist and feels super festive.
- Sea Salt Topping: Sprinkle a tiny pinch of flaky sea salt right on top before baking for a perfect sweet-salty balance. My friends are obsessed with this one!
- Nutty Puddles: Toss in chopped walnuts or pecans if you want some crunch. I like this combo but add the nuts sparingly so they don’t overpower the softness.
- Gluten-Free Version: Try swapping the flour with a gluten-free all-purpose blend—just watch the consistency; sometimes a little extra cornstarch helps.
How to Make Chocolate Puddles Recipe
Step 1: Mix the Dry Ingredients
Start by whisking together your flour, cocoa powder, baking soda, baking powder, and cornstarch in a medium bowl. This ensures everything is nicely combined and evenly distributed, which is key to your puddles having that consistent, tender texture. If you get clumps in the cocoa powder, sift it together for a smoother batter.
Step 2: Cream the Butter and Sugars
Using a hand mixer or stand mixer, beat your softened salted butter with granulated sugar and brown sugar until creamy and well combined—this usually takes about 2 to 3 minutes. This step is crucial because it incorporates air for a lighter texture. Don’t rush it; when the mix looks fluffy and pale, you’re good to go.
Step 3: Add Eggs and Extract
Next, beat in the eggs one at a time, making sure each is fully mixed in before adding the next. Then stir in your choice of vanilla or peppermint extract. I usually stick with vanilla, but peppermint around Christmas time is so festive and delicious!
Step 4: Combine Wet and Dry Ingredients
Slowly fold the dry mixture into the wet until just combined. Don’t overmix here—few lumps are fine. Overworking will make your Chocolate Puddles tough, and we want them tender and soft.
Step 5: Shape and Bake
Preheat your oven to 350°F (175°C). Scoop tablespoon-sized mounds of dough onto a parchment-lined baking sheet. I recommend spacing them about 2 inches apart to give them room to “puddle” out. Bake for 7 to 9 minutes until just set but still soft in the center.
Immediately after taking them out of the oven, press a Hershey’s Kiss gently into the center of each warm cookie. Watch it soften to that lovely melted puddle we all love.
How to Serve Chocolate Puddles Recipe
Garnishes
I love dusting these chocolate puddles with just a little powdered sugar for a classic look, kind of like a snow-dusted treat. Sometimes, I sprinkle tiny chocolate shavings or even a pinch of flaky sea salt on top of the Hershey’s Kiss for a surprising pop of flavor. It’s those little touches that make them feel special!
Side Dishes
They’re rich, so I usually serve these chocolate puddles alongside something lighter, like a big scoop of vanilla ice cream or a simple fresh fruit salad. The creamy ice cream pairs beautifully with the warm, chocolatey center.
Creative Ways to Present
For a party, I love arranging these Chocolate Puddles Recipe bites on a pretty platter with some decorative doilies or holiday-themed napkins. Another favorite trick of mine is serving them in cute cupcake liners to make picking them up easier and add a dash of charm. Sometimes I drizzle a little melted white chocolate over the top for an elegant finishing touch.
Make Ahead and Storage
Storing Leftovers
After baking, I let these cool completely, then store them in an airtight container at room temperature for up to 3 days. They stay soft and delicious, but if you live somewhere humid, the fridge works too—just let them come to room temp before enjoying.
Freezing
I’ve frozen these Chocolate Puddles successfully by placing baked puddles in a single layer on a baking sheet first, freezing until solid, then transferring them to a freezer-safe bag. They can keep well for up to 2 months. When you want to enjoy, just thaw at room temperature or gently warm them.
Reheating
For me, reheating is best in a microwave for about 10-15 seconds just to bring back that gooey center and softened edges. Avoid overheating or they’ll dry out. A quick warm-up is perfect for getting that just-baked feel again!
FAQs
-
Can I use dark chocolate instead of Hershey’s Kisses?
Absolutely! Dark chocolate pieces or mini chocolate chips work great as well. Just make sure to press them into the hot puddles right after baking so they melt nicely.
-
Why is cornstarch used in this Chocolate Puddles Recipe?
Cornstarch is a wonderful addition because it softens the texture and helps create that tender “puddle” consistency. Without it, the cookies might turn out a bit tougher or cakier than desired.
-
Can I make these dairy-free?
Yes! Substitute the butter with a plant-based vegan butter or coconut oil, and make sure your chocolate kisses are dairy-free too. The texture may shift slightly, but they’ll still be delicious.
-
How do I know when the puddles are done baking?
Look for edges that are set but a center that’s still soft and slightly underbaked. They’ll firm up as they cool, so err on the side of underbaking a bit for the best texture.
Final Thoughts
I can’t recommend this Chocolate Puddles Recipe enough—it’s one of those special desserts that brings everyone together, whether you’re making it for yourself or sharing with friends and family. It’s simple, indulgent, and full of those cozy chocolatey vibes that we all crave. So grab your ingredients, give it a whirl, and enjoy the warm, melty goodness one puddle at a time!
Print
Chocolate Puddles Recipe
- Prep Time: 15 minutes
- Cook Time: 10 minutes
- Total Time: 25 minutes
- Yield: 24 cookies 1x
- Category: Dessert
- Method: Baking
- Cuisine: American
Description
Chocolate Puddles is a delightful cookie recipe featuring a rich, cocoa-infused batter topped with a classic Hershey’s Kiss. These soft, fudgy cookies deliver a perfect balance of chocolate flavor and sweetness, topped with a melt-in-your-mouth chocolate kiss that adds an extra layer of decadence, making them ideal for holiday treats or anytime you’re craving a chocolatey delight.
Ingredients
Dry Ingredients
- 1¾ cups all-purpose flour
- ½ cup cocoa powder
- 1 teaspoon baking soda
- ¾ teaspoon baking powder
- 2 tablespoons cornstarch
Wet Ingredients
- ½ cup salted butter, softened
- ½ cup granulated sugar
- ½ cup packed light brown sugar
- 2 large eggs, room temperature
- 2 teaspoons vanilla extract, or 1 teaspoon peppermint extract
Topping
- ½ cup powdered sugar
- 24 Hershey’s kisses
Instructions
- Preheat the oven: Preheat your oven to 350°F (175°C) and line baking sheets with parchment paper or silicone baking mats to prevent sticking.
- Mix dry ingredients: In a large bowl, sift together the all-purpose flour, cocoa powder, baking soda, baking powder, and cornstarch to ensure there are no lumps and the ingredients are evenly combined.
- Cream butter and sugars: In a separate bowl, beat the softened salted butter, granulated sugar, and light brown sugar until the mixture is light and fluffy. This process helps incorporate air for a tender cookie texture.
- Add eggs and extract: Beat in the eggs one at a time, ensuring each is fully incorporated before adding the next. Stir in the vanilla or peppermint extract until combined.
- Combine wet and dry: Gradually add the dry ingredient mixture to the wet ingredients, mixing just until combined to avoid overworking the dough, which can lead to dense cookies.
- Scoop the dough: Using a cookie scoop or tablespoon, portion the dough onto the prepared baking sheets, spacing them 2 inches apart to allow for spreading.
- Bake: Bake in the preheated oven for 9-11 minutes, or until the cookies have set around the edges but are still slightly soft in the center.
- Press Hershey’s Kisses: Immediately after removing the cookies from the oven, press one Hershey’s Kiss gently into the center of each cookie. The warmth will soften the kiss slightly for a perfect meld with the cookie.
- Coat with powdered sugar: While the cookies are still warm, lightly dust or roll them in powdered sugar to create a delicate sweet crust.
- Cool: Transfer the cookies to a wire rack to cool completely, allowing the texture to set and the chocolates to firm up slightly.
Notes
- Ensure eggs are at room temperature to help them blend smoothly into the batter, giving a better texture.
- The peppermint extract is optional and can be substituted with vanilla extract for a classic chocolate flavor.
- Do not overbake; the cookies should look slightly underbaked in the center when removed from the oven as they will continue to cook as they cool.
- Use good quality cocoa powder for the richest chocolate flavor.
- You can store these cookies in an airtight container at room temperature for up to 5 days or freeze for longer storage.
Keywords: chocolate cookies, Hershey’s kisses cookies, holiday cookies, cocoa cookies, soft chocolate cookies