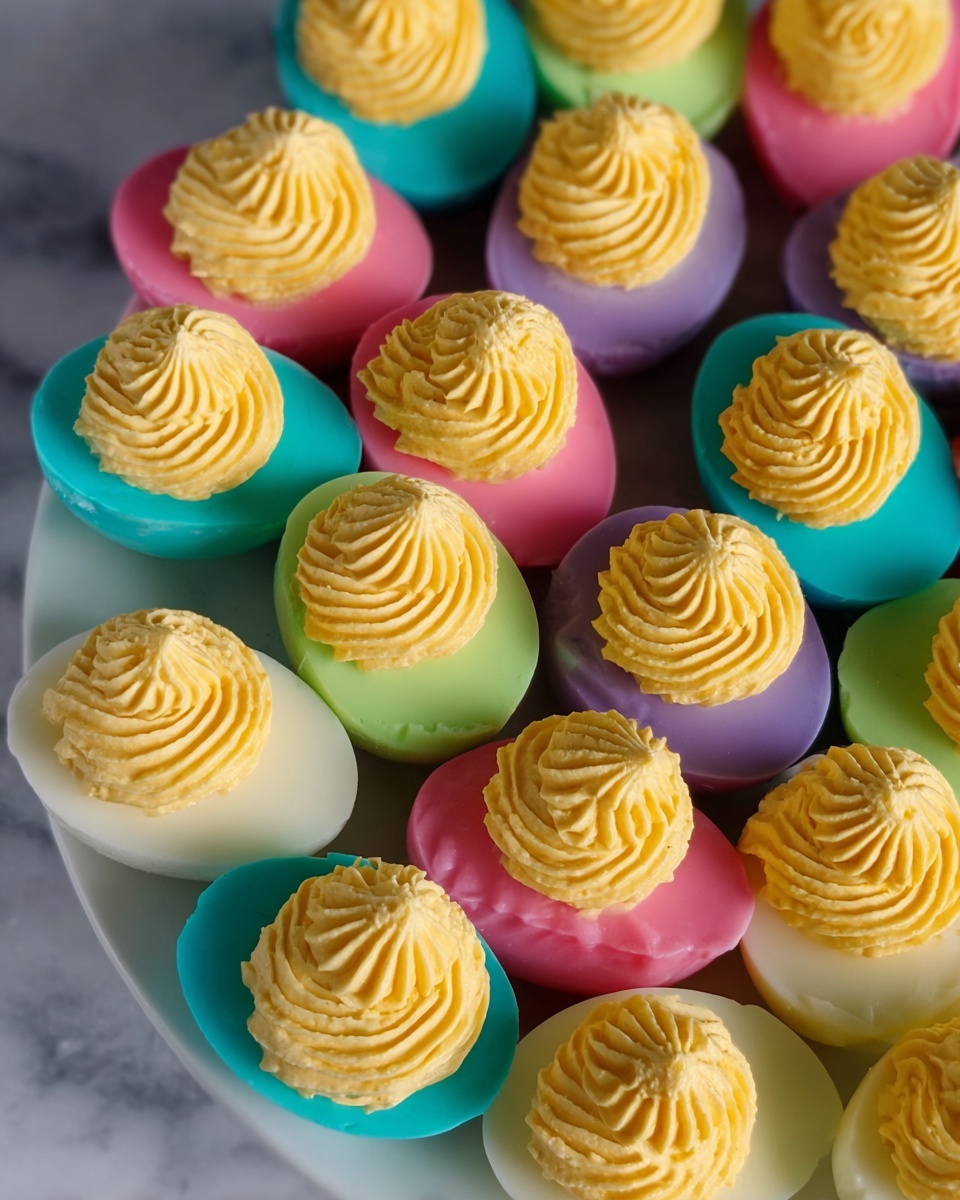
Easter Deviled Eggs with Colorful Dyeing Technique Recipe
There’s something so cheerful about Easter Deviled Eggs with Colorful Dyeing Technique Recipe that instantly lifts the spirit of any gathering. This isn’t just your usual deviled eggs – we’re talking about a whole festive experience, blending creamy, tangy filling with vibrant, pastel-colored egg whites that catch everyone’s eye before they even take a bite. I find these eggs make my Easter brunch table pop and bring a playful charm that both kids and adults can’t resist.
What makes this recipe truly special is how simple it is to dye the egg whites after peeling and before filling them, giving you customizable, gorgeous colors without drama. If you’re looking for an Easter recipe that’s quick, colorful, and a guaranteed crowd-pleaser, this Easter Deviled Eggs with Colorful Dyeing Technique Recipe should be your go-to. Plus, I’ll share my tips to help you nail every step and avoid the common slip-ups I’ve learned along the way.
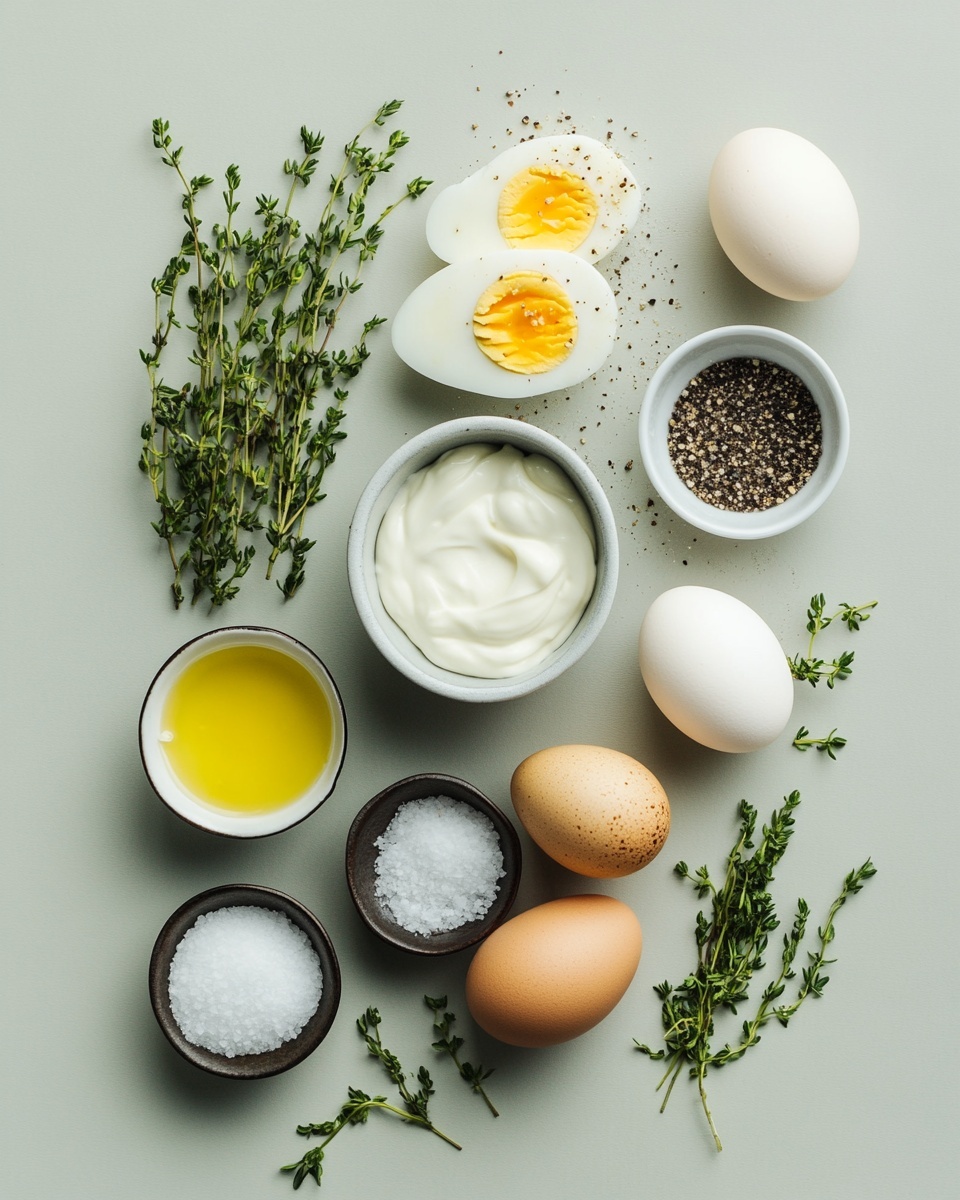
Ingredients You’ll Need
Each ingredient in this Easter Deviled Eggs with Colorful Dyeing Technique Recipe plays a vital role, coming together to balance creaminess, tang, and vibrant color beautifully. When shopping, opt for fresh eggs and quality mayonnaise — they make a huge difference in final flavor and texture.
- Large eggs: Fresh eggs are key; they peel easier, and the texture of the whites turns out smoother when dyed.
- Mayo: I prefer a good-quality mayo for that luscious creaminess in the filling.
- Dijon mustard: Adds a subtle tang and depth that elevate the classic deviled egg flavor.
- Pickle brine: This little ingredient surprises many by giving an extra zing without overpowering.
- Salt and pepper: Simple seasonings, but essential for that perfect balance in the yolk filling.
- Liquid food colouring (4 colors): Pick bright, food-grade colors; gel won’t work as well for the dye bath.
- White vinegar: Helps the colors set on the egg whites for that beautiful pastel effect.
Variations
This Easter Deviled Eggs with Colorful Dyeing Technique Recipe is quite versatile, and I love experimenting with flavors to match my mood or dietary needs. You can easily personalize the filling or change the dye colors to fit any occasion.
- Avocado deviled eggs: I swapped mayo for mashed avocado once, and the creamy green filling paired surprisingly well with the colored whites.
- Spicy twist: Add a dash of hot sauce or a sprinkle of smoked paprika in the filling for those who crave a little heat.
- Herbed version: Fresh dill or chives stirred into the filling brighten the flavor and add fresh green flecks.
- Natural food dyes: Try beet juice or turmeric for coloring if you want a natural, DIY approach instead of artificial food colors.
How to Make Easter Deviled Eggs with Colorful Dyeing Technique Recipe
Step 1: Boil and Cool the Eggs Perfectly
Bring a large pot of water to a rolling boil, then carefully lower in your eggs with a spoon — this helps avoid cracking. Boil them for 13 minutes exactly, no more, no less, so the yolks stay firm but not chalky. Once done, immediately transfer the eggs to ice water to halt cooking and make peeling easier. I like to cool them just until I can handle them comfortably without waiting too long; this keeps the process moving without drying out the eggs.
Step 2: Peel and Prep for Dyeing
Peeling can sometimes be the trickiest part. I recommend gently tapping the eggs to crack the shell all around, then peeling under running water or in a bowl of water to help wash away stubborn bits. Set aside two eggs that are less pretty — you’ll chop these into the filling so none go to waste. For the rest, slice each egg in half lengthwise and carefully remove all the yolks, rinsing the whites to get a clean surface for dyeing.
Step 3: Make the Creamy Filling
Pop the chopped “ugly” eggs, mayo, Dijon mustard, and pickle brine into a food processor and blitz until smooth. Next, add all the yolks and pulse until creamy and well combined. Taste and season with salt and pepper — sometimes a little extra salt takes the filling from good to unforgettable. Place this filling in the fridge covered, so it’s chilled and ready when your egg whites have finished coloring.
Step 4: Dye the Egg Whites with Colorful Technique
Set up four small bowls or glasses, each with water, a half teaspoon of white vinegar, and 2-3 drops of your chosen liquid food coloring. Vinegar helps the dye stick beautifully to the eggshell-less whites. Submerge the egg white halves in the dye baths for around 2 minutes, keeping an eye on the color deepen. If you prefer softer pastels, you can take them out right away; for bolder color, add a few extra drops of dye and leave them a bit longer. Remove with a slotted spoon, then blot dry gently on paper towels so they’re not wet when you add the filling.
Step 5: Fill and Serve Your Colorful Easter Treats
Arrange the vibrantly dyed egg whites on your serving platter and either spoon or pipe the filling back into each half. I love using a piping bag with a star tip for a fancy look, but a simple spoon works just as well if you’re in a hurry. The contrast of creamy yellow filling against the colorful pastel whites never fails to impress guests and brighten the holiday table.
How to Serve Easter Deviled Eggs with Colorful Dyeing Technique Recipe
Garnishes
For garnish, I’m a fan of a sprinkle of paprika or freshly cracked black pepper for that classic touch. Fresh dill sprigs or chive slices add a lovely green pop and aroma. If you’re feeling fancy, tiny edible flowers like violets or pansies can turn your deviled eggs into miniature works of art.
Side Dishes
I usually serve these Easter Deviled Eggs with Colorful Dyeing Technique Recipe alongside a crisp spring salad or some roasted asparagus. Fresh fruit platters or soft dinner rolls also pair beautifully, creating a balanced and inviting Easter brunch spread.
Creative Ways to Present
One of my favorite presentation tricks is arranging the dyed eggs in a decorative nest made of fresh herbs like rosemary or thyme. It not only looks festive but adds subtle fragrance. For kids’ parties, try putting the eggs in colorful cupcake liners placed on a tray — it keeps fingers clean and everyone delighted by the color theme.
Make Ahead and Storage
Storing Leftovers
I store leftover deviled eggs in an airtight container in the fridge, ideally within a single layer to prevent smudging the filling. They stay fresh and tasty for up to 2 days, though honestly, they rarely last that long around here! Covering the eggs individually with plastic wrap can help preserve their vibrant color and prevent moisture loss.
Freezing
Freezing isn’t great for this recipe because the egg whites can become rubbery and the filling texture changes. My experience suggests enjoying these fresh or refrigerated only. For big events, making the filling and dyeing the whites on the same day ensures peak quality.
Reheating
Deviled eggs are best served chilled, so reheating isn’t necessary. If you prefer them closer to room temperature, just let the eggs sit out for 15–20 minutes before serving rather than warming. This keeps that creamy filling intact without drying or cooking it further.
FAQs
-
Can I use natural food dyes for the Easter Deviled Eggs with Colorful Dyeing Technique Recipe?
Absolutely! Natural dyes like beet juice for red or purple shades, turmeric for yellow, and spinach water for green work well. Just keep in mind their color intensity might be softer and require longer soaking times compared to liquid food coloring.
-
How long can I keep dyed deviled eggs before serving?
For the best texture and color, serve them within 24 hours after dyeing and filling. Beyond that, the colors can fade slightly and the whites may absorb moisture. Store them chilled and covered to maintain freshness.
-
Why is vinegar added to the dye baths?
Vinegar helps the food coloring stick better to the egg whites, allowing for brighter and more vibrant colors. It slightly affects the pH of the water, which improves dye absorption.
-
What if my egg whites break while dyeing?
I’ve had this happen too! The key is to handle the whites very gently when placing and removing them from the dye baths. Using a slotted spoon carefully and ensuring the eggs aren’t overcooked helps prevent whites from being too fragile.
-
Can I prep the filling a day ahead?
Yes, prepping the filling a day ahead helps flavors meld beautifully. Just keep it chilled tightly covered and mix it up again before filling to ensure smooth consistency.
Final Thoughts
This Easter Deviled Eggs with Colorful Dyeing Technique Recipe has become my favorite way to bring a little wow factor to a classic dish. It’s easy enough to whip up any time, but those pops of pastel colors truly make it special for holidays and celebrations. I hope you’ll enjoy creating these as much as I do — they’re fun, tasty, and perfect for sharing with friends and family around the table. Trust me, once you try this colorful twist, your deviled eggs will never look the same!
Print
Easter Deviled Eggs with Colorful Dyeing Technique Recipe
- Prep Time: 15 minutes
- Cook Time: 13 minutes
- Total Time: 30 minutes
- Yield: 20 deviled egg halves 1x
- Category: Appetizer
- Method: Boiling
- Cuisine: American
- Diet: Vegetarian
Description
These vibrant Easter Deviled Eggs bring a festive twist to a classic appetizer. Hard-boiled egg whites are dyed in pastel colors and filled with a creamy, tangy yolk mixture flavored with mayo, Dijon mustard, and pickle brine, creating a visually appealing and delicious treat perfect for holiday gatherings or spring celebrations.
Ingredients
Eggs
- 12 Large eggs
Filling
- ½ cup Mayonnaise
- 1 tablespoon Dijon mustard
- 2 teaspoons Pickle brine
- Salt and pepper to taste
Dye
- 4 colors of Liquid food coloring
- 2 teaspoons White vinegar, divided
- 2⅔ cups Water, divided (⅔ cup per dye bath)
Instructions
- Boil the eggs: Bring a large pot of water to a rolling boil. Carefully add the 12 large eggs to the boiling water and boil them for 13 minutes to ensure firm yolks.
- Cool the eggs: Drain the hot water and immediately transfer the eggs to an ice water bath. Let them cool just enough to handle comfortably; this also helps with peeling.
- Peel the eggs: Gently peel off the shells from all the eggs, discarding the shells completely.
- Prepare the filling base: Chop your two ugliest eggs roughly, then place them in a food processor along with ½ cup mayonnaise, 1 tablespoon Dijon mustard, and 2 teaspoons pickle brine.
- Separate egg whites: Carefully slice each of the remaining 10 eggs in half lengthwise. Remove the yolks from each half and gently rinse any residual yolk bits out of the whites. Set the whites aside for dyeing.
- Make the filling: Add the separated yolks to the food processor with the chopped eggs and other ingredients. Blend until smooth and creamy. Season the filling with salt and pepper to taste.
- Chill the filling: Cover the creamy yolk mixture and refrigerate until you are ready to use it.
- Prepare dye baths: Set up four small bowls or glasses. In each, combine 2 to 3 drops of a different color of liquid food coloring, ½ teaspoon of white vinegar, and ⅔ cup of water. Stir each mixture well to distribute the color evenly.
- Dye the egg whites: Divide the egg white halves evenly among the four dye cups. Let them steep for about 2 minutes, then check their color.
- Adjust coloring: For pastel hues, the eggs might be ready now. For more intense colors, add additional food coloring drops and allow the whites to soak longer until the desired shade is reached.
- Dry the egg whites: Using a slotted spoon, carefully remove the dyed egg whites from the dye baths and place them on paper towel-lined surfaces. Blot dry thoroughly with paper towels to remove excess moisture.
- Assemble the deviled eggs: Arrange the colored egg white halves neatly on a serving platter. Spoon or pipe the chilled creamy yolk filling into each egg white half, filling them generously and evenly.
Notes
- For best peeling results, use eggs that are at least a week old.
- Adjust the amount of food coloring based on the intensity of color you desire for the egg whites.
- Pickle brine adds a subtle tang and depth to the yolk filling; adjust the quantity to taste or omit if preferred.
- Use a piping bag or zip-top bag with a corner cut off for neater filling presentation.
- Keep the deviled eggs refrigerated until serving to maintain freshness and food safety.
Keywords: Easter deviled eggs, colorful deviled eggs, holiday appetizer, dyed eggs, creamy deviled eggs, picnic recipe, party food