Hard Candy Recipe for Holidays Recipe
There’s something truly magical about making your own sweets, especially during the holiday season, and this Hard Candy Recipe for Holidays Recipe is a shining example. It’s one of those delightful projects where a handful of simple ingredients transform under your careful watch into glossy, shiny candies that bring out the festive spirit. Whether you’re looking to add a personal touch to your holiday gifts or treat your family to something sweet and homemade, this recipe consistently delivers a big “wow” factor.
I’ve always found making hard candy rewarding because it’s a bit of a science but still really accessible when you have the right guidance. What makes this Hard Candy Recipe for Holidays Recipe stand out is how easily customizable it is—just tweak the colors and flavors to fit your mood or the occasion. Plus, once you get the hang of it, you’ll feel so proud showing off those perfectly formed candies, each one a little edible masterpiece.
Ingredients You’ll Need
These straightforward ingredients work beautifully together to create that perfect balance of sweetness and texture in your hard candy. The secret is getting quality basics and understanding what each component brings to the table—especially that clear corn syrup, which keeps things crystal clear and from crystallizing.
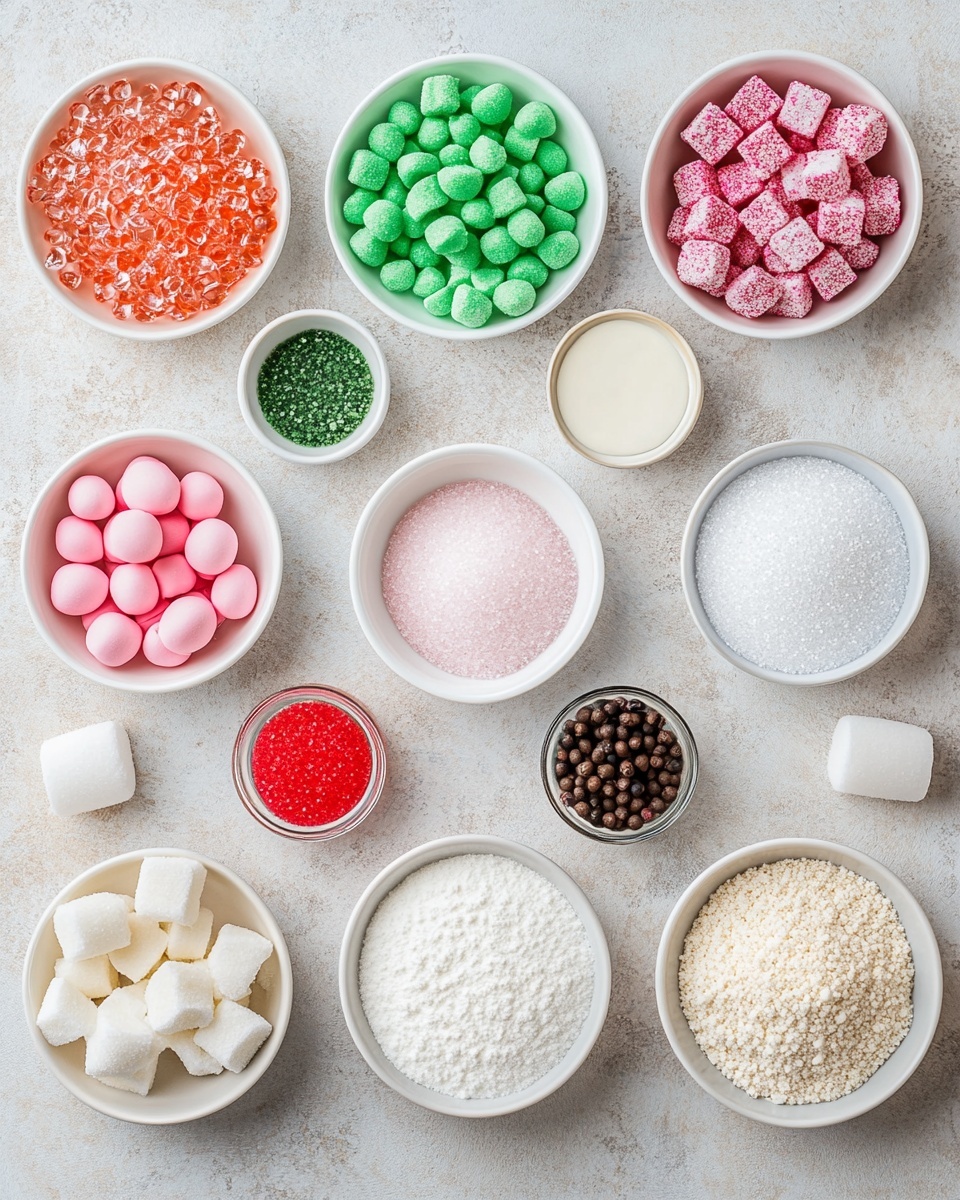
- Granulated sugar: The sweet foundation of the candy, make sure it’s fresh and dry for best results.
- Water: Helps dissolve the sugar evenly as it heats, allowing for a smooth candy texture.
- Clear corn syrup: Essential to prevent sugar crystals from forming, ensuring your candy stays glossy and smooth.
- Food coloring (liquid): Liquid works best for vibrant, even colors; you can mix green and red drops to get festive shades just right.
- Flavoring extract or flavor oil: Whether it’s classic peppermint or a fun cotton candy scent, a few drops pack a big punch in flavor.
- Powdered sugar for coating: Helps prevent your candies from sticking together once cooled.
Variations
I love switching up this Hard Candy Recipe for Holidays Recipe depending on the crowd or my mood—there’s just so much potential for creativity here. You can easily make it more kid-friendly by sticking to natural fruit flavors or go bold with holiday spices. Don’t hesitate to make this your own!
- Minty Fresh: Adding peppermint extract instantly brings a classic holiday vibe—my go-to when I want that nostalgic touch.
- Fruit Medley: Using strawberry or raspberry flavor oils makes these candies feel fresh and summery, a fun twist for holiday parties.
- Spiced Up: Try adding a bit of cinnamon or clove extract for a cozy, warm candy that feels like comfort in every bite.
- Sugar-Free Variations: If you need a dietary tweak, look into sugar substitutes designed for candy making—just keep in mind texture might shift.
- Color Play: I sometimes swirl red and green together for a peppermint swirl effect that always sparks compliments.
How to Make Hard Candy Recipe for Holidays Recipe
Step 1: Combine Sugar, Water, and Corn Syrup
Start by mixing sugar, water, and corn syrup in a heavy-bottomed saucepan. Stir until the sugar is fully dissolved, but once it heats up, avoid stirring to prevent crystallization. Use medium heat and keep an eye on it—it should bubble and the color will remain clear. I find that an accurate candy thermometer is a lifesaver here; you’ll want to reach about 300°F (the hard crack stage) to get that perfect brittle texture.
Step 2: Add Color and Flavor Before Cooling
Once your mixture hits 300°F, remove it from heat and quickly add your food coloring drops and flavor extract. Stir gently but thoroughly to distribute evenly, then immediately pour it onto a silicone mat or greased marble surface to cool. Timing is crucial here—you want to work fast before the candy starts to harden around the edges.
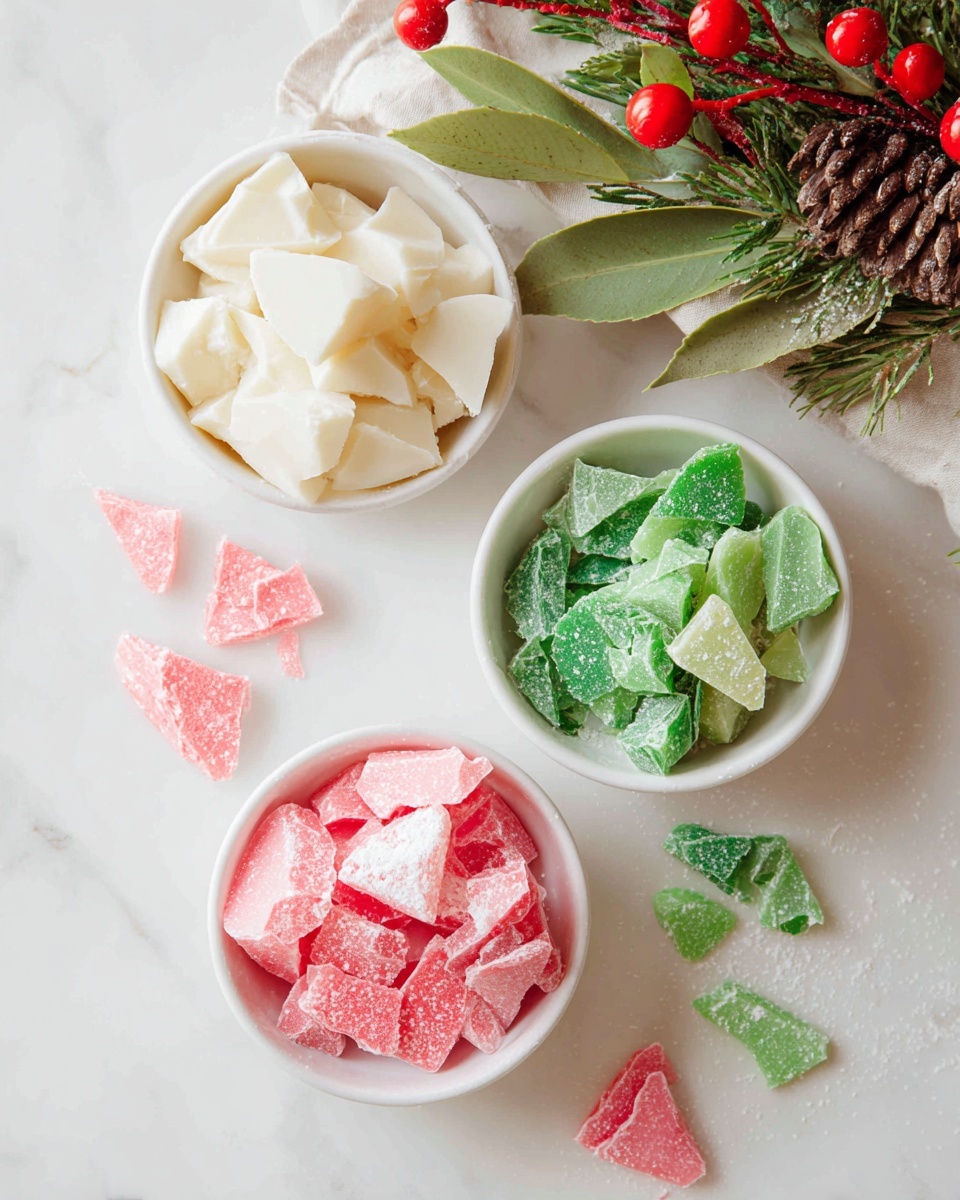
Step 3: Shape and Cool Your Candies
While the candy is still warm and pliable, you can score pieces with a knife or break it into bite-sized chunks once it hardens. Dusting powdered sugar over the pieces keeps them from sticking together. When I’m making gifts, I like to wrap individual candies in wax paper to keep them fresh and pretty.
How to Serve Hard Candy Recipe for Holidays Recipe
Garnishes
I usually keep garnishes simple with this hard candy—sometimes just a little sprinkle of edible glitter or crushed candy canes for that festive sparkle and extra crunch. It makes for a charming presentation without overwhelming the candy’s flavor.
Side Dishes
Hard candy pairs wonderfully with other holiday treats like gingerbread cookies, spiced nuts, or a warm cup of hot cocoa. Serving a small platter with these candies alongside a hot beverage is always a crowd-pleaser at holiday parties.
Creative Ways to Present
One fun way I like to present this Hard Candy Recipe for Holidays Recipe is by filling clear glass jars with colorful candies layered by color, tied with festive ribbons. It’s such a beautiful and simple way to add charm to your holiday table or give a thoughtful homemade gift.
Make Ahead and Storage
Storing Leftovers
Once cooled, store your hard candies in an airtight container in a cool, dry place to keep them from getting sticky or melting. I recommend layering pieces between sheets of wax or parchment paper if you’re stacking them—that way they stay nice and separate.
Freezing
I haven’t had much luck freezing hard candy because it can cause condensation, making the texture sticky when thawed. Keeping them at room temperature in a dry environment usually works best for maintaining their crispness.
Reheating
If you want to soften leftover candy pieces to reshape or remold, a quick, gentle warming over low heat or a few seconds in the microwave (watch closely!) can do the trick. Just be careful not to overheat—hard candy is temperamental!
FAQs
-
Can I use powdered food coloring instead of liquid?
Powdered food coloring can sometimes be used, but liquid coloring disperses more evenly in the hot candy mixture and helps maintain that clear, shiny finish. If you only have powdered colors, use sparingly and blend well, but be prepared for potential cloudy results.
-
What is the best way to prevent candy from sticking together?
Coating your candies lightly in powdered sugar and storing them in a dry, airtight container are key. Also, avoid humidity as much as possible since moisture causes them to stick and lose their crisp texture.
-
How can I tell when the candy has reached the right temperature?
The perfect hard candy stage is known as the “hard crack” stage—around 300°F (149°C). Using a candy thermometer is the most reliable way to measure this. The candy should crack easily when dropped into cold water.
-
Can I use this recipe to make lollipops?
Absolutely! Just pour the hot candy mixture into lollipop molds and insert sticks immediately before the candy hardens. Silicone molds work best for easy removal once cooled.
-
Is corn syrup necessary in this recipe?
Corn syrup is really helpful because it stops crystallization and keeps your candy smooth and shiny. Without it, your candy might become grainy, which typically isn’t as pleasant in texture.
Final Thoughts
This Hard Candy Recipe for Holidays Recipe has become one of my favorite go-to recipes when I want to impress without spending hours in the kitchen. It’s surprisingly straightforward but delivers that classic feel-good candy experience that everyone loves. You’ll enjoy making it as much as eating it, especially knowing that you crafted these festive sweets with your own hands. So next time the holidays roll around, give this recipe a try—you just might start a delicious new tradition.
Print
Hard Candy Recipe for Holidays Recipe
- Prep Time: 10 minutes
- Cook Time: 15 minutes
- Total Time: 40 minutes
- Yield: Approximately 40 pieces depending on size 1x
- Category: Candy
- Method: Stovetop
- Cuisine: American
Description
This Hard Candy Recipe is perfect for holidays, creating colorful, flavorful candies that are easy to make at home. Using simple ingredients like sugar, water, and corn syrup, this recipe guides you through the process of making festive peppermint, vanilla, or fruit-flavored hard candies coated in powdered sugar to prevent sticking. Ideal for gifting or holiday treats, these candies have a delightful crunch and vibrant hues, making your celebrations even sweeter.
Ingredients
Hard Candy Base
- 1 cup granulated sugar
- ⅓ cup water
- ⅓ cup clear corn syrup
Color and Flavor
- 42 drops food coloring (liquid works best): Green 22 drops, Red 20 drops
- Flavoring extract (such as peppermint or vanilla) or flavor oil (such as strawberry or cotton candy) – amount as desired, typically ½ to 1 teaspoon
Finishing
- Powdered sugar for coating
Instructions
- Prepare the cooking pan: Lightly grease a metal baking sheet or line it with a silicone mat to prevent the candy from sticking. Set aside.
- Combine ingredients: In a medium saucepan, combine 1 cup granulated sugar, ⅓ cup water, and ⅓ cup clear corn syrup. Stir over medium heat until the sugar dissolves completely.
- Boil the mixture: Attach a candy thermometer to the saucepan. Bring the mixture to a boil without stirring, and continue cooking until the temperature reaches the hard crack stage, about 300°F (149°C). This step may take 10-15 minutes; watch carefully to avoid burning.
- Add colors and flavors: Remove the saucepan from heat. Quickly stir in the 42 drops of food coloring (22 green drops and 20 red drops, or adjust as desired) and your choice of flavoring extract or flavor oil. Mix thoroughly but swiftly, as the candy will start to harden.
- Pour and cool: Immediately pour the hot candy mixture onto the prepared baking sheet, spreading it out evenly and quickly to form a thin layer. Allow it to cool completely at room temperature until it hardens, which should take about 20-30 minutes.
- Break and coat: Once hardened, crack the candy into bite-sized pieces. Lightly dust the pieces with powdered sugar to prevent them from sticking together.
- Store properly: Store the finished hard candy in an airtight container at room temperature. Ensure they are kept dry to maintain crunchiness.
Notes
- Use a candy thermometer for accuracy to reach the hard crack stage essential for hard candy texture.
- Work quickly when adding color and flavor to prevent premature hardening.
- Customize colors and flavors based on your holiday theme or preference.
- Keep candies in an airtight container to prevent moisture absorption and stickiness.
- Powdered sugar coating helps keep candies separated and easy to handle.
Keywords: hard candy, holiday candy, peppermint candy, homemade candy, candy recipe, festive treats, corn syrup candy