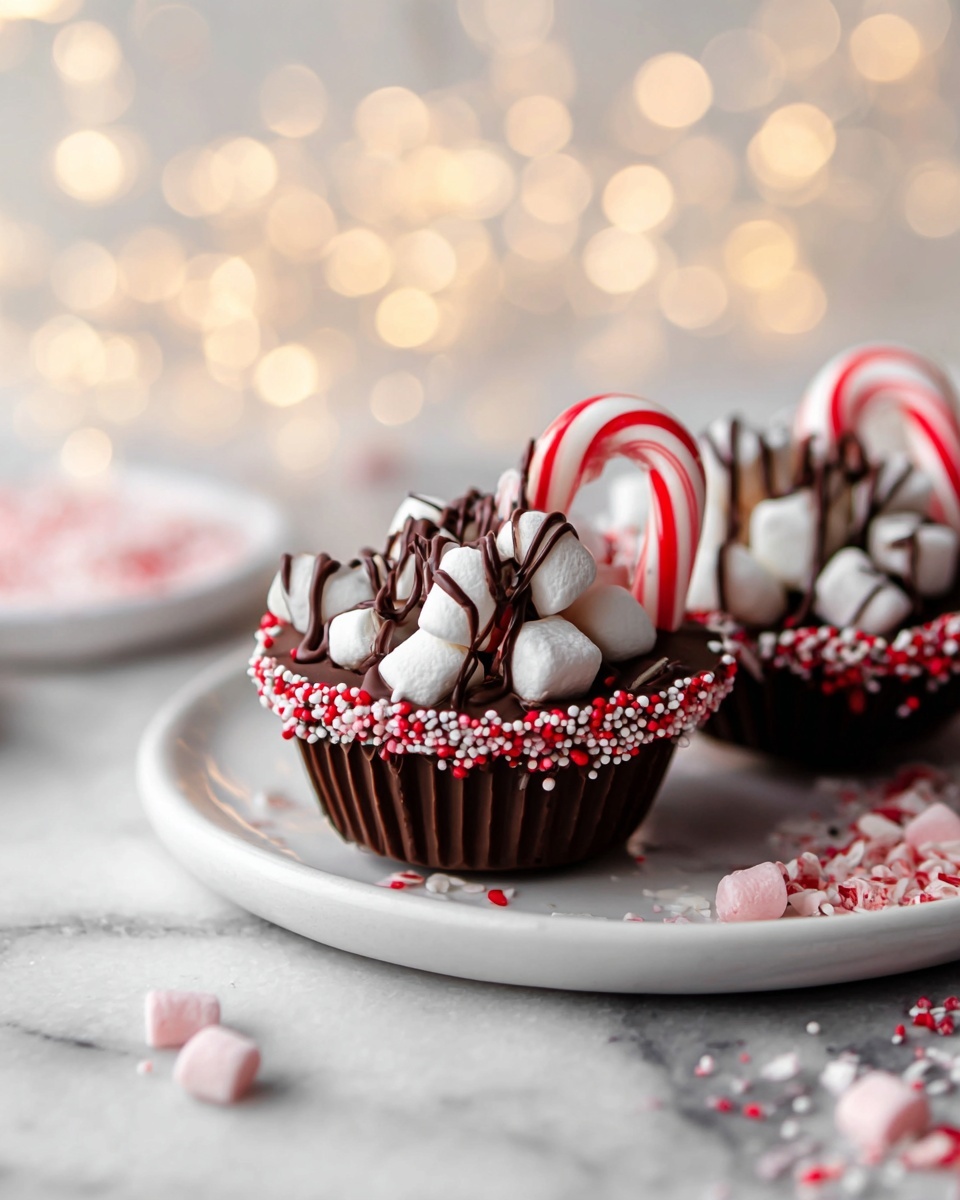
Hot Cocoa Melting Mugs Recipe
If you’re anything like me, the joy of cozying up on a chilly evening with a warm cup of hot cocoa is one of life’s simple pleasures. That’s exactly why I adore this Hot Cocoa Melting Mugs Recipe—it takes the classic hot chocolate experience up a notch by delivering the cocoa in a fun, interactive way. Instead of just stirring powder into milk, you get to watch and savor a chocolate cup melt right before your eyes, infusing the drink with rich, melty goodness. It’s the kind of cozy treat that works brilliantly for winter nights, holiday gatherings, or anytime you want to bring a smile to someone’s face.
What makes this Hot Cocoa Melting Mugs Recipe truly special is how customizable and impressive it looks. You’re not just drinking hot cocoa; you’re participating in a little chocolate magic. I remember making these for a holiday party and everyone was so taken by the melting effect, asking how I did it! Plus, it’s surprisingly easy to pull off, even if you don’t consider yourself a dessert pro. Stick with me, and I’ll share all my tips and tricks to make sure your chocolate mugs turn out perfect every time.
Ingredients You’ll Need
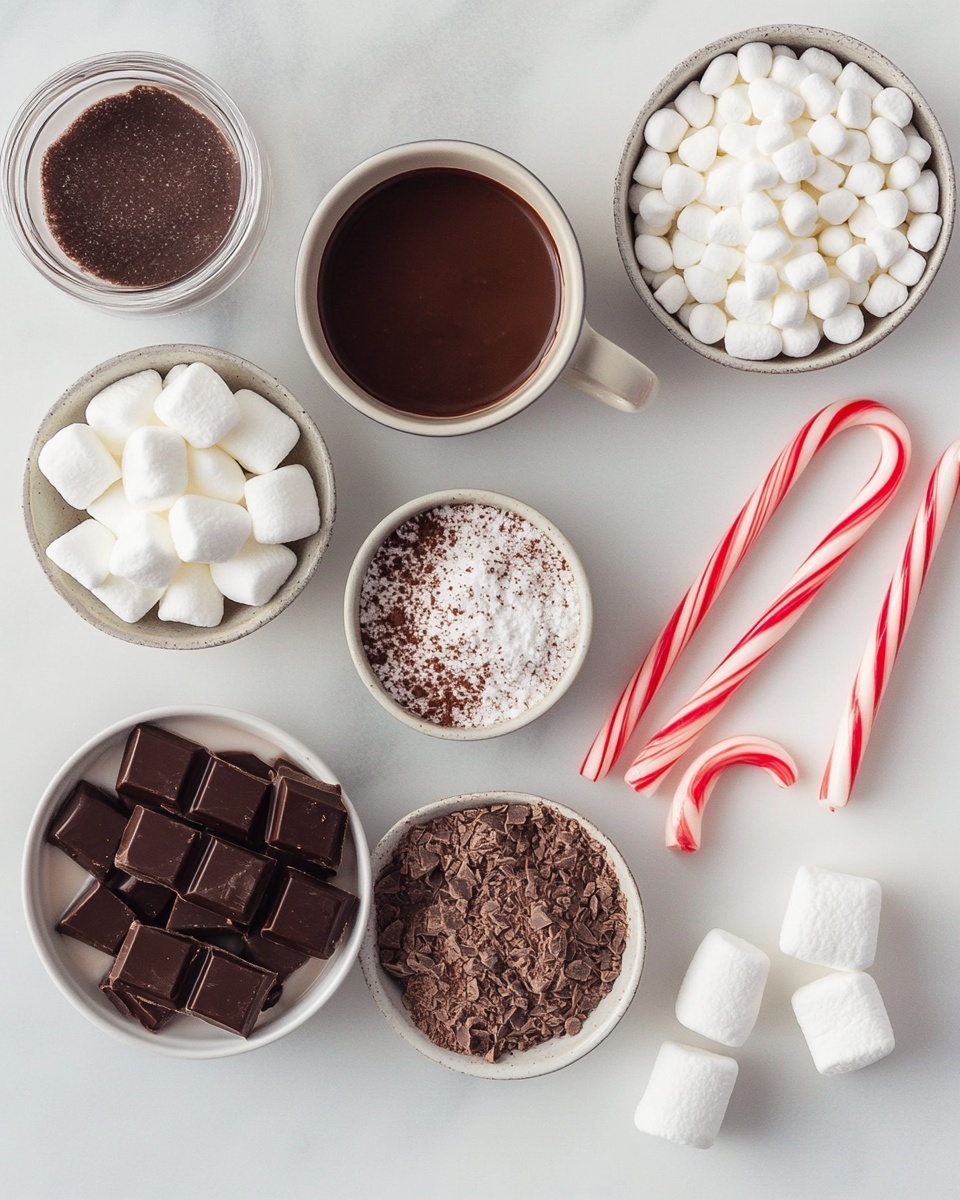
Each ingredient in this Hot Cocoa Melting Mugs Recipe plays a key role in balancing flavor and texture. The powdered components melt smoothly, and the chocolate cups carry the perfect silky richness. Here’s a quick rundown with some of my favorite tips for shopping and prep:
- Instant milk powder: This adds creaminess without watering down your cocoa, making the drink luxuriously smooth.
- Powdered sugar: It dissolves super easily, ensuring your hot chocolate isn’t grainy.
- Unsweetened cocoa powder: I love using Dutch-processed cocoa here for a deep, mellow chocolate flavor.
- Salt: Just a pinch—trust me, it enhances the chocolate flavor like nothing else.
- Semi-sweet chocolate: Use good-quality chocolate bars for the melting mugs to get that glossy, beautiful finish.
- Festive sprinkles or crushed candy canes (optional): These are just for that extra holiday flair if you’re feeling fancy.
- Mini marshmallows: A classic topping that melts delightfully on your hot cocoa.
- Candy canes: Great for stirring and adding a peppermint twist.
- Whole milk: Brings richness and body to each cup of hot chocolate.
- Water: Used to balance the milk and help melt the cups evenly.
Variations
One of the best parts about the Hot Cocoa Melting Mugs Recipe is how easy it is to make it your own. I’ve played around with flavors and toppings depending on the season or what I have in my pantry. Don’t hesitate to make it your own little chocolate tradition.
- Peanut Butter Twist: Adding a tiny spoonful of peanut butter to each cup before melting creates a nutty surprise that I swear upgrades the whole experience.
- Dairy-Free Version: Use coconut or almond milk and dairy-free chocolate to fit any dietary needs—I’ve tried it and still loved how rich it tastes!
- Spicy Kick: Sprinkle a pinch of cinnamon or cayenne in with the cocoa powder for a warming, spicy hot chocolate.
- Seasonal Flavors: Stir in a drop of peppermint or orange extract for festive holiday sips.
How to Make Hot Cocoa Melting Mugs Recipe
Step 1: Crafting Your Chocolate Mugs
Start by finely chopping your semi-sweet chocolate or using chips, which melt more evenly. Then, using a silicone mug-shaped mold or a standard muffin tin lined with plastic wrap, coat the insides with the chocolate. I like to do this with a spoon or pastry brush—just make sure each “mug” has an even layer around the sides and bottom. Pop these into the fridge to set for about 20-30 minutes. This part can be a little messy, but don’t rush it; a smooth shell is key to your mugs melting gracefully later.
Step 2: Mixing the Instant Cocoa Blend
While the chocolate mugs are setting, whisk together the instant milk powder, powdered sugar, unsweetened cocoa powder, and a pinch of salt in a bowl. This is your dry hot cocoa mix and it’s the heart of what melts into the milk for that velvety finish. I like to sift the cocoa powder to avoid clumps—trust me, a smooth mix makes stirring a breeze.
Step 3: Filling and Freezing Your Mugs
Once your chocolate shells are firm, gently remove them from the molds. Fill each “mug” with a few mini marshmallows and a tablespoon or two of the cocoa mix, then cover with plastic wrap and freeze for at least an hour. Freezing helps the solid shape hold before you serve them, so the magic melting effect is clean and dramatic.
Step 4: Time to Melt and Pour
When you’re ready to enjoy, heat equal parts whole milk and water in a saucepan or microwave until hot but not boiling. Place one melting mug in a heat-safe cup or mug, then pour about ½ cup of the hot milk-water mixture over it. Watch the chocolate start melting, mixing to dissolve the cocoa powder evenly into the milk. Stir well and top with candy canes or marshmallows if you like—this is the part where you’ll want to snap a picture because it’s pure magic.
How to Serve Hot Cocoa Melting Mugs Recipe
Garnishes
I’m a big fan of the classics: a heap of mini marshmallows, a twisty candy cane for stirring, and sometimes a dusting of cinnamon or cocoa powder on top. For holidays, I’ll rim the mugs with crushed candy canes or colorful sprinkles to amp up the festive feel. It’s cozy, a little indulgent, and oh so fun to sip with these garnishes melting right into your drink.
Side Dishes
When it comes to sides, I love pairing these hot cocoa melting mugs with soft cookies—think snickerdoodles or chocolate chip. If you’re aiming for a snack over dessert, buttery shortbread or biscotti works beautifully. There’s nothing quite like dipping a crunchy cookie into a rich, melty cup of hot chocolate to take the experience over the top.
Creative Ways to Present
For holiday brunches or cozy family get-togethers, I’ve used clear mugs to showcase the melting mugs inside, adding a little garnish to the handle—like a candy cane or cinnamon stick tied with ribbon. Setting up a hot cocoa bar with different toppings lets everyone customize their drink, making this recipe a real crowd-pleaser. Don’t be shy to play with colorful sprinkles or flavored marshmallows for extra fun.
Make Ahead and Storage
Storing Leftovers
If you happen to have leftover melting mugs (which is rare in my house), store them in an airtight container in the fridge. Because they’re mostly chocolate, they keep well for up to a week without losing flavor or shape. Just keep them away from strong-smelling foods so they don’t pick up unwanted aromas.
Freezing
Freezing these mugs after molding and filling is actually the best way to store them long term. I like to freeze them for up to a month if I’m prepping for a party or holiday. Just make sure they’re well-wrapped to prevent freezer burn and brought to room temperature a few minutes before melting for the smoothest results.
Reheating
To reheat leftover cups of hot cocoa made with the melting mugs, gently warm on the stove or microwave, stirring frequently. If you want to remelt the chocolate mug itself for fresh enjoyment, just pour hot milk over it as usual—the magic lives on each time!
FAQs
-
Can I make the Hot Cocoa Melting Mugs Recipe ahead of time?
Absolutely! In fact, freezing the chocolate mugs after filling them with cocoa mix and marshmallows is ideal. This way, you can prepare batches in advance and have them ready to melt in hot milk whenever you want a quick treat.
-
What kind of chocolate is best for melting mugs?
Semi-sweet chocolate bars or good-quality chocolate chips work perfectly. Look for chocolate with a good cocoa content (around 60%) for a balance of sweetness and richness that’s ideal for the mugs.
-
Can I use non-dairy milk with this recipe?
Yes! Using plant-based milks like almond, oat, or coconut milk works well. The melting mugs still melt beautifully, and the cocoa blend adjusts perfectly with the right choice of milk to suit your dietary preferences.
-
How do I prevent the chocolate mugs from breaking when removing from molds?
Chill them thoroughly to set, and gently flex the silicone mold or loosen edges with a craft knife if needed. Chocolate can be delicate, so taking your time with this step makes a big difference.
-
Why add a pinch of salt to the cocoa mix?
Salt enhances the chocolate flavor by balancing sweetness and deepening the cocoa notes. Even a tiny pinch makes the taste more vibrant and satisfying.
Final Thoughts
If you’re looking to turn an ordinary cup of cocoa into a memorable, joyful experience, this Hot Cocoa Melting Mugs Recipe is where the magic begins. It’s simple enough for a weeknight but special enough for holiday celebrations, and it always brings those cozy smiles around the table. Give it a try next time you want to treat yourself or wow your guests—once you see a chocolate mug melt into a warm, creamy drink, you’ll probably want to make it a tradition like I have.
Print
Hot Cocoa Melting Mugs Recipe
- Prep Time: 25 minutes
- Cook Time: 10 minutes
- Total Time: 35 minutes
- Yield: 4 melting mugs 1x
- Category: Beverage
- Method: No-Cook
- Cuisine: American
- Diet: Vegetarian
Description
Indulge in a festive treat with these Hot Cocoa Melting Mugs, a fun and creative way to enjoy hot chocolate. Crafted with semi-sweet chocolate mugs that melt perfectly into a rich cocoa base made from instant milk powder, cocoa, and powdered sugar, this recipe is perfect for cozy winter evenings or holiday celebrations. Decorate with sprinkles or crushed candy canes for an extra festive touch and serve with warm milk and water for a delightful hot beverage experience.
Ingredients
Hot Cocoa Mix
- ¼ cup (20g) instant milk powder
- ¼ cup (30g) powdered sugar
- 2 tablespoons unsweetened cocoa powder
- Pinch of salt
Mug Shaped Melting Cups
- 6 ounces (170g) semi-sweet chocolate, finely chopped (about 1 cup)
- Festive sprinkles and/or crushed candy canes (optional, for decorating the rims)
- Mini marshmallows
- Candy canes
For Serving
- ½ cup (120mL) whole milk per melting mug (total 2 cups for 4 mugs)
- ½ cup (120mL) water per melting mug (total 2 cups for 4 mugs)
Instructions
- Prepare the Hot Cocoa Mix: In a bowl, combine the instant milk powder, powdered sugar, unsweetened cocoa powder, and a pinch of salt. Mix well to create the dry hot cocoa base.
- Create the Melting Chocolate Mugs: Melt the semi-sweet chocolate gently over a double boiler or microwave in short bursts, stirring frequently to avoid burning. Once melted, spoon and spread the chocolate evenly inside silicone mug-shaped molds to form thin walls. Optionally, decorate the rims with sprinkles or crushed candy canes by dipping the edges while the chocolate is still soft. Place the molds in the refrigerator until the chocolate hardens completely.
- Assemble the Cups: Once the chocolate mugs are set, carefully remove them from the molds. Fill each chocolate cup with a spoonful of the hot cocoa mix, mini marshmallows, and a small candy cane for stirring.
- Serve with Warm Liquids: For each mug, warm ½ cup (120mL) whole milk and ½ cup (120mL) water in a saucepan over medium heat until steaming but not boiling. Pour the warm liquid mixture into the chocolate mugs to dissolve the cocoa mix and start melting the chocolate walls, creating a delicious hot cocoa drink.
- Enjoy Immediately: Serve the melting mugs immediately with spoons and stirrers, allowing guests to enjoy the gradual melting of the chocolate mugs into their hot cocoa.
Notes
- Finely chop the chocolate to ensure smooth melting and easier molding.
- Silicone molds are highly recommended for easy removal of the chocolate mugs.
- Adjust sweetness by modifying the amount of powdered sugar in the mix.
- For a dairy-free version, substitute whole milk with almond, oat, or soy milk.
- Be careful when heating milk and water—avoid boiling to prevent scorching.
Keywords: hot cocoa, melting mugs, chocolate mug, festive hot chocolate, holiday drink, semi-sweet chocolate, hot beverage, winter drink