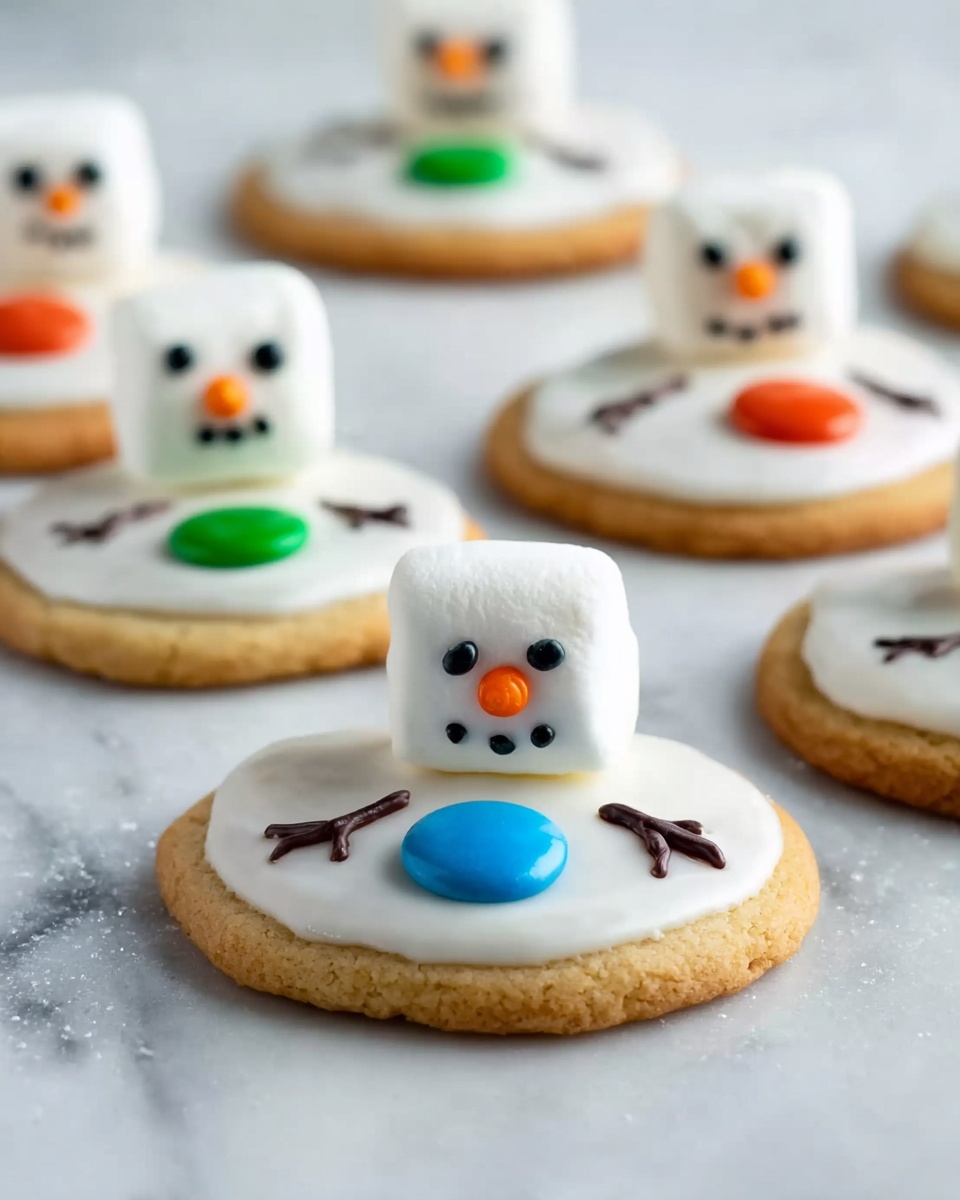
Melted Snowman Cookies Recipe
If you’re looking for a fun and festive treat that’s almost too cute to eat, this Melted Snowman Cookies Recipe is exactly what you need. I first made these a couple of winters ago, and they cracked me up—the “melted” snowman design brings a playful twist to traditional sugar cookies that’s perfect for holiday parties or cozy nights by the fire. What I love most is how they balance that sweet, classic sugar cookie base with the charming melted snowman face made from simple yet delightful toppings.
These cookies work wonders as a conversation starter or little gifts for neighbors and coworkers. Plus, the recipe is beginner-friendly, so whether you’re a seasoned baker or just trying to whip something whimsical up with the kids, you’ll find it a breeze. I promise, once you try this Melted Snowman Cookies Recipe, it’ll become one of your go-to festive treats every season!
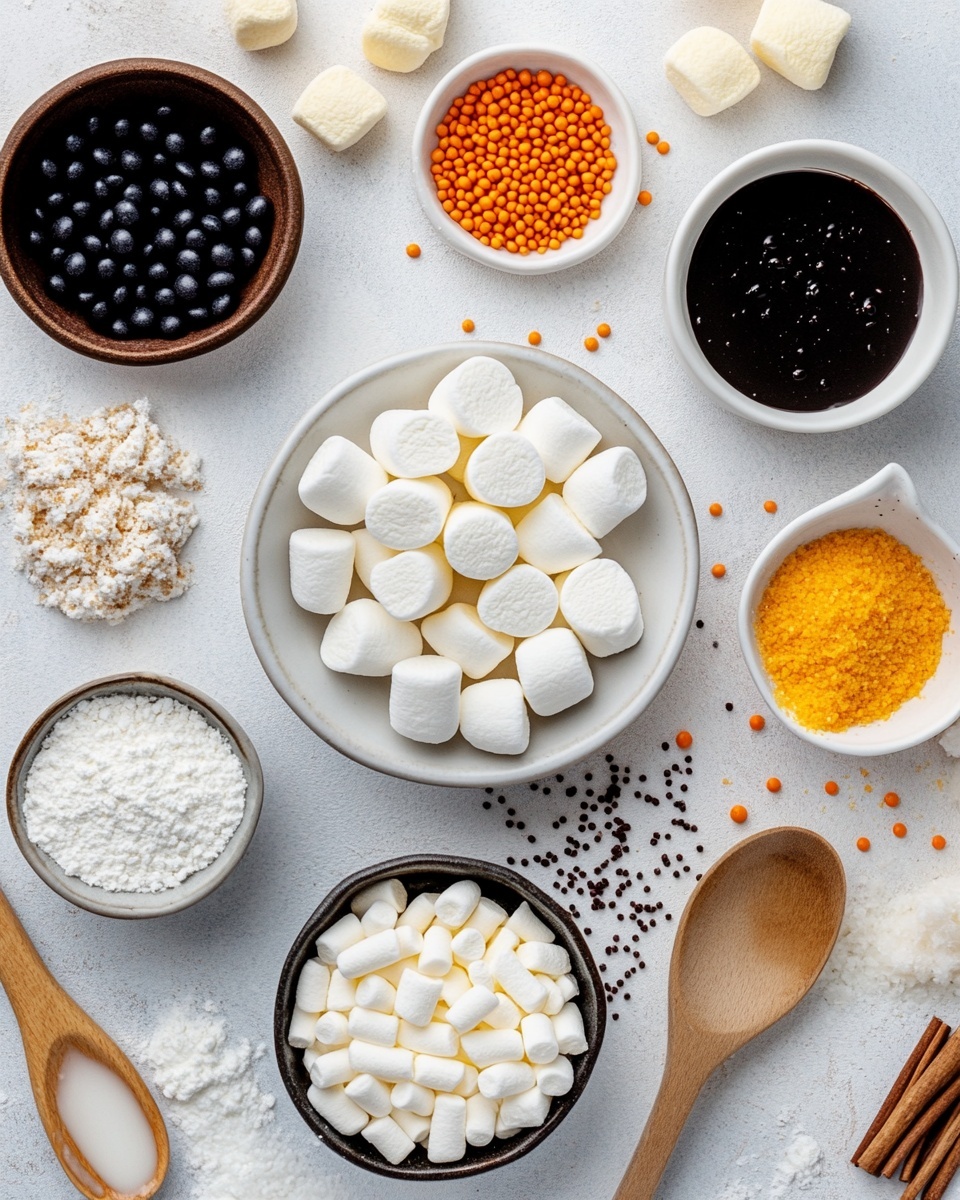
Ingredients You’ll Need
Each ingredient in this Melted Snowman Cookies Recipe brings something special to the table, making the whole creation both delicious and visually fun. Keep an eye out for fresh marshmallows and good-quality royal icing to get the best results.
- Sugar Cookies: I like using homemade ones, but store-bought work fine too—just make sure they’re sturdy enough to hold the toppings.
- Royal Icing: You want it to be thick enough to pipe details but still smooth for coverage. I’ve found premade royal icing saves time without sacrificing taste.
- Marshmallows (cut in half): These make the snowman’s “body”—cutting them evenly helps with a neat look.
- Long Orange Sprinkles: Perfect for the snowman’s carrot nose. I always choose bright orange for a pop of color.
- M&Ms: Mini ones work best here for the eyes and buttons—they add a playful color contrast and keep everything in place.
- Black Gel Food Color: Essential for drawing the mouth and other fine details. I prefer gel for vibrant, precise decorating.
Variations
This Melted Snowman Cookies Recipe is super flexible, and I encourage you to play around with it. I’ve tried swapping out the M&Ms for chocolate chips or adding coconut flakes for a snowy texture—both add their own charm.
- Gluten-Free Variation: On one occasion, I made these with gluten-free sugar cookies, and they turned out just as delightful. Just be mindful of the consistency of your dough.
- Vegan Option: Using vegan marshmallows and dairy-free royal icing allowed me to share these with friends who avoid animal products without losing any of the fun.
- Seasonal Twist: Try swapping orange sprinkles with yellow or gold for an autumn-themed “melting pumpkin” version—it was a hit at my Halloween party!
How to Make Melted Snowman Cookies Recipe
Step 1: Prepare Your Base Cookies
Whether you’re baking sugar cookies from scratch or using a favorite store-bought batch, start by making sure they’re completely cooled. Warm cookies will make the icing and toppings slide off, which is a decorating disaster! Lay them out on a clean surface so you have plenty of room to work on each one comfortably.
Step 2: Pipe the Royal Icing Blanket
With your royal icing ready, pipe a thick, smooth layer across each cookie to mimic the “melted snow.” It’s easiest to do this with a piping bag fitted with a round tip or even a plastic sandwich bag with a tiny corner snipped off. Don’t worry about making it perfect—the slightly uneven edges actually add to the “melting” effect! Just be sure to cover the cookie entirely for best adhesion of marshmallows and decorations.
Step 3: Add Your Marshmallow Snowman
Place two marshmallow halves vertically on the icing—these are the snowman’s body. Press down gently but firmly to make sure they stick well without squishing them. If the icing has started to dry, you can add a little drop under each marshmallow for extra “glue.”
Step 4: Decorate the Face and Buttons
This is where the fun happens! Use your long orange sprinkles to give your snowman a carrot nose, laying them right across the marshmallow head. For the eyes and buttons, carefully place M&Ms—mini ones fit perfectly. Finally, use a toothpick dipped in black gel food color to draw a little smiling mouth. Take your time—this small touch brings your cookie to life!
Step 5: Let Your Cookies Set
Once decorated, allow your cookies to rest at room temperature until the icing hardens—this usually takes about 2-3 hours. This step is crucial for keeping your snowman intact and prevents the details from smudging when you stack or package them.
How to Serve Melted Snowman Cookies Recipe
Garnishes
I love to dust these cookies lightly with powdered sugar, mimicking freshly fallen snow. It adds an extra touch of magic and sweetness without overwhelming the design. Sometimes, I even sprinkle edible glitter for a frosty shimmer that delights the kids!
Side Dishes
Pair these Melted Snowman Cookies with a cup of hot cocoa or warm apple cider for the ultimate winter treat. If you’re serving at a party, cheese and fruit platters alongside these cookies add a nice balance of savory and sweet.
Creative Ways to Present
For holiday gatherings, I like presenting these cookies on a bed of crinkled white tissue to create a snowy effect inside a festive tin or basket. Tying a clear cellophane bag with a colorful ribbon for each cookie also makes them perfect little take-home gifts.
Make Ahead and Storage
Storing Leftovers
I keep leftover Melted Snowman Cookies in an airtight container at room temperature on the counter, separated with parchment paper layers to avoid sticking. They stay fresh this way for up to a week, but honestly, they rarely last more than a couple of days in my house!
Freezing
If you want to freeze them, I recommend freezing just the plain sugar cookies first. Decorate them fresh after thawing for the best texture and appearance. You can wrap the undecorated cookies tightly in plastic wrap and foil—they freeze up to three months this way.
Reheating
Since these are decorated sugar cookies, reheating isn’t usually necessary, but if you want to soften the cookie slightly, a few seconds in the microwave (10-15 seconds) works well. Just be gentle to avoid melting the icing or decorations!
FAQs
-
Can I make these Melted Snowman Cookies Recipe ahead of time?
Absolutely! The cookies can be baked and decorated a day or two before your event. Just store them in an airtight container to keep the icing from drying out or becoming sticky.
-
What if I don’t have black gel food color?
If you don’t have black gel food color, you can use melted dark chocolate or edible markers to draw the mouth. Just be sure whatever you use is safe for decorating food!
-
Can I use other candies instead of M&Ms?
Yes, mini chocolate chips, small gummy candies, or even edible pearls work nicely as eye and button substitutes. Pick what you like and what fits well on your marshmallows.
-
How long do Melted Snowman Cookies stay fresh?
Stored properly in an airtight container, they stay fresh for up to a week at room temperature. For best taste and texture, enjoy them within a few days.
Final Thoughts
This Melted Snowman Cookies Recipe holds a special place on my holiday baking list—not just because of how delicious the cookies are but because it brings out the joyful, playful spirit of the season. I love how it sparks smiles and memories every time I make them. So go ahead, gather your ingredients, have some fun decorating, and share these adorable treats with friends and family—you’re sure to make everyone’s day just a little brighter!
Print
Melted Snowman Cookies Recipe
- Prep Time: 20 minutes
- Cook Time: 0 minutes (assuming cookies are pre-baked)
- Total Time: 1 hour 20 minutes (including setting time)
- Yield: 12 decorated melted snowman cookies 1x
- Category: Dessert
- Method: No-Cook
- Cuisine: American
- Diet: Vegetarian
Description
Melted Snowman Cookies are a delightful and festive treat perfect for the holiday season. These sugar cookies are decorated with royal icing, marshmallow snowmen bodies, and colorful details like orange sprinkles for noses and M&Ms for buttons and eyes. Using simple ingredients and creative decorating techniques, these cookies bring a playful winter charm to any cookie platter.
Ingredients
Cookies
- 12 sugar cookies
Decoration
- 2 cups royal icing
- 6 marshmallows, cut in half
- Long orange sprinkles (for noses)
- M&Ms (for eyes and buttons)
- Black gel food color (for detailing)
Instructions
- Prepare the Sugar Cookies: Begin with 12 baked sugar cookies as the base for your melted snowman design. Allow them to cool completely before decorating to ensure the icing and decorations adhere properly.
- Apply Royal Icing Base: Using the 2 cups of royal icing, spread an even layer over the top of each cookie. This acts as the snowy background for the snowman and helps secure the marshmallows in place.
- Position Marshmallows: Cut 6 marshmallows in half to create two flat surfaces. Place two halves vertically, stacked or aligned, on each cookie to form the ‘melted’ snowman body. The melting effect is achieved by the vertical marshmallow halves representing the snowman’s squished shape.
- Add Snowman Features: Decorate the snowmen by placing long orange sprinkles on each marshmallow half to represent carrot noses. Use M&Ms to form eyes and buttons on the marshmallows, pressing them gently into the royal icing so they stay in place.
- Create Facial Details: Use black gel food color to draw small dots or lines for additional facial details such as a mouth or eyebrows, enhancing the snowman’s character and charm.
- Allow to Set: Let the decorated cookies sit at room temperature until the royal icing is fully dry and hardened, typically about 1-2 hours, to ensure all decorations are firmly set before serving or packaging.
Notes
- Royal icing should be prepared or purchased ahead of time and optionally tinted white if it’s not already.
- Use a piping bag or a small offset spatula to apply and smooth the royal icing.
- For best results, make sure marshmallows are fresh and cut cleanly to maintain the snowman shape.
- These cookies are best consumed within 3-4 days when stored in an airtight container at room temperature.
- Substitute M&Ms with other small candy pieces if allergies are a concern.
Keywords: melted snowman cookies, holiday cookies, sugar cookies, royal icing cookies, festive treats, marshmallow cookies, Christmas cookies