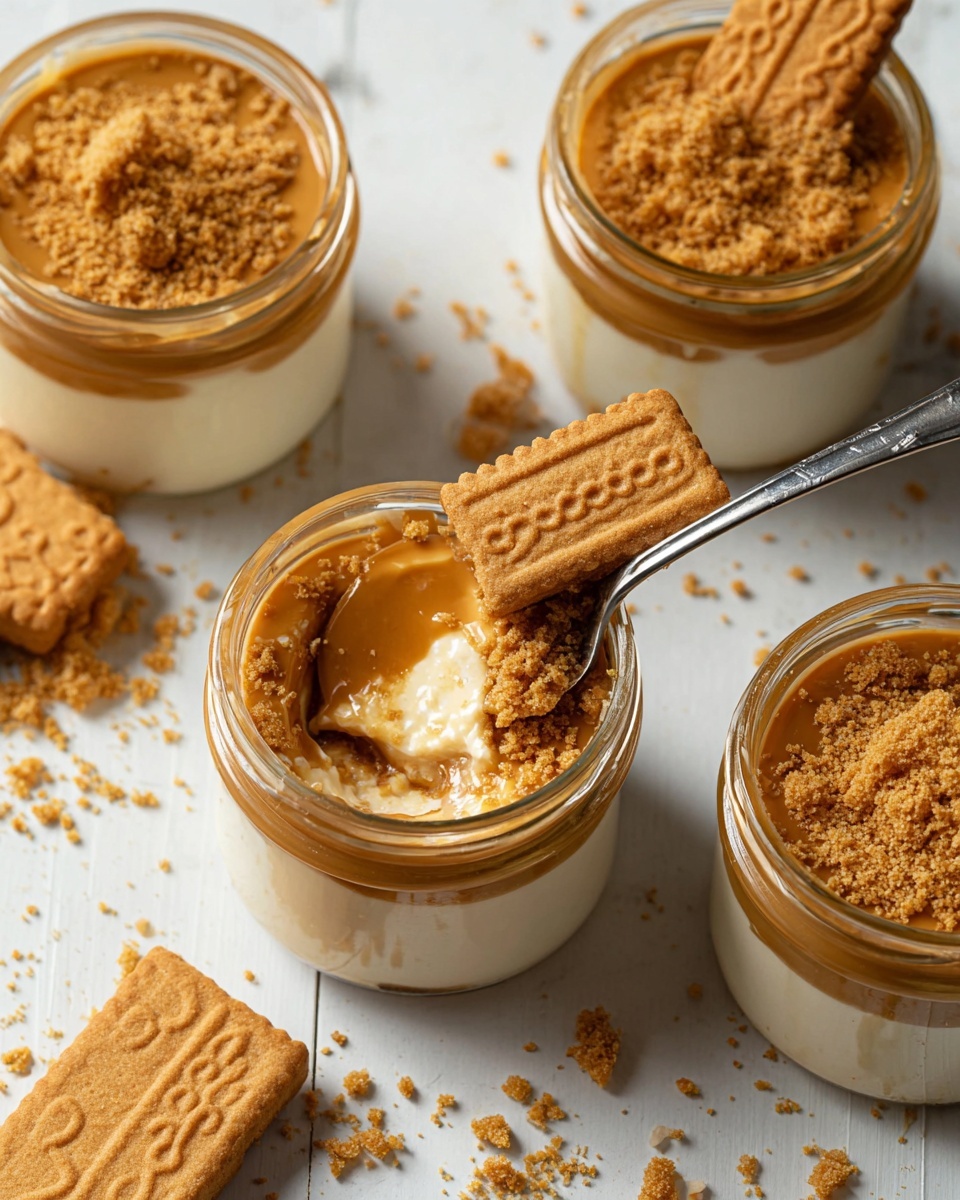
No-Bake Biscoff Cheesecake Cups Recipe
If you’re anything like me and have a soft spot for that irresistible caramel-cinnamon flavor of Biscoff, then you’re going to love this No-Bake Biscoff Cheesecake Cups Recipe. It’s the perfect treat when you want something decadent but don’t want to turn on the oven or fuss with complicated steps. These individual cups pack all the creamy, dreamy goodness with layers of crunchy Biscoff crumbs and silky cheesecake filling — it’s like a little slice of heaven each time you dig in.
What makes this recipe even more special is how easy it is to whip up on a whim for gatherings, parties, or just a cozy night in. I’ve made these for friends before, and no one believed they were no-bake! Plus, because they’re served in cups, portion control is a breeze, and presentation is a breeze — which means you’ll get compliments without the stress. Trust me, once you try these No-Bake Biscoff Cheesecake Cups, they’ll become a regular in your dessert rotation.
Ingredients You’ll Need
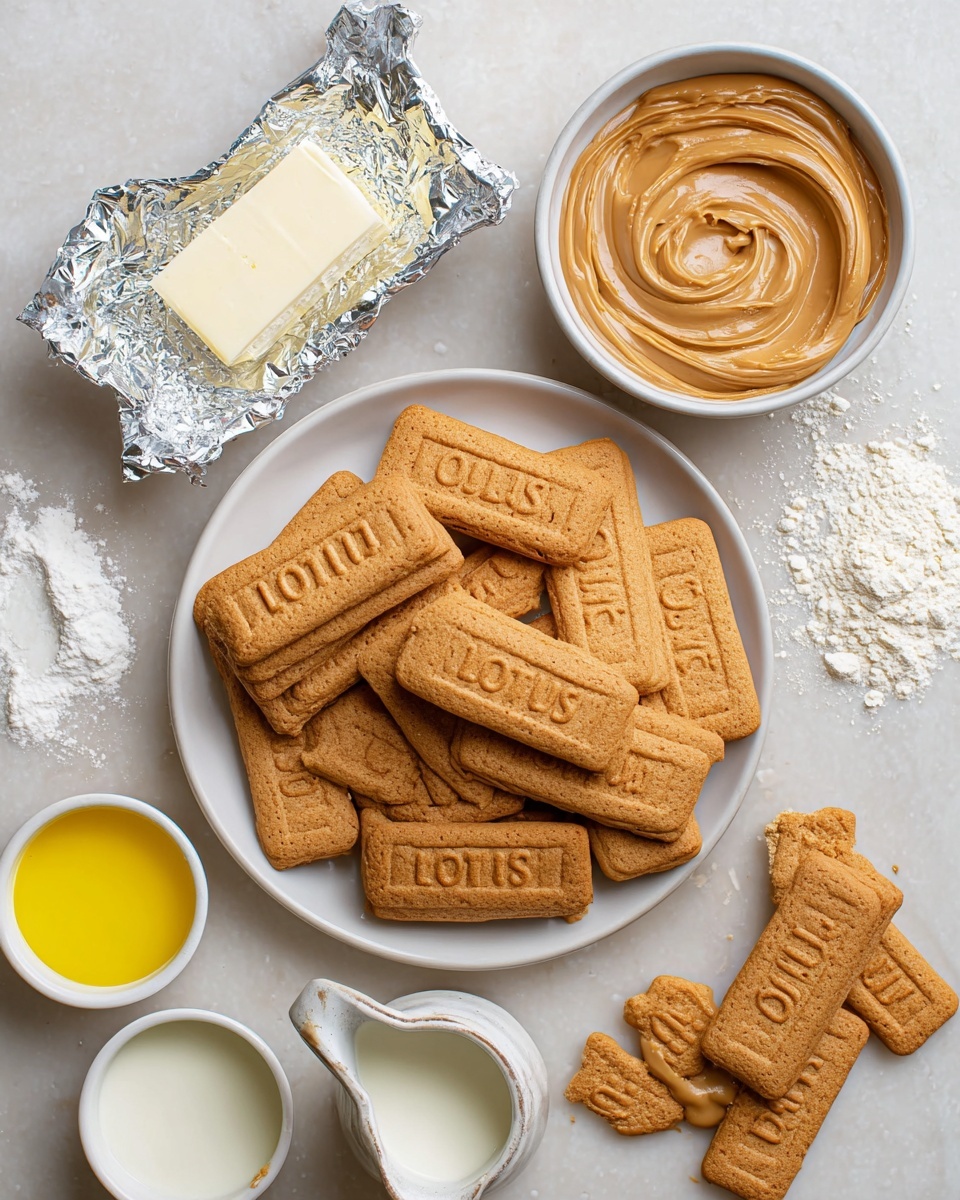
Let’s talk about the magic happening behind the scenes: each ingredient plays a role in creating layers of flavor and texture that truly shine in this dessert. I recommend using authentic Lotus Biscoff biscuits and spread, as they’re the star of this recipe and bring that unique spice and caramel zing that’s hard to replicate.
- Lotus Biscoff biscuits: These form the buttery, crunchy crumb base — fresh biscuits work best for maximum crunch.
- Unsalted butter: Melted butter binds the crumbs together for that perfect crust texture.
- Heavy cream: This whips up thick and airy, giving the cheesecake filling a luscious, light feel.
- Cream cheese: Make sure it’s softened to room temperature so you don’t get lumps in the filling.
- Powdered sugar: For sweetness without gritty texture; it blends smoothly into the cream cheese.
- Biscoff spread: This dreamy caramel-spiced spread folds right into the filling and makes the flavor pop.
- Vanilla extract: A little vanilla enhances the richness and rounds out the flavors.
- Additional Biscoff spread and biscuits for garnish: Because topping it off with more Biscoff and crunch is the best kind of extra.
Variations
I find that this No-Bake Biscoff Cheesecake Cups Recipe is wonderfully versatile, so I often tweak it based on who I’m serving or what I’ve got on hand. Feel free to play around with the sweetness or textures to make it your own.
- Peanut butter twist: Swirl in a spoonful of peanut butter with the Biscoff spread for a nutty surprise – my friends love this combo!
- Vegan version: Use vegan cream cheese and coconut cream instead of heavy cream to keep it dairy-free, still creamy, and utterly delicious.
- Mini cheesecake cups: Use smaller shot glasses or mini jars for bite-sized servings, perfect for party platters.
- Berry topping: Add fresh raspberries or strawberry compote on top for a fruity balance to the caramelized flavor.
- Spiced up: Add a pinch of cinnamon or nutmeg in the crust or filling to enhance the warm spice notes.
How to Make No-Bake Biscoff Cheesecake Cups Recipe
Step 1: Crush Those Biscoff Biscuits Into Perfect Crumbs
Start by popping the Lotus Biscoff biscuits into a food processor or zip-lock bag and giving them a good crush until they’re fine crumbs. You want little bits instead of large chunks to get that smooth, even base. If you don’t have a processor, just smash them with a rolling pin—room temperature biscuits will crush easier and won’t just crumble into dust.
Step 2: Mix and Press the Crumb Base
Combine your crushed biscuits with melted unsalted butter. This step is crucial because the butter helps bind the crumbs when they chill. Press this mixture firmly into the bottom of your serving cups—don’t be shy to pack it down well. I like to use the back of a spoon or a small glass for pressing to get an even layer. Set the cups aside in the fridge while you work on the filling.
Step 3: Whip Up the Light and Creamy Filling
In a mixing bowl, beat the heavy cream until soft peaks form — this means when you lift your beater, the cream holds a little shape but still wiggles. In a separate bowl, blend the softened cream cheese with powdered sugar until smooth, then add the Biscoff spread and vanilla extract and mix well. Gently fold the whipped cream into your cream cheese mixture to keep the filling airy and silky. This folding step is key, so don’t rush it or you’ll lose that light texture.
Step 4: Assemble and Chill
Spoon or pipe the cheesecake filling over the chilled crumb base in your cups, smoothing the tops nicely. I usually stop here and refrigerate them for at least 4 hours, or overnight if you have the time — the chilling really helps the filling set for that perfect cheesecake texture. Trust me, patience pays off here!
Step 5: Garnish and Impress
Just before serving, warm some extra Biscoff spread slightly so it’s drizzle-friendly. Drizzle it over each cheesecake cup and add half a biscoff cookie on top for crunch and flair. This finishing touch is my favorite because it makes the dessert look straight out of a fancy café but took me just minutes to pull together.
How to Serve No-Bake Biscoff Cheesecake Cups Recipe
Garnishes
I love keeping it simple with garish that amplify the Biscoff flavor — a drizzle of Biscoff spread is essential for me, plus that crisp biscoff cookie half adds both texture and a beautiful crunch. If I’m feeling fancy, a sprinkle of chopped toasted pecans or a dusting of cinnamon adds a lovely aroma and extra depth.
Side Dishes
Because these cheesecake cups are rich and sweet, I like to pair them with light and refreshing sides like fresh fruit salad or sliced citrus to balance each bite. A cup of strong coffee or spiced chai also complements the caramel notes perfectly — it’s a fantastic combo for brunch or afternoon treats.
Creative Ways to Present
For special occasions, I sometimes layer the cheesecake filling in clear mini mason jars with alternating cookie crumbs and even add a layer of chocolate ganache for contrast. Another fun twist is serving them on spoons or in mini parfait glasses for elegant bite-sized desserts at dinner parties.
Make Ahead and Storage
Storing Leftovers
If you have any leftovers (which might be rare!), keep the cheesecake cups covered in the fridge to maintain moisture and avoid them picking up fridge odors. I store mine with plastic wrap or in airtight containers, and they stay fresh for up to 3 days. Just make sure to add fresh garnishes before serving again.
Freezing
I’ve frozen these cups successfully by wrapping each one tightly with cling film and then placing them in a freezer-safe box. When you’re ready to enjoy, thaw them overnight in the fridge. The texture remains surprisingly creamy, though I recommend using the freezer if you need to store for longer than a few days.
Reheating
Since this is a no-bake cheesecake, reheating isn’t necessary and actually not recommended because you want to keep that cool, creamy texture. If anything, let the frozen cups soften in the fridge or at room temperature for a bit before serving for the best experience.
FAQs
-
Can I use a different type of cookie instead of Lotus Biscoff for this recipe?
Absolutely! While Lotus Biscoff cookies give this cheesecake its unique caramel-spiced flavor, you can substitute graham crackers, digestive biscuits, or gingersnaps for a different twist. Just keep in mind the flavor will shift accordingly, but the recipe will still work beautifully.
-
Do I have to use heavy cream, or can I substitute something lighter?
Heavy cream is preferred because it whips into stiff peaks and adds that silky, rich texture important for cheesecake filling. Using lighter cream or milk won’t whip the same way and could lead to a runnier filling. If you want a lighter version, consider using a blend of Greek yogurt and cream cheese but expect a firmer texture.
-
How long do these No-Bake Biscoff Cheesecake Cups last in the fridge?
Stored properly in airtight containers or covered cups, these cheesecake cups last about 3 days in the refrigerator. Beyond that, the crust might soften and the filling’s texture can change, so they’re definitely best enjoyed within that window.
-
Is it possible to make these gluten-free?
Definitely! Just swap the Biscoff cookies for a gluten-free cookie alternative with a similar texture. Make sure the Biscoff spread you use is also gluten-free (some brands are) to keep it safe for gluten-sensitive folks.
-
Can I prepare these No-Bake Biscoff Cheesecake Cups Recipe in advance?
Yes! One of the best things about this recipe is how well it stores. Prepare them a day ahead and let them chill overnight to set perfectly. This actually enhances the flavor and makes your day-of serving super stress-free.
Final Thoughts
This No-Bake Biscoff Cheesecake Cups Recipe is honestly one of my favorite quick desserts to pull out when I want to impress without stress. The way the rich, creamy filling pairs with the spiced cookie base and that iconic Biscoff flavor combo is just dreamy every time. I hope you’ll give it a try—you really can’t go wrong with these, and I promise your friends and family will be begging for the recipe too!
Print
No-Bake Biscoff Cheesecake Cups Recipe
- Prep Time: 20 minutes
- Cook Time: 0 minutes
- Total Time: 4 hours 20 minutes (including chilling time)
- Yield: 8 individual cheesecake cups 1x
- Category: Dessert
- Method: No-Cook
- Cuisine: American
Description
These No-Bake Biscoff Cheesecake Cups combine a crunchy Lotus Biscoff biscuit base with a smooth, creamy cheesecake filling infused with Biscoff spread. Perfect for an effortless dessert, these individual cups are garnished with extra Biscoff spread and cookie halves, making them a delightful treat for any occasion without the need for oven baking.
Ingredients
Crumb Base
- 30 Lotus Biscoff biscuits
- 2 tablespoons unsalted butter, melted
Cheesecake Filling
- 16 oz (2 cups) heavy cream
- 8 oz cream cheese, at room temperature
- ½ cup powdered sugar
- ½ cup Biscoff spread
- 1 teaspoon vanilla extract
Garnish
- ½ cup Biscoff spread
- 8 Biscoff cookies, cut in half
Instructions
- Prepare the Crumb Base: Crush the 30 Lotus Biscoff biscuits into fine crumbs using a food processor or by placing them in a sealed bag and crushing them with a rolling pin. Mix the crumbs with 2 tablespoons of melted unsalted butter until the mixture resembles wet sand.
- Form Base Layers: Evenly press the biscuit and butter mixture into the bottom of individual serving cups or jars to create a firm base. Refrigerate while preparing the filling to set.
- Make the Cheesecake Filling: In a mixing bowl, beat the 8 oz of cream cheese until smooth. Add the ½ cup of powdered sugar, ½ cup Biscoff spread, and 1 teaspoon vanilla extract, mixing until fully combined and creamy.
- Whip the Heavy Cream: In a separate chilled bowl, whip the 16 oz of heavy cream until stiff peaks form. Gently fold the whipped cream into the cream cheese mixture, combining carefully to maintain the light, airy texture.
- Assemble the Cheesecake Cups: Spoon or pipe the cheesecake filling evenly over the chilled crumb bases in each cup. Smooth the tops with a spatula.
- Chill to Set: Refrigerate the assembled cups for at least 4 hours or preferably overnight to allow the cheesecake filling to firm up and develop flavor.
- Add Garnishes: Before serving, warm the ½ cup Biscoff spread slightly to soften and drizzle or dollop it on top of each cheesecake cup. Garnish with halves of Biscoff cookies for added texture and presentation.
Notes
- Ensure the cream cheese is softened to room temperature for a smooth filling without lumps.
- Use chilled equipment and whipping cream for best whipping results.
- This dessert is best served within 2 days and kept refrigerated.
- For a lighter version, substitute heavy cream with whipped coconut cream for a dairy-free alternative.
- Adjust sweetness by varying the amount of powdered sugar according to taste.
Keywords: No-Bake, Cheesecake, Biscoff, Dessert Cups, Easy Dessert, Lotus Biscoff