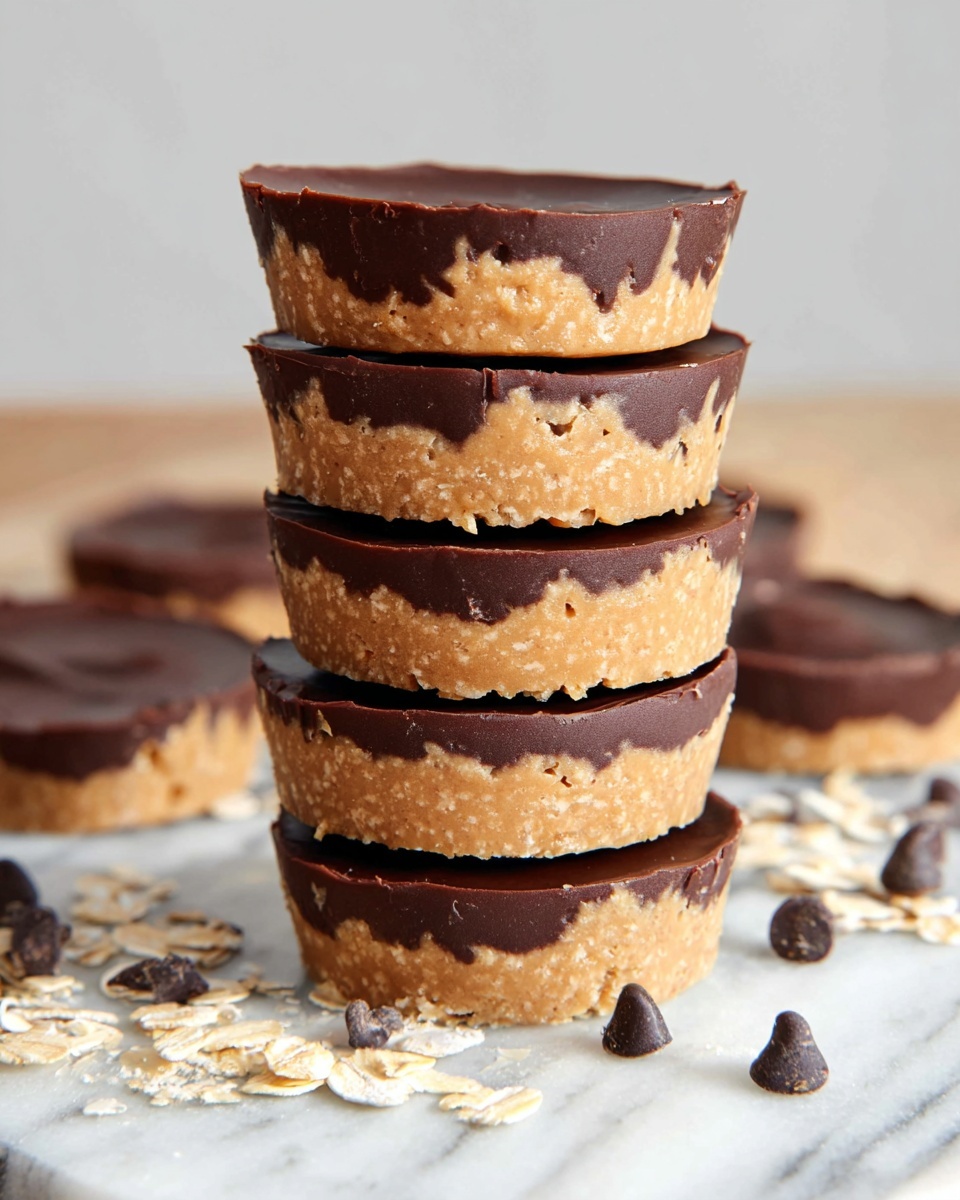
No Bake Peanut Butter Oat Cups Recipe
If you’re anything like me, you love snacks that feel indulgent but actually pack a punch of wholesome ingredients. This No Bake Peanut Butter Oat Cups Recipe is exactly that kind of treat—easy, satisfying, and just downright delicious. Whether you’re craving something sweet during a busy afternoon or need a quick bite to throw in your kid’s lunchbox, these cups really hit the spot without heating up the kitchen.
What makes this No Bake Peanut Butter Oat Cups Recipe so special is how simple it is yet so versatile. I’ve made it countless times for different occasions, and it never disappoints. You can whip it up in about 10 minutes, and the no-bake aspect means no fussing over oven timers or complicated steps—perfect when life’s hectic but you still want a homemade snack that feels like a little win.
Ingredients You’ll Need
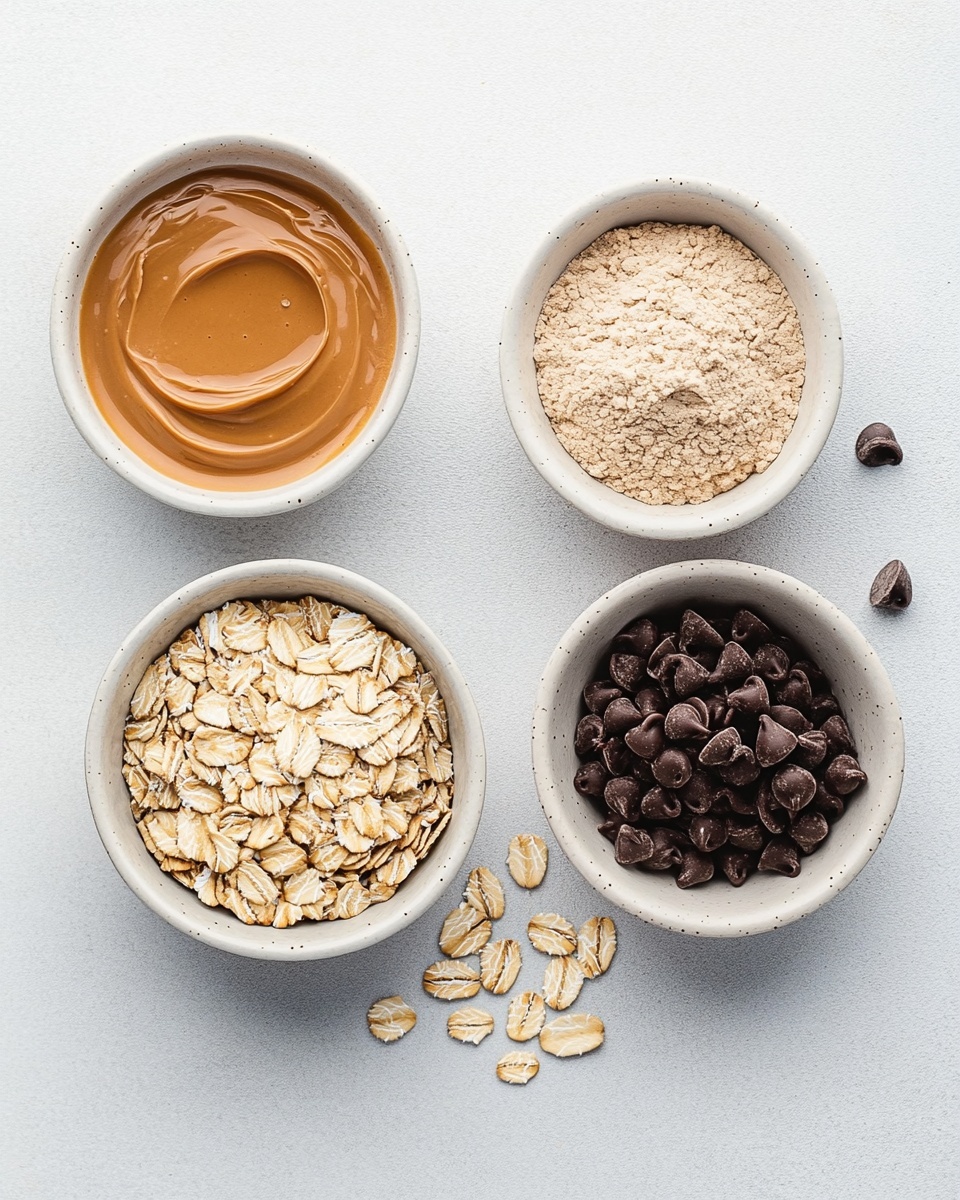
Every ingredient here plays its own part to keep these cups both tasty and nutritious. Grab a jar of your favorite peanut butter and some rolled oats for that hearty base. I like to grind up the oats for a smoother texture that blends beautifully, but you can leave them whole for a bit of chew if you prefer. Maple syrup brings natural sweetness without overpowering the peanut butter flavor, and the chocolate chips? Well, they’re just happy to tag along.
- Peanut butter: Use creamy or chunky depending on your texture preference. I find creamy blends easiest for molding the cups.
- Rolled oats: Pulled through a food processor to create oat flour for a smoother feel, though you can leave them whole for more bite.
- Maple syrup: Natural sweetener that adds just the right amount of sweetness and helps bind everything together.
- Chocolate chips: I prefer semi-sweet, but dark or milk chocolate works great too. They melt into a perfect glossy topping.
- Coconut oil (optional): Adds shine and smoothness when melting the chocolate chips; don’t skip if you want that silky finish.
Variations
I love tweaking this No Bake Peanut Butter Oat Cups Recipe depending on the season or what I have on hand. The best part? You can personalize it to match your taste buds or dietary needs. Feel free to experiment!
- Pumpkin Spice Addition: When fall rolls around, I add pumpkin puree and pumpkin spice for a cozy twist that’s irresistible.
- Nut-Free Version: Swap peanut butter for sunflower seed butter or almond butter if you want a nut-free or different nut flavor option.
- Extra Crunch: Toss in some chopped nuts, seeds, or even mini pretzels for a satisfying texture contrast.
- Sweetness Level: Adjust the maple syrup if you like it sweeter or more natural; a little extra always helps if your mixture feels dry.
How to Make No Bake Peanut Butter Oat Cups Recipe
Step 1: Make Your Oat Flour
Start by pulsing your rolled oats in a high-speed blender or food processor until they reach a fine, flour-like consistency. This step is key because it helps the oats blend seamlessly into the rest of the ingredients, giving you smooth peanut butter oat cups with no gritty bits. Just a quick 30 seconds or so usually does the trick.
Step 2: Melt Peanut Butter and Maple Syrup
In a microwave-safe bowl, combine your peanut butter and maple syrup. Microwave it for 40 to 60 seconds, then stir thoroughly until everything is perfectly smooth and combined. This warm mixture makes it easier to mix the oat flour in and keeps your oat cups from turning dry or crumbly.
Step 3: Incorporate the Oat Flour
Slowly add your oat flour to that warm peanut butter-syrup bowl. You’ll want to mix well until the mixture is thick but moldable—this can take some muscle! If it feels too dry, don’t hesitate to add a teaspoon or so more maple syrup or peanut butter. If you want a moister cup, a little pumpkin puree works wonders here.
Step 4: Prepare Your Muffin Pan
Line your muffin pan with cupcake liners or use a silicone muffin pan for easy removal. I’ve found that these cups stick a bit if you skip liners, so unless you have a really slick silicone pan, don’t skip this step. Mini muffin tins work great too if you want bite-sized options.
Step 5: Form the Cups
Scoop the peanut butter oat mixture evenly into each muffin cup. Press down firmly with your fingers to compact the mixture—it helps your cups hold together once chilled. Don’t be shy; a little pressure goes a long way here.
Step 6: Melt the Chocolate Topping
In a small microwave-safe bowl, combine chocolate chips with coconut oil (if using). Heat in 30-second bursts, stirring in between until it’s smooth and glossy. This coconut oil tip is a game-changer for that perfect chocolate topping texture.
Step 7: Top Your Cups with Chocolate
Pour a layer of melted chocolate over each cup and smooth the tops with the back of a spoon. If you want to get fancy, sprinkle some flaky sea salt, mini chocolate chips, or sprinkles on top before the chocolate hardens. Trust me, little details like these make your treats feel special.
Step 8: Chill and Set
Pop the pan into the fridge for 2-3 hours so your peanut butter oat cups can set completely. Once firm, carefully remove them from the pan, liners, or silicone molds. They’re ready to enjoy or pack away for later snacking.
How to Serve No Bake Peanut Butter Oat Cups Recipe
Garnishes
I usually keep my garnishes simple—just a pinch of flaky sea salt over the chocolate tops to really enhance the peanut butter’s richness. But if you’re feeling playful, some toasted coconut flakes or finely chopped nuts add a lovely crunch and contrast. Plus, it makes them look super pretty on the plate!
Side Dishes
Since these are snack-sized, I like pairing No Bake Peanut Butter Oat Cups Recipe with a refreshing fruit salad or a hot cup of tea. They also make a great pre- or post-workout fuel alongside a banana or a handful of berries for balance.
Creative Ways to Present
For a fun party platter, I’ve arranged these cups on a tiered dessert stand sprinkled with additional chopped nuts and mini chocolate chips. Wrapping each in a small parchment paper square tied with twine is a sweet touch if you’re gifting them too. It turns these simple cups into a handmade, thoughtful treat everyone will remember.
Make Ahead and Storage
Storing Leftovers
I keep leftover peanut butter oat cups stored in an airtight container in the refrigerator, where they stay fresh for up to 5 days. Because they don’t contain preservatives, refrigeration is key to maintaining their texture and flavor. I love having these ready-made snacks on hand for busy days.
Freezing
Freezing is a great option if you want to make a big batch ahead. I wrap each cup individually in parchment or plastic wrap, then place them together in a freezer-safe container. They freeze well for about a month. When you’re ready, just thaw in the fridge overnight.
Reheating
These don’t really need reheating since they’re best enjoyed cold or at room temperature—but if you do want a softer texture, a quick 10-second zap in the microwave works fine. Just be careful not to melt them too much, or the chocolate topping might lose that lovely firmness.
FAQs
-
Can I use crunchy peanut butter instead of creamy in this recipe?
Absolutely! Using crunchy peanut butter adds a delightful texture to your No Bake Peanut Butter Oat Cups Recipe. Just be aware that it might make the mixture a bit chunkier, so be prepared for a slightly different mouthfeel, which many people actually love.
-
What if I don’t have a food processor to make oat flour?
No worries! You can use quick oats or finely ground rolled oats if you can’t process them yourself. The cups may be a little more textured but will still hold up well and taste great.
-
Is it possible to make these vegan?
Yes! This No Bake Peanut Butter Oat Cups Recipe is naturally vegan as long as you choose vegan-friendly chocolate chips and maple syrup. Double-check labels just in case, but in general, this recipe fits perfectly into a plant-based diet.
-
How do I make the chocolate topping shinier?
Add a teaspoon of coconut oil when melting your chocolate chips. It smooths out the chocolate and gives it a gorgeous glossy finish that looks super professional.
- Can I add other mix-ins like dried fruit or seeds?
Definitely! Finely chopped dried fruit, chia seeds, or pumpkin seeds can add extra flavor and nutrition. Just fold them into the mixture before pressing it into the muffin pan.
Final Thoughts
Honestly, this No Bake Peanut Butter Oat Cups Recipe feels like a hug in snack form every time I make it. It’s simple, quick, and hits all the right sweet-and-salty notes without the hassle of baking. If you’re looking for a no-fuss, crowd-pleasing treat that feels homemade and wholesome, trust me—you’ll want to keep this recipe close. Give it a try and watch how fast these cups disappear in your house!
Print
No Bake Peanut Butter Oat Cups Recipe
- Prep Time: 10 minutes
- Cook Time: 0 minutes
- Total Time: 2 hours 10 minutes
- Yield: 12 cups 1x
- Category: Snack
- Method: No-Cook
- Cuisine: American
- Diet: Vegetarian
Description
These No Bake Peanut Butter Oat Cups are a quick and easy treat combining creamy peanut butter, finely ground oats, and sweet maple syrup, topped with a smooth layer of melted chocolate. Perfect for a healthy snack or dessert, they require no baking and set firmly in the refrigerator.
Ingredients
Main Ingredients
- 1.5 cups peanut butter
- 1.5 cups rolled oats, processed finely to oat flour
- 1/4 cup maple syrup
- 1 cup chocolate chips
- 1 tsp coconut oil (optional)
Instructions
- Prepare Oat Flour: Blend rolled oats in a high-speed blender or food processor until they become a fine oat flour.
- Mix Wet Ingredients: Combine peanut butter and maple syrup in a microwave-safe bowl and heat for 40-60 seconds. Stir thoroughly until fully combined and smooth.
- Combine Ingredients: Gradually add the oat flour to the peanut butter mixture, mixing well until the mixture is thick and moldable. Add extra maple syrup or peanut butter if too dry. Optionally, add 1/4-1/3 cup pumpkin puree for moisture.
- Prepare Muffin Pan: Line a muffin pan with cupcake liners or use a silicone muffin pan for easy removal.
- Form Cups: Evenly scoop the peanut butter oat mixture into muffin cups, pressing down firmly with your fingers to shape the base layer.
- Melt Chocolate: In a microwave-safe bowl, heat chocolate chips and coconut oil in 30-second increments, stirring between each until smooth and melted.
- Add Chocolate Topping: Pour melted chocolate evenly over each oat cup and smooth with the back of a spoon. Optionally, sprinkle flaky salt, sprinkles, or mini chocolate chips on top before the chocolate sets.
- Chill to Set: Refrigerate the cups for 2-3 hours until fully set. Carefully remove from muffin pan or liners and store in an airtight container in the refrigerator for up to 5 days.
Notes
- For a pumpkin variation, add 1/3 cup pumpkin puree and 1 1/2 teaspoons pumpkin spice to the mixture.
- Use silicone muffin pans to make removal easier and avoid liners.
- Store these cups refrigerated to maintain freshness and prevent melting.
- If mixture is too dry, add maple syrup or peanut butter teaspoon by teaspoon to achieve ideal consistency.
Keywords: no bake peanut butter cups, peanut butter oat cups, healthy snack, no bake dessert, peanut butter chocolate cups, easy no bake recipe