Oreo Cookie Christmas Ornaments Recipe
Hey friend, if you’re looking for a super fun and festive treat to dazzle your holiday guests or just get into the Christmas spirit, you’ve got to try this Oreo Cookie Christmas Ornaments Recipe. It’s a playful twist on classic cookies that turns Oreos into adorable edible ornaments — perfect for hanging on your tree or gifting to loved ones. I’ve made these a few times during the holidays, and every single time they sparkle up the party and bring smiles all around.
What I love most about this Oreo Cookie Christmas Ornaments Recipe is how simple it is, yet the results look so impressive. You don’t need fancy baking skills — just a bit of melting, decorating, and a sprinkle of holiday magic. Whether you’re making these with kids or whipping them up as a last-minute gift, they work wonderfully to add a whimsical touch to your festivities. Trust me, once you try it, you’ll be hooked!
Ingredients You’ll Need
For this recipe, I stick with a few simple ingredients that pair beautifully, allowing the flavors and decorations to really pop. If you grab these basics ahead of time, you’ll breeze through this project while still looking like a holiday pro.
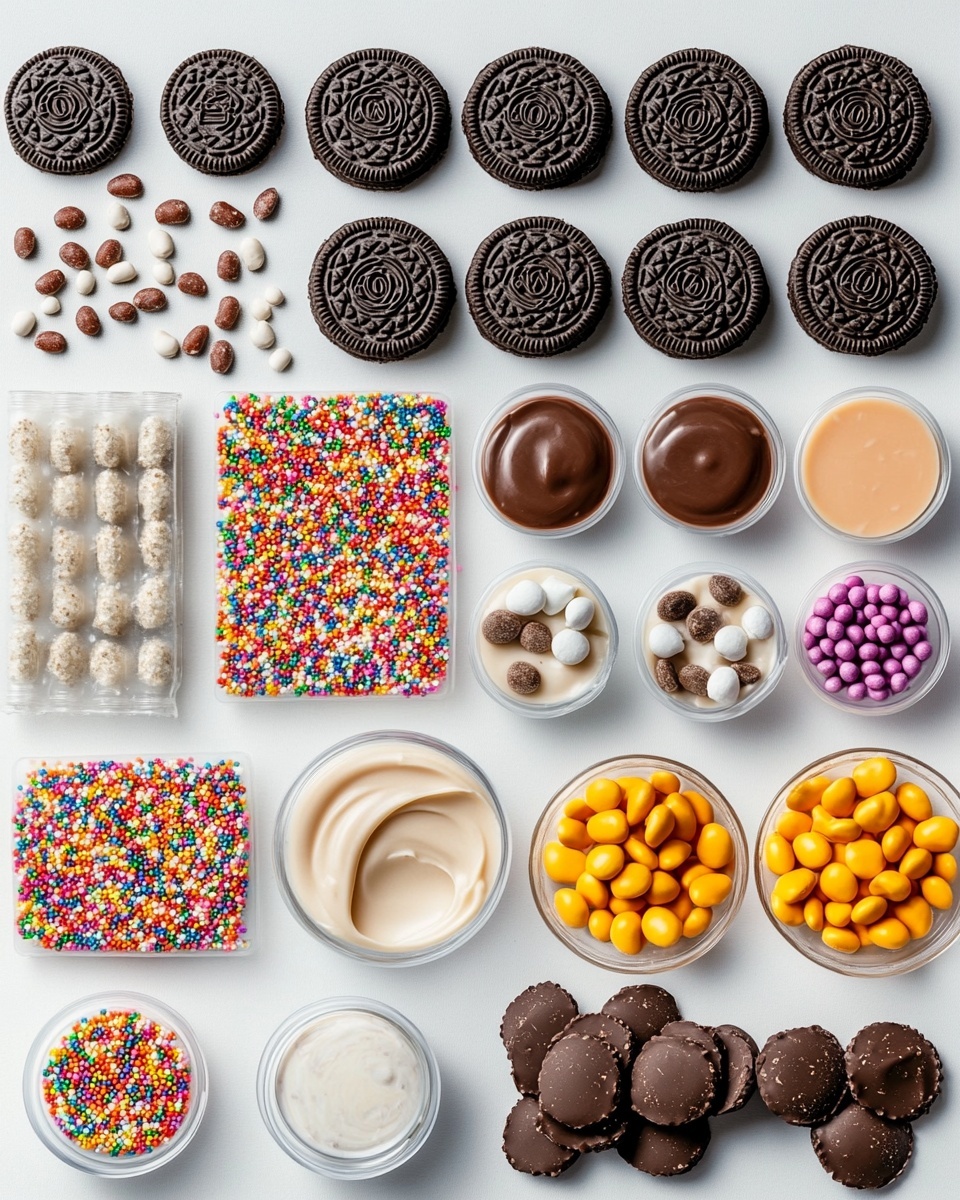
- Oreos: Classic Oreos work perfectly here — the well-known chocolate cookies give a rich base that everyone loves.
- Mini peanut butter cups: These add a sweet, creamy center and make excellent “ornament caps” when you attach the loop.
- Candy melts: Choose festive colors like red, green, or white to coat the Oreos; they melt smoothly and harden with a nice shine.
- Sprinkles and candy decorations: Get creative here! I love using a variety of sprinkles, mini candies, or edible glitter for that extra holiday sparkle.
Variations
This Oreo Cookie Christmas Ornaments Recipe feels like a blank canvas to me, and I often mix things up based on what I have on hand or the theme I’m aiming for. You can easily tailor it to suit your taste or your crowd.
- Variation: One holiday, I swapped the mini peanut butter cups for mini marshmallows for a sweeter, fluffier ornament top — it was a hit with the kids!
- Dietary twist: If you want a gluten-free version, you can find gluten-free sandwich cookies and candy melts, so no one has to miss out.
- Seasonal colors: Mix candy melt colors—like shimmering silver or gold—to match your tree’s color scheme or party theme.
How to Make Oreo Cookie Christmas Ornaments Recipe
Step 1: Prep Your Workspace and Ingredients
Gather everything on your counter; it really makes the process smoother. I always line a baking sheet with parchment paper so the coated Oreos don’t stick. Take your candy melts and melt them according to the package instructions—usually a few minutes in the microwave will do, just be sure to stir often to avoid burning. Having sprinkles within arm’s reach means you can decorate while the coating is still wet, which is key!
Step 2: Dip Oreos in Candy Melt Coating
Now, one by one, dip each Oreo into your melted candy melts, fully covering it or just partially if you want. Use a fork or a dipping tool, and tap gently on the bowl’s edge to get rid of excess coating. This part is fun but quick—if the candy hardens too soon, you’ll get bumps. Do this swiftly but carefully to keep your ornaments smooth and shiny.
Step 3: Add the Mini Peanut Butter Cup ‘Hooks’ and Decorations
While the coating is still soft, place a mini peanut butter cup on top of each Oreo to serve as the ornament’s cap. Press gently so it sticks but doesn’t break the cookie. I also immediately add a tiny loop of icing or a sprinkle string on top to look like the hook part of the ornament—this gives it that authentic ornament vibe. Finish by sprinkling your choice of decorations before the candy hardens.
Step 4: Let Them Set Completely
Once decorated, place your Oreos on the parchment-lined tray and leave them to set at room temperature or pop them in the fridge for 10-15 minutes. Don’t rush this—letting the candy melts fully harden ensures your ornaments hold their shape and shine beautifully. If you’re making lots, consider using a cooling rack over a lined tray to catch drips.
How to Serve Oreo Cookie Christmas Ornaments Recipe
Garnishes
When I serve these, I like to stack a few on a white or red festive plate and add a sprinkle of powdered sugar around for a snowy effect. I’ve also tied tiny ribbons around the peanut butter cup tops for an extra festive touch. It makes the cookies look gift-ready and adds to the charm.
Side Dishes
I love pairing these Oreo ornaments with a warm cup of hot cocoa or a simple glass of milk to balance the sweetness. They also go surprisingly well with a cheese platter—adding a sweet contrast to salty snacks is always a crowd-pleaser at holiday gatherings.
Creative Ways to Present
One year, I stacked the Oreo Christmas ornaments inside clear glass jars layered with holiday candy canes and ribbons — it was an instant hit as a party favor. Another idea is hanging the Oreos on smaller branches of your Christmas tree for edible decor that guests can pick right off! These little touches elevate the presentation and spark conversations.
Make Ahead and Storage
Storing Leftovers
I find the best way to store these is in an airtight container layered with parchment sheets to keep them from sticking. They hold up well at room temperature for about 4-5 days — perfect if you’re prepping early for a party.
Freezing
Yes, you can freeze these little beauties! Just place them in a single layer on a baking sheet, freeze until firm, and then transfer to a freezer-safe container. When you’re ready to serve, let them thaw at room temperature — they keep their charm and flavor pretty well this way.
Reheating
Since these are no-bake treats, no reheating is necessary. If the candy melts lose a bit of their shine, a quick chill in the fridge helps them firm back up. Just avoid heat, or the decorations might melt, and you’ll lose that pristine look.
FAQs
-
Can I use other types of cookies for the Oreo Cookie Christmas Ornaments Recipe?
Absolutely! While Oreos are classic and provide the best shape and taste, you can try sandwich cookies with different flavors or sizes. Just make sure they’re sturdy enough to hold the candy coating and decorations without crumbling.
-
What’s the best way to make sure the candy melts don’t harden too quickly?
Keeping your candy melts warm as you work helps a lot — you can return the bowl to the microwave for short 10-15 second bursts if it starts cooling. Also, work in small batches so you’re not dipping too many Oreos at once, which slows the process and causes early setting.
-
How do I prevent the Oreo ornaments from sticking to the parchment paper?
Spray a light coating of non-stick spray on your parchment or wax paper before placing the dipped Oreos down. Alternatively, silicone baking mats work wonderfully to prevent sticking and make clean-up easier.
-
Can I make these egg-free or nut-free?
Yes, this Oreo Cookie Christmas Ornaments Recipe is naturally egg-free since there’s no baking involved. For nut-free, just omit the peanut butter cups and replace with mini marshmallows or chocolate chips for the ornament cap instead.
Final Thoughts
This Oreo Cookie Christmas Ornaments Recipe has become one of my go-to holiday treats because it’s so easy, fun, and festive all at once. I love how it brings a playful twist to traditional Christmas baking without too much fuss or mess. If you want to wow your family or friends with something cute, tasty, and perfectly seasonal, I really encourage you to give this a try. You’ll enjoy every minute of making them and, trust me, they disappear fast once you put them out!
Print
Oreo Cookie Christmas Ornaments Recipe
- Prep Time: 10 minutes
- Cook Time: 15 minutes
- Total Time: 25 minutes
- Yield: 12 Oreo Christmas Ornaments 1x
- Category: Dessert
- Method: No-Cook
- Cuisine: American
Description
Create festive Oreo Cookie Christmas Ornaments that are perfect for holiday celebrations! These adorable treats combine rich Oreo cookies with creamy mini peanut butter cups, all dipped in colorful candy melts and decorated with sprinkles and candy for a delightful seasonal dessert.
Ingredients
Cookies and Filling
- 12 Oreo cookies
- 12 mini peanut butter cups
Coating and Decoration
- 10 oz candy melts (color of your choice)
- Sprinkles and assorted candy for decorating
Instructions
- Prepare the Oreos: Carefully twist apart each Oreo cookie to separate the two halves. Remove the cream filling from one side of each Oreo, setting aside the plain cookie halves.
- Attach the Peanut Butter Cups: Place one mini peanut butter cup on the side of the Oreo half without cream. This will serve as the ‘ornament’ center.
- Reassemble Cookies: Place the other Oreo half (with cream filling) back on top of the peanut butter cup, pressing gently to make a sandwich again.
- Melt Candy Coating: Melt the candy melts according to package instructions, typically in a microwave-safe bowl heating in 30-second intervals stirring between until smooth.
- Dip Oreos: Using a fork or dipping tool, dip each reassembled Oreo sandwich into the melted candy to coat fully or partially depending on your decoration style.
- Add Decorations: Before the candy coating sets, sprinkle each dipped Oreo with festive sprinkles and candies to create a Christmas ornament look.
- Drying: Place the decorated Oreos on wax paper or a baking sheet lined with parchment paper and let the coating harden completely at room temperature or in the refrigerator for faster setting.
- Serving and Storage: Once hardened, your Oreo Cookie Christmas Ornaments are ready to enjoy or package as festive treats.
Notes
- You can use different colored candy melts to match your holiday theme.
- Adding a small loop of string or edible decorative topper can enhance the ornament look.
- Store finished ornaments in an airtight container at room temperature for up to a week.
- If allergic to peanuts, substitute peanut butter cups with mini chocolate candies or other preferred fillings.
Keywords: Oreo cookies, Christmas ornaments, holiday desserts, candy melts, peanut butter cups, festive treats