Red Velvet Cheesecake Bliss
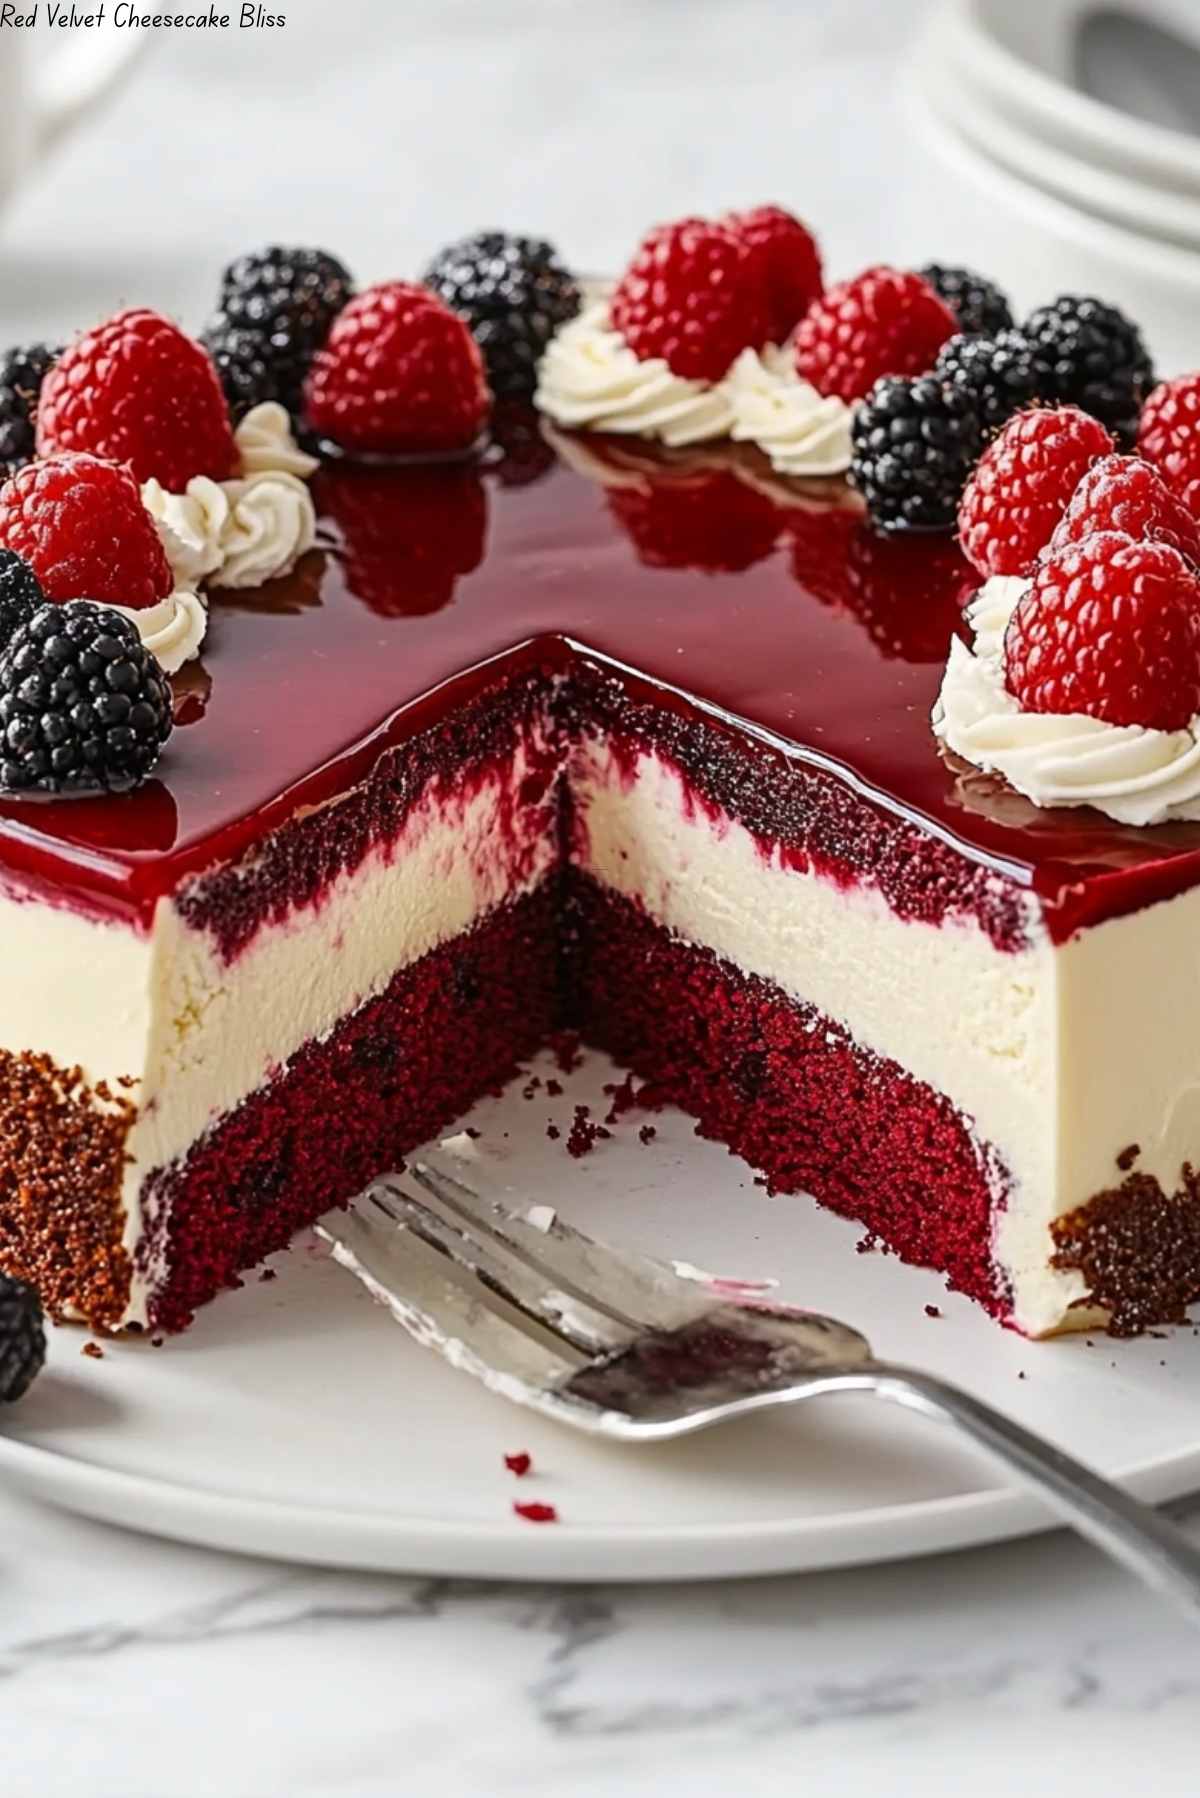
Indulge in the heavenly combination of red velvet cake and creamy cheesecake with this irresistible Red Velvet Cheesecake Bliss recipe. Perfect for special occasions or just a sweet treat, this dessert is sure to impress with its rich flavors and simple preparation. This dish has become a staple in my kitchen, wowing guests every time!
Why You’ll Love This Recipe?
- The decadent flavors of red velvet cake and creamy cheesecake blend perfectly for a truly indulgent treat.
- With easy-to-find ingredients and straightforward instructions, this dish is a breeze to make.
- This recipe is versatile and can be made ahead of time, making it ideal for meal prep or entertaining.
Ingredient Notes:
For the Red Velvet Cake Layer:
- All-purpose flour, granulated sugar, cocoa powder, baking powder, baking soda, salt, buttermilk, egg, vegetable oil, red food coloring or beetroot powder for a natural option, vanilla extract, white vinegar.
For the Cheesecake Layer: - Cream cheese (softened), sour cream, granulated sugar, eggs, vanilla extract, all-purpose flour.
For the Whipped Cream Topping: - Heavy cream, powdered sugar, vanilla extract.
For Garnish (optional): - Fresh berries, red velvet cake crumbs.
Step-by-Step Instructions:
- Preheat the oven and prepare a baking pan.
- Make the red velvet cake batter by mixing the dry ingredients, then adding the wet ingredients.
- In a separate bowl, prepare the cheesecake layer by combining cream cheese, sour cream, sugar, eggs, vanilla, and flour.
- Layer the red velvet cake batter and cheesecake mixture in the pan.
- Bake until set, then cool and refrigerate.
- Whip the cream and assemble the dessert with optional garnishes.
Helpful Tips:
- Be sure not to overmix the batter to keep the texture light and fluffy.
- For a richer flavor, use high-quality cocoa powder and vanilla extract.
- Store leftovers in the refrigerator for up to 3 days and bring to room temperature before serving.
Expert Tips for the Best Results:
- Allow the cheesecake layer to set in the refrigerator for at least 4 hours before serving for the best texture.
- Use a water bath while baking to prevent cracking on the cheesecake surface.
- Experiment with different garnishes like chocolate shavings or caramel sauce for added flair.
Serving Suggestions:
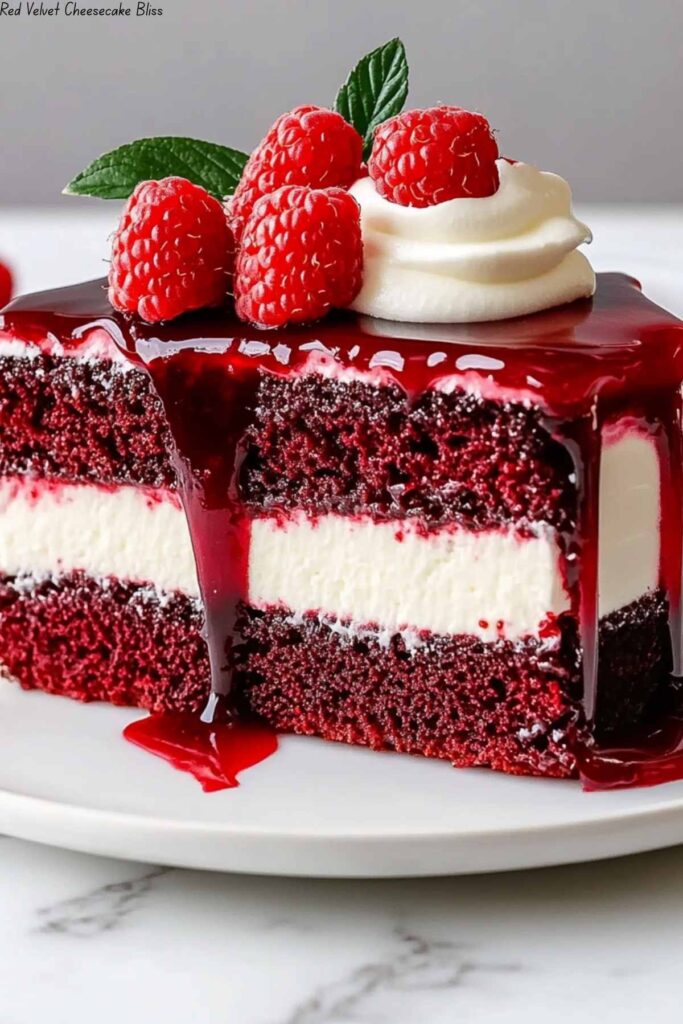
Serve this Red Velvet Cheesecake Bliss with a dollop of whipped cream and fresh berries for a stunning presentation. Pair it with a cup of hot coffee or a glass of red wine for a delightful dessert experience.
Storage and Reheating Tips:
To store, cover the dessert tightly with plastic wrap and keep refrigerated. When ready to serve, let it come to room temperature for the best flavor and texture.
Frequently Asked Questions:
- Can I use a different type of food coloring for the red velvet cake?
- Yes, you can experiment with natural food colorings like beetroot powder for a healthier alternative.
- How can I prevent the cheesecake from cracking?
- Using a water bath while baking and allowing the cheesecake to cool gradually can help prevent cracking.
- Can I freeze this dessert?
- While it’s best enjoyed fresh, you can freeze leftovers for up to one month in an airtight container.
- Can I make this recipe gluten-free?
- You can try using gluten-free flour and ensure all ingredients are gluten-free for a suitable alternative.
Conclusion:
Treat yourself and your loved ones to the delightful fusion of flavors in this Red Velvet Cheesecake Bliss. Whether for a special occasion or a sweet indulgence, this dessert is sure to impress with its rich taste and creamy texture. Give it a try and share your feedback with us!
Print
Red Velvet Cheesecake Bliss
- Prep Time: 20 mins
- Cook Time: 1 hour
- Total Time: 1 hour 20 mins
- Yield: 8–10 servings 1x
- Category: Desserts
- Method: Baking
- Cuisine: American
- Diet: Vegetarian
Description
Indulge in the perfect combination of red velvet cake and creamy cheesecake in this Red Velvet Cheesecake Bliss. A decadent dessert that will impress your guests and satisfy your sweet cravings.
Ingredients
Red Velvet Cake Layer:
- 1 ½ cups all-purpose flour
- 1 cup granulated sugar
- 1 tbsp cocoa powder
- 1 tsp baking powder
- ½ tsp baking soda
- ½ tsp salt
- 1 cup buttermilk
- 1 large egg
- ½ cup vegetable oil
- 2 tbsp red food coloring or beetroot powder for natural option
- 1 tsp vanilla extract
- 1 tsp white vinegar
For Cheesecake Layer:
- 16 oz cream cheese, softened
- ½ cup sour cream
- ½ cup granulated sugar
- 2 large eggs
- 1 tsp vanilla extract
- 2 tbsp all-purpose flour
For Whipped Cream Topping:
- 1 cup heavy cream
- 2 tbsp powdered sugar
- 1 tsp vanilla extract
For Garnish (optional):
- Fresh berries
- Red velvet cake crumbs
Instructions
- Prepare Red Velvet Cake Layer: Mix dry ingredients, add wet ingredients, and bake.
- Prepare Cheesecake Layer: Beat cream cheese, add sour cream, sugar, eggs, and flour.
- Assemble: Layer red velvet cake and cheesecake mixture, bake until set.
- Whipped Cream Topping: Whip cream, sugar, and vanilla until stiff peaks form.
- Garnish: Top with whipped cream, berries, and cake crumbs.
Notes
- For a richer flavor, use full-fat cream cheese and sour cream.
- Adjust sweetness by adding more or less sugar to the cheesecake layer.
- Allow the cheesecake to cool completely before chilling in the fridge.
Nutrition
- Serving Size: 1 slice
- Calories: 350 kcal
- Sugar: 20 g
- Sodium: 250 mg
- Fat: 22 g
- Saturated Fat: 12 g
- Unsaturated Fat: 8 g
- Trans Fat: 0 g
- Carbohydrates: 32 g
- Fiber: 1 g
- Protein: 6 g
- Cholesterol: 95 mg
Keywords: red velvet, cheesecake, dessert, baking, sweet treat