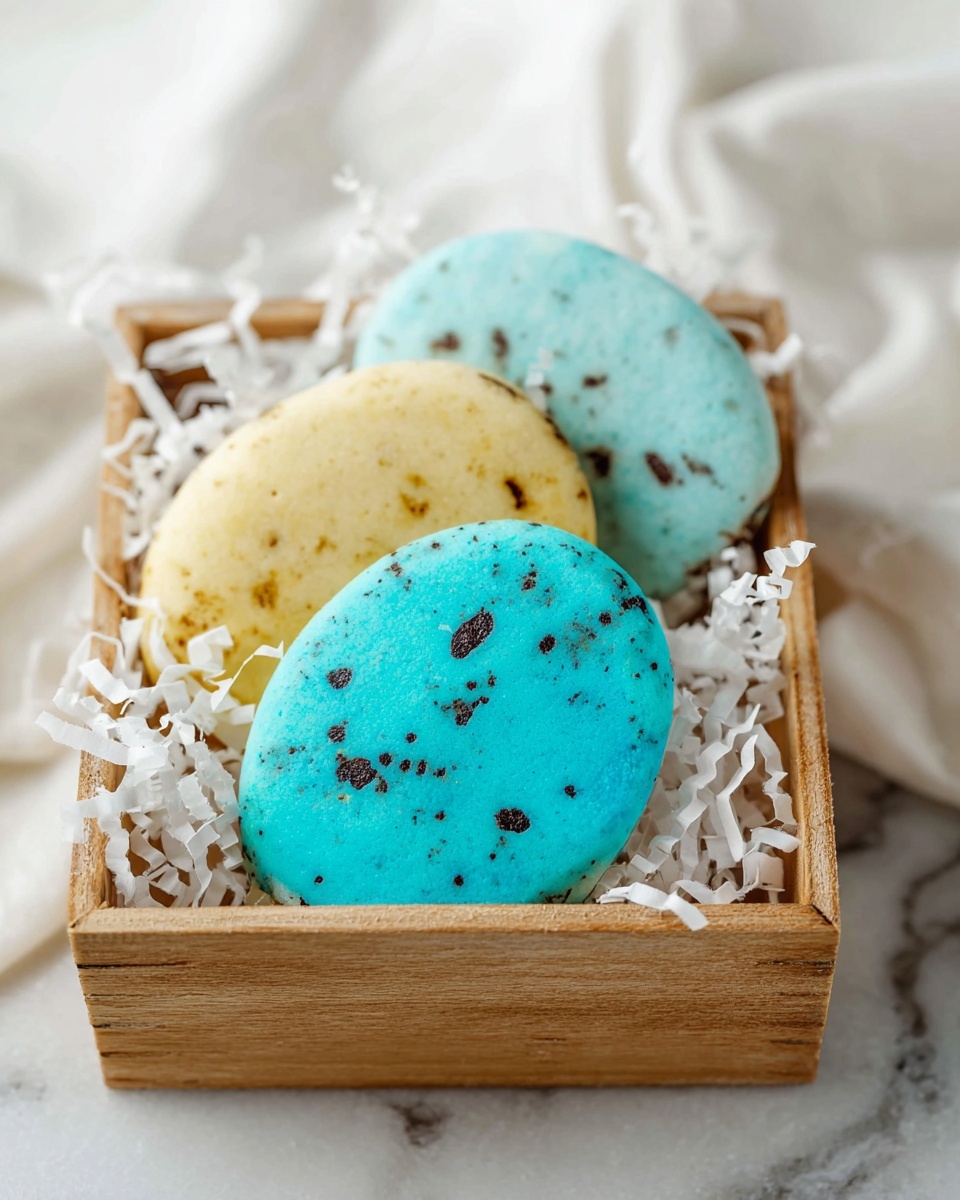
Speckled Egg Cookies Recipe
If you’re searching for a sweet treat that instantly brings a smile, let me introduce you to my Speckled Egg Cookies Recipe. These charming, little cookies aren’t just adorable—they’re a delicious blend of tender sugar cookie and beautifully decorated royal icing with speckles that look like tiny bird eggs. They make an especially delightful addition to Easter baskets, springtime gatherings, or anytime you want a little whimsical bite with your coffee or tea.
I first stumbled on this Speckled Egg Cookies Recipe when I was hunting for a fun way to share cookies with my kids during spring break. The speckled detail gives each cookie a surprise touch of personality, and honestly, decorating them turned into a mini arts and crafts session that was just as much fun as eating the finished treats. What I love most is how the cookies balance that classic sugar cookie softness with the crisp icing finish—perfect for gifting or nibbling yourself!
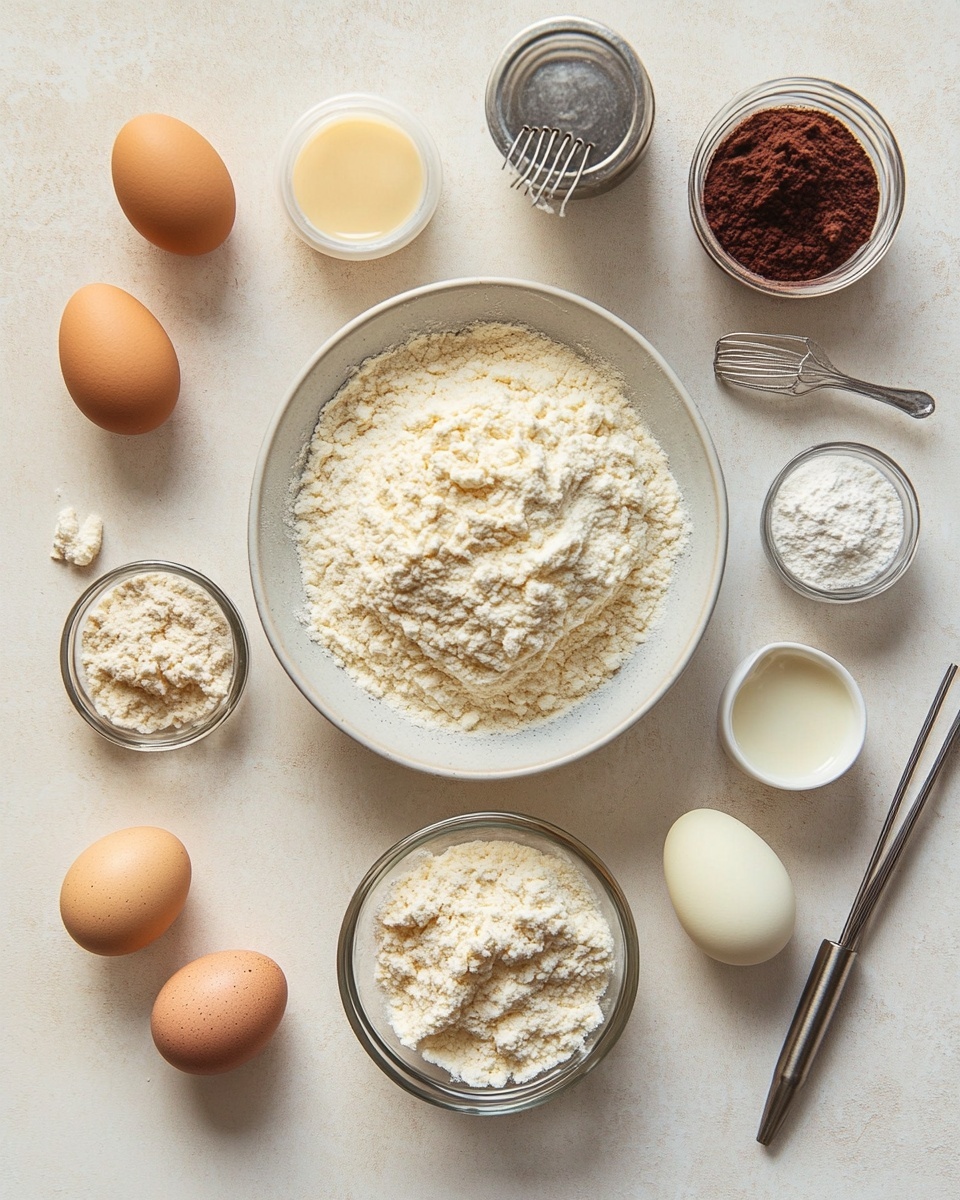
Ingredients You’ll Need
Every ingredient in this Speckled Egg Cookies Recipe works together to create that perfect cookie texture and decorative flair. I recommend using quality basics like real butter and fresh eggs to get the best flavor and consistency, and when it comes to decorating, take your time picking gel food colors that make those speckles pop!
- All-purpose flour: It’s the backbone of the cookie, and make sure it’s fresh for tender results.
- Salt: Just a pinch to balance sweetness and enhance flavor.
- Baking powder: Adds a light lift to the cookies so they’re tender, not dense.
- Granulated sugar: Sweetness and structure, choose fine sugar for better mixing.
- Unsalted butter: Room temperature and real butter gives the best buttery flavor and texture.
- Eggs: Large and at room temperature for proper emulsification.
- Vanilla extract: Pure vanilla is ideal, but lemon or almond extract can add a lovely twist.
- Sour cream: Adds moisture and a subtle tang to keep the cookies soft.
- Meringue powder: Essential for royal icing, giving that perfect stiff sheen.
- Water: For mixing with meringue powder and adjusting icing consistency.
- Powdered sugar: Sifted for smooth royal icing without lumps.
- Light corn syrup: Keeps the icing glossy and prevents it from drying out too fast.
- Almond extract: Adds a delicate flavor to your icing, but you can swap for lemon or clear vanilla if preferred.
- Gel food coloring: Choose gel-based for vibrant, smooth colors that don’t thin out your icing.
- Cocoa powder: Used to make the specks on the egg-shaped cookies—gives a natural, gentle speckled effect.
- Warm water: To mix with cocoa powder creating the perfect speckle paint.
- Egg-shaped cookie cutter: About 2 inches tall to get that signature speckled egg shape.
- #2 piping tip and piping bags: For detailed icing application and flooding.
- Clean toothbrush or paintbrush: To flick the cocoa speckles onto each cookie easily.
Variations
One of my favorite things about this Speckled Egg Cookies Recipe is how easy it is to adapt! Play around with different extracts or colors to make your cookies unique and perfect for the occasion.
- Citrus Twist: I love swapping vanilla for lemon extract to add a bright, fresh zing that pairs beautifully with spring flavors.
- Almond Delight: Using almond extract in both the dough and icing gives a delicate nuttiness that’s truly special.
- Chocolate Speckles: If you’re feeling adventurous, try using royal icing tinted brown instead of cocoa powder for your speckles—gives a richer chocolate look.
- Gluten-Free Version: Substitute all-purpose flour with a 1:1 gluten-free baking blend—just be sure to chill your dough well for better texture.
- Pastel Palette: For a baby shower or Easter, go with soft pastel colors in your icing for an elegant, festive vibe.
How to Make Speckled Egg Cookies Recipe
Step 1: Whisk Your Dry Ingredients Together
In a medium bowl, combine the flour, salt, and baking powder. Whisking these together ensures the leavening is evenly distributed, so your cookies rise nicely without any surprises. I always do this first to keep my process organized and smooth.
Step 2: Cream Butter and Sugar Until Fluffy
Using a stand mixer fitted with a paddle attachment, beat your room-temperature butter and sugar together on medium speed for about 1-2 minutes. You’re aiming for a light, fluffy texture here—this step is crucial because it traps air in the dough, resulting in tender cookies. Don’t rush this; you’ll notice the mixture lighten in color and fluff up.
Step 3: Add the Eggs, Extract, and Sour Cream
Add your eggs one at a time, beating well after each to fully incorporate. Then pour in your vanilla (or chosen) extract and sour cream. These wet ingredients help create that soft, moist crumb in the finished cookie.
Step 4: Slowly Mix in the Dry Ingredients
Reduce your mixer to low and add the flour mixture gradually. Stop mixing when only a few streaks of flour remain—you’ll finish by hand to avoid overworking the dough. This helps keep your cookies tender, not tough.
Step 5: Chill the Dough
Divide the dough into two discs, wrap tightly in plastic, and refrigerate for about 30 minutes until firmer but still pliable. This step is key because it keeps the dough from spreading too much while baking and makes rolling it easier. If your dough gets too firm, just let it sit at room temperature for 10-15 minutes before rolling.
Step 6: Roll and Cut Out Your Egg Shapes
Preheat your oven to 350°F. Place one disc between parchment sheets and roll out to ¼ inch thickness. Use a 2-inch egg-shaped cookie cutter to cut out shapes and transfer them to parchment-lined baking trays. Re-roll scraps as needed—don’t worry if your first pass isn’t perfect; just keep chilling the dough if it softens too much.
Step 7: Optional Chill Before Baking
Pop your tray with cut cookies in the freezer for about 10 minutes to help them retain their shape during baking. This step is my secret weapon, especially for more intricate shapes or when the kitchen heats up.
Step 8: Bake and Cool Completely
Bake for around 8 minutes, until edges just start to take on color and the shiny raw dough look is gone. Let them rest on the tray for 5 minutes, then move to a wire rack to cool before decorating. Cooling completely is crucial or else the royal icing will melt.
Step 9: Make Your Royal Icing
In a mixer, whip meringue powder with water until foamy. Add sifted powdered sugar, beat until incorporated, then add corn syrup and almond extract. Mix for 5 minutes on medium-high speed until shiny and stiff—but don’t overmix or you’ll get too many bubbles. Thin the icing with water tablespoon by tablespoon until it drips smoothly off a spoon in about 15 seconds. Divide and add gel colors, mixing by hand to keep your colors vibrant and consistent.
Step 10: Pipe, Flood, and Let Dry
Outline each cookie with a fine edge of royal icing using a #2 tip, then flood the center. Use a toothpick to nudge icing into any gaps. Let them set for at least 2 hours or until completely dry.
Step 11: Add Speckles for That Signature Look
Mix cocoa powder and warm water to a paint-like consistency. Wearing gloves, flick a clean toothbrush loaded with cocoa brown speckles over each cookie for that charming speckled effect. This little step transforms your cookies into little works of art that look like tiny bird eggs.
How to Serve Speckled Egg Cookies Recipe
Garnishes
I often serve these cookies with a small dusting of powdered sugar or even a light shimmer of edible pearl dust to make the speckles pop more—especially when giving them as gifts. Fresh edible flowers nearby can also add a spring vibe to your cookie display.
Side Dishes
Pair your Speckled Egg Cookies with a cup of freshly brewed coffee, herbal tea, or even a light sparkling lemonade for a perfect afternoon pick-me-up. They’re also fantastic alongside fruit salads or yogurt parfaits for brunch gatherings.
Creative Ways to Present
I’ve had a lot of fun arranging these cookies in little nest-shaped paper baskets with edible grass or coconut flakes dyed green. For holiday tables, I like placing them on tiered serving trays with complementary pastel macarons or mini cupcakes. Wrapping a few in a clear cellophane bag tied with a ribbon makes an adorable party favor.
Make Ahead and Storage
Storing Leftovers
Once your royal icing has dried fully—usually overnight—you can stack your cookies between sheets of parchment or wax paper in an airtight container. Store at room temperature for up to two weeks. Avoid the fridge, as humidity there can soften the icing or cause it to sweat.
Freezing
I’ve found freezing decorated cookies works great if you package each cookie individually in plastic wrap and then keep them in an airtight container. Freeze for up to 6 months and thaw at room temperature while still wrapped to prevent moisture damage or color bleeding.
Reheating
No need to heat these cookies for eating! If you like a softer bite, leave them in a sealed container with a slice of bread overnight—the moisture transfer softens the cookie without messing up the icing at all.
FAQs
-
Can I use regular egg whites instead of meringue powder for the royal icing?
You can, but meringue powder is more convenient and food safe since it’s pasteurized, making it ideal for royal icing. If you use fresh egg whites, make sure they are pasteurized and beat them to stiff peaks carefully to avoid any food safety risks.
-
How do I prevent my royal icing from cracking?
Royal icing cracks if it’s too thick or dries out too quickly. To avoid this, don’t overmix on high speed, thin the icing properly, and let the cookies dry at room temperature in an environment that’s not too dry or drafty.
-
What can I do if my cookie dough is too sticky to roll out?
Pop it back into the refrigerator wrapped tightly for 15-30 minutes until it firms up. If it’s still sticky, lightly flour your rolling surface and cookie cutter, but avoid adding too much extra flour to keep the cookies tender.
-
Can I substitute other shapes for the egg cookie cutter?
Absolutely! While the egg shape is charming for the speckled effect, you can use any cookie cutter you love. Just adjust icing and speckling to suit your design.
-
How long does it take for royal icing to dry completely?
It usually takes at least 2 hours for a thin layer to dry to the touch, but I recommend letting decorated cookies dry overnight—about 12 hours—to ensure the icing has fully hardened for stacking or packaging.
Final Thoughts
I can’t recommend this Speckled Egg Cookies Recipe enough if you want a cookie that’s as fun to make as it is to eat. Between the soft sugar cookie base, the shiny royal icing, and the artistic speckling step, it’s a project that feels special but is totally manageable—even if you don’t consider yourself a baker or decorator. Whip up a batch, invite your friends or family to help with the decorating, and enjoy the smiles these sweet speckled eggs bring. Trust me, once you try them, you’ll be thinking about all your next cookie adventures!
Print
Speckled Egg Cookies Recipe
- Prep Time: 1 hour 30 minutes
- Cook Time: 8 minutes
- Total Time: 2 hours 8 minutes
- Yield: About 60 small (2-inch) cookies or 36 medium (2.5-inch) cookies 1x
- Category: Dessert
- Method: Baking
- Cuisine: American
Description
Speckled Egg Cookies are delightful sugar cookies shaped like eggs, decorated with smooth royal icing and delicate cocoa speckles. This recipe combines classic sugar cookie dough with a perfectly balanced royal icing, ideal for festive occasions like Easter. The cookies are soft, slightly crisp on the edges, and beautifully decorated with a speckled effect that adds a charming rustic touch. Enjoy about 60 small, 2-inch cookies that are perfect for gifting or sharing.
Ingredients
For the Sugar Cookies:
- 19 oz all-purpose flour (4 ¼ cups)
- 1 tsp salt
- 1 tsp baking powder
- 12.25 oz granulated sugar (1 ¾ cups)
- 8 oz unsalted butter (1 cup), at room temperature
- 2 large eggs, at room temperature
- 1 tsp vanilla extract (can substitute lemon or almond extract)
- 1 oz sour cream (2 TBSP), at room temperature
For the Royal Icing:
- 1.8 oz meringue powder (6 TBSP)
- 3/4 cup water (6 fl oz)
- 24 oz powdered sugar (6 cups)
- 2 tsp light corn syrup
- 1/2 tsp almond extract (can substitute lemon or clear vanilla extract)
- Assorted gel food coloring (Americolor brand recommended)
To Decorate:
- 1 TBSP cocoa powder
- 1 TBSP warm water
- Egg-shaped cookie cutter, about 2” tall
- #2 piping tip
- Piping bags
- Clean unused toothbrush or paintbrush
Instructions
- Combine dry ingredients: In a bowl, whisk together the flour, salt, and baking powder, and set aside for now.
- Cream butter and sugar: In the bowl of a large stand mixer fitted with a paddle attachment, combine the butter and sugar. Mix on medium speed until fluffy and well-mixed, about 1-2 minutes.
- Add eggs and wet ingredients: Add the eggs one at a time, beating well after each addition. Then add the vanilla extract and sour cream, mixing to incorporate.
- Add dry ingredients: With the mixer on low speed, gradually add the dry ingredients. Mix until just about incorporated—stop when a few flour streaks remain. Scrape the bowl and finish mixing by hand to ensure even dough.
- Chill the dough: Divide dough into two discs (~22 oz each), wrap in plastic wrap, and refrigerate about 30 minutes until firmer but not hard.
- Roll out the dough: Preheat oven to 350°F. Place one dough disc between parchment sheets and roll out to 1/4-inch thickness.
- Cut out the cookies: Use a 2-inch egg-shaped cookie cutter to cut cookies. Place on parchment-lined baking sheets. Re-roll scraps as needed, yielding about 60 small cookies. Chill dough briefly if too soft.
- Chill the cookies (optional): Freeze cut cookies for 10 minutes before baking to help retain shape, especially for intricate designs.
- Bake and cool: Bake for about 8 minutes until edges lightly color and centers lose raw shine. Cool 5 minutes on baking sheet, then transfer to wire racks until completely cool.
- Mix meringue powder with water: In a stand mixer, combine meringue powder and water. Mix on medium speed until foamy.
- Add powdered sugar: Stop mixer and sift powdered sugar into bowl. Beat on low until incorporated. Scrape bowl, then add corn syrup and almond extract.
- Mix until thick: Increase to medium-high speed and beat for 5 minutes until royal icing becomes shiny, stiff, bright white, and voluminous. Avoid highest speed to prevent air bubbles.
- Thin the icing: Add water tablespoon by tablespoon, mixing to reach flood consistency—icing drips off a spoon slowly and trails disappear in about 15 seconds.
- Divide and color the icing: Split icing into bowls and add gel food coloring as desired. Mix until evenly colored, remembering colors darken slightly when dried.
- Fill piping bags: Fit piping bags with #2 round tips and fill each with a different icing color for decorating.
- Flood cookie tops with royal icing: Pipe a thin outline around cookie edges, then flood inside with icing. Use a toothpick to smooth any gaps.
- Let set: Allow the icing to dry at room temperature for at least 2 hours to fully set before adding details.
- Add speckles: Mix cocoa powder and warm water to make a thin paste. Using a clean toothbrush dipped in the paste, flick small speckles onto iced cookies for a speckled effect. Wear gloves and do this over parchment for easy cleanup.
- Storage and make-ahead: Let iced cookies dry in a single layer at room temperature for at least 12 hours before stacking. Store in airtight containers between parchment layers at room temperature for up to 2 weeks. Avoid refrigeration to prevent icing softening.
- Freezer instructions: Cookies freeze well up to 6 months when individually wrapped and stored in a plastic container. Thaw at room temperature in packaging to minimize moisture and color bleeding.
Notes
- This recipe yields about 60 small (2-inch) cookies or 36 medium (2.5-inch) cookies.
- Allow royal icing to dry overnight before stacking or packaging to maintain decoration integrity.
- The recipe produces slightly more royal icing than needed; leftover icing can be refrigerated for up to 1 week or frozen up to 6 months. Re-mix separated icing before use.
- If cocoa powder is not preferred for speckles, substitute with thinned brown royal icing or luster dust mixed with vodka for a deep bronze or copper shimmer.
Keywords: speckled egg cookies, sugar cookies, royal icing cookies, Easter cookies, decorated cookies, homemade sugar cookies, holiday cookies