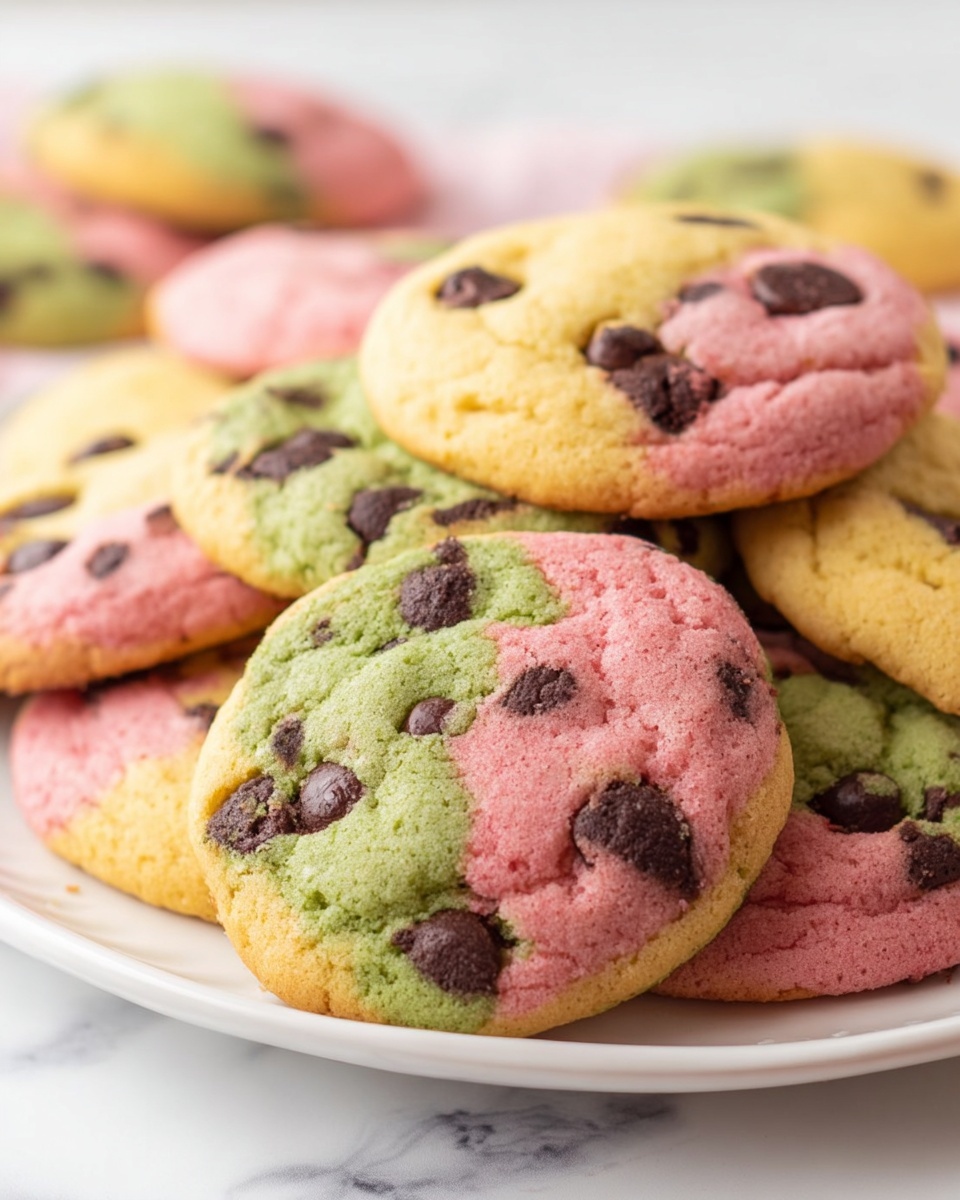
Spring Marble Chocolate Chip Cookies Recipe
If you’re looking for a cookie that screams springtime joy with every bite, this Spring Marble Chocolate Chip Cookies Recipe is your new go-to. I love how these cookies combine the classic comfort of chocolate chip with bright, playful colors that bring the season into your kitchen in the most delightful way. Whether you’re baking for a family gathering, a cheerful picnic, or just because you want a sweet mood boost, these cookies never disappoint.
What makes this Spring Marble Chocolate Chip Cookies Recipe stand out? It’s the marbled colors swirled together with those melty chocolate chips – such a showstopper. Plus, the texture hits that perfect balance between soft and chewy, so every cookie feels like a little celebration. You’ll definitely want to keep this recipe handy for any occasion that calls for something a bit special yet totally comforting.
Ingredients You’ll Need
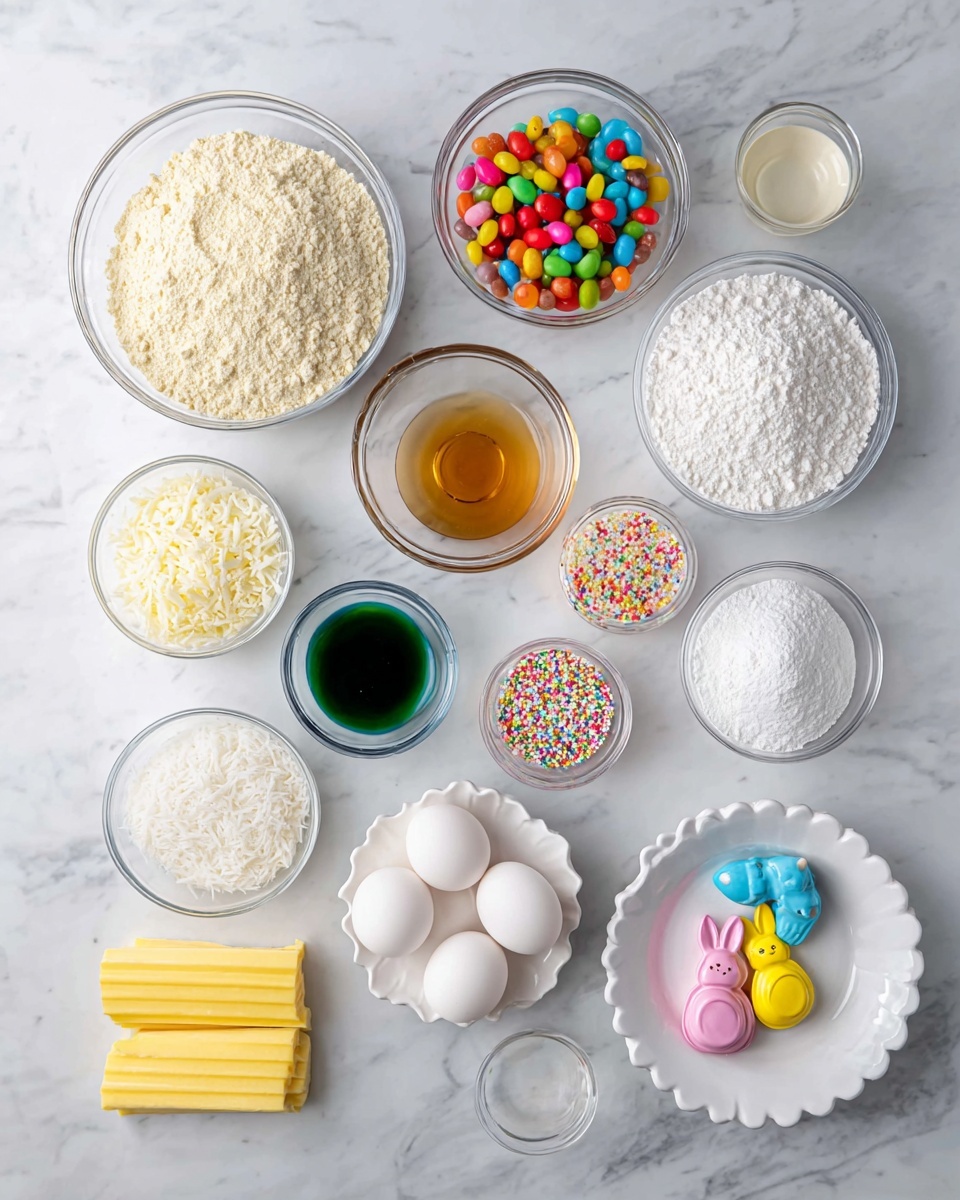
Each ingredient in this recipe plays its part beautifully to create those tender, flavorful cookies with gorgeous spring vibes. Here’s a quick rundown and some tips for shopping smart.
- Softened Butter: Using salted butter adds a subtle depth, but if you only have unsalted, just add a bit extra salt in the dough.
- Granulated Sugar: This helps give the cookies the right crisp on the edges while keeping things sweet.
- Brown Sugar: I prefer packed brown sugar here for a chewy, slightly caramel hint in the cookie.
- Eggs: Important for structure and moisture – make sure they’re at room temp for best mixing results.
- Vanilla Extract: Nothing fancy here, pure vanilla really lifts the flavor.
- Baking Soda: This is your rising agent, so don’t skip it to keep the cookies tender.
- Salt: Just a little to balance all the sweetness and enhance flavors.
- All-Purpose Flour: Perfect for that classic cookie texture.
- Nestle Toll House Chocolate Chips: Use your favorite brand, but I swear by Toll House for that ideal melt and flavor.
- Wilton Color Right Food Coloring: This is the secret weapon for vibrant colors that don’t bleed into the dough too much.
Variations
I love tweaking the Spring Marble Chocolate Chip Cookies Recipe depending on the occasion or mood. Feel free to play around and make these cookies your own – that’s part of the fun! Here are a few of my favorite ways to customize it.
- Nutty Twist: Adding chopped walnuts or pecans gives a great crunch and a bit of earthy flavor. I did this once for Easter and everyone loved the texture contrast!
- White Chocolate Swap: Sometimes, I switch out regular chocolate chips for white chocolate to brighten the flavor and pair beautifully with the pastel colors.
- Gluten-Free Version: Use a trusted gluten-free flour blend. Just keep an eye on the dough consistency—it may be a tad different but still delicious.
- Seasonal Flavors: Adding a teaspoon of almond extract or a pinch of citrus zest can bring a fresh twist to these already delightful spring treats.
- Vegan Adaptation: Substitute butter with coconut oil and use flax eggs. It takes a bit of experimenting but totally doable for a plant-based version.
How to Make Spring Marble Chocolate Chip Cookies Recipe
Step 1: Cream Your Butters and Sugars Until Fluffy
Start by softening your butter — room temperature is key here. I usually leave mine out for about 30 minutes before baking. Beat the butter with the brown sugar and granulated sugar until it’s light, fluffy, and slightly pale. This usually takes about 3-4 minutes in a standard mixer. This step is crucial because that fluffiness makes such a difference in the cookie’s texture later on.
Step 2: Add Your Wet Ingredients
Next, crack in the eggs one at a time, mixing well after each addition. Don’t rush—this ensures everything emulsifies nicely. Then, pour in the vanilla extract. You’ll already start smelling that warm vanilla goodness, which is such a comforting sign you’re on the right track!
Step 3: Mix Dry Ingredients and Slowly Incorporate
In a separate bowl, whisk together the baking soda, salt, and flour. Then add this dry mixture to your wet ingredients gradually, just a half cup or so at a time, mixing gently until fully combined. This technique helps avoid overworking the dough, which could make your cookies tough. Remember, the dough should be soft but not sticky.
Step 4: Divide and Color the Dough
Here’s where the fun really begins! Split your dough into three equal portions. Using Wilton Color Right Food Coloring, tint each portion with yellow, pink, and green to create that stunning spring marble effect. Don’t be shy with the color – a little drop can go a long way. Add your chocolate chips to each colored dough and gently fold them in. The contrast between bright dough and melted chocolate chips is simply irresistible.
Step 5: Shape and Bake to Perfection
Roll out 2-ounce balls from the three colors together to make one marbled cookie ball. Don’t over-mix at this point – you want distinct color swirls. Place these balls on your cookie sheet and gently press them down just slightly. Pop them into a preheated 350°F oven and bake for about 8-9 minutes. Keep an eye on them—edges should turn golden while centers stay soft. That perfect edge-to-center texture? Total bliss.
How to Serve Spring Marble Chocolate Chip Cookies Recipe
Garnishes
I like to dust these cookies lightly with some powdered sugar for an extra touch of sweetness and visual appeal. If it’s a picnic or party, a few edible flower petals really elevate the look and give that fresh spring vibe we’re aiming for. Sometimes, I also add a tiny drizzle of white chocolate on top – extra decadence!
Side Dishes
Pair these cookies with a cup of hot tea or freshly brewed coffee – the warm bitterness offsets the sweet, chocolaty cookie so nicely. For a more festive occasion, I love serving them alongside a light fruit salad or a bowl of fresh berries to keep things bright and balanced.
Creative Ways to Present
For birthdays or springtime celebrations, I’ve arranged these cookies on a platter layered with pastel-colored tissue paper and fresh mint leaves. It’s such an easy way to make them look extra special. You can also stack three cookies tied with a thin ribbon as cute, edible favors. Trust me, everyone notices the marbled colors and loves the presentation.
Make Ahead and Storage
Storing Leftovers
If you have any leftovers (which can be rare!), I store these cookies in an airtight container at room temperature. They stay soft and delicious up to 4 days if kept sealed. I usually separate layers with parchment paper to avoid them sticking together.
Freezing
You can absolutely freeze the dough balls before baking. I portion mine onto a tray, freeze until firm, then transfer to a zip-top bag. When you want fresh cookies fast, just pop them on a baking sheet (no need to thaw) and add a minute or two to the baking time. It’s a lifesaver for last-minute gatherings!
Reheating
To bring back that freshly baked warmth, I heat the cookies in a 300°F oven for 3-4 minutes or microwave them for about 10-15 seconds—just enough to soften up the chocolate chips without drying out the cookie. It’s like having a fresh batch all over again.
FAQs
-
Can I use other food colorings for the Spring Marble Chocolate Chip Cookies Recipe?
Yes! While I prefer Wilton Color Right Food Coloring because it’s vibrant and stable, you can use any gel or paste food coloring. Just avoid liquid colors as they can change the dough’s consistency too much. Be sure to add coloring gradually for the best control over the intensity.
-
What if I don’t want colored dough – can I make this recipe without the marble effect?
Absolutely! The base cookie dough is fantastic on its own. You can simply skip the food coloring and mix all the dough with chocolate chips for classic chocolate chip cookies. The recipe still yields soft, chewy, and delicious results.
-
How do I prevent the colors from bleeding and mixing too much?
When combining the colored dough portions, gently swirl them instead of mixing thoroughly. Also, don’t overwork the dough balls while shaping. Chilling the dough before shaping can help keep the colors distinct during baking.
-
Can I make these cookies vegan?
Yes, by swapping butter for coconut oil or vegan butter and using flax eggs or another egg substitute, you can make a vegan version. Just keep in mind texture and flavor might shift slightly, so you may want to experiment a bit to find your favorite combo.
-
How long do these cookies last fresh?
Stored in an airtight container at room temperature, these cookies stay fresh for about 4 days. For longer storage, freezing the dough or baked cookies is your best bet.
Final Thoughts
Honestly, the Spring Marble Chocolate Chip Cookies Recipe holds a special place in my kitchen because it instantly brightens up any day with its fun colors and classic chocolate chip flavor. Baking these cookies feels like welcoming spring indoors, even if the weather isn’t quite there yet. I can’t recommend them enough—give them a try and let those cheerful swirls and warm chocolate chips bring a little extra joy to your baking adventures.
Print
Spring Marble Chocolate Chip Cookies Recipe
- Prep Time: 10 minutes
- Cook Time: 10 minutes
- Total Time: 20 minutes
- Yield: 18 cookies 1x
- Category: Dessert
- Method: Baking
- Cuisine: American
Description
Spring Marble Chocolate Chip Cookies are a festive and colorful twist on the classic chocolate chip cookie. Featuring vibrant swirls of yellow, pink, and green dough blended with rich chocolate chips, these soft and chewy cookies bring a playful beauty to any occasion. Perfectly golden around the edges with a tender center, they combine buttery sweetness with bursts of chocolate delight, making them an irresistible treat for spring celebrations or everyday indulgence.
Ingredients
Cookie Dough Ingredients
- 1 cup Softened Butter (Sweet Cream, Salted)
- 1 cup Granulated Sugar
- 1/2 cup Brown Sugar (packed)
- 2 Eggs
- 2 teaspoons Vanilla Extract
- 1 teaspoon Baking Soda
- 1/2 teaspoon Salt
- 2 3/4 cups All-Purpose Flour
Additional Ingredients
- 1 Bag Nestle Toll House Chocolate Chips
- Wilton Color Right Food Coloring (yellow, pink, green)
Instructions
- Cream the Butter and Sugars: In a mixer, beat the softened butter together with the brown sugar and granulated sugar until the mixture is smooth and creamy.
- Add Eggs and Vanilla: Beat in the eggs and vanilla extract until the dough is light and fluffy, ensuring proper incorporation of ingredients.
- Incorporate Baking Soda and Salt: Mix in the baking soda and salt to evenly distribute the leavening and seasoning throughout the dough.
- Add Flour Gradually: Slowly add the all-purpose flour a little at a time, mixing well after each addition until the dough is fully combined and smooth.
- Divide Dough: Separate the cookie dough evenly into three portions to prepare for coloring.
- Color Dough Portions: Use Wilton Color Right Food Coloring to tint each dough portion with yellow, pink, and green colors respectively.
- Add Chocolate Chips: Fold chocolate chips evenly into each colored dough portion, ensuring chocolate is well distributed.
- Form Cookie Balls: Combine small portions of each color dough to create a single 2-ounce cookie ball that shows the marble effect.
- Shape Cookies: Slightly press each cookie ball down on an ungreased cookie sheet to prepare for baking.
- Bake Cookies: Place the cookie sheet in a preheated 350°F (175°C) oven and bake for 8-9 minutes or until the edges turn golden brown.
Notes
- For best results, use room temperature butter for easier creaming.
- Make sure to not overbake; cookies should be slightly soft in the center when removed from the oven.
- Use gel food coloring for more vibrant colors without affecting dough consistency.
- Chilling the dough before baking can help maintain shape and enhance flavor.
- These cookies can be stored in an airtight container at room temperature for up to 5 days.
Keywords: spring cookies, marble cookies, chocolate chip cookies, colorful cookies, festive cookies, baked cookies