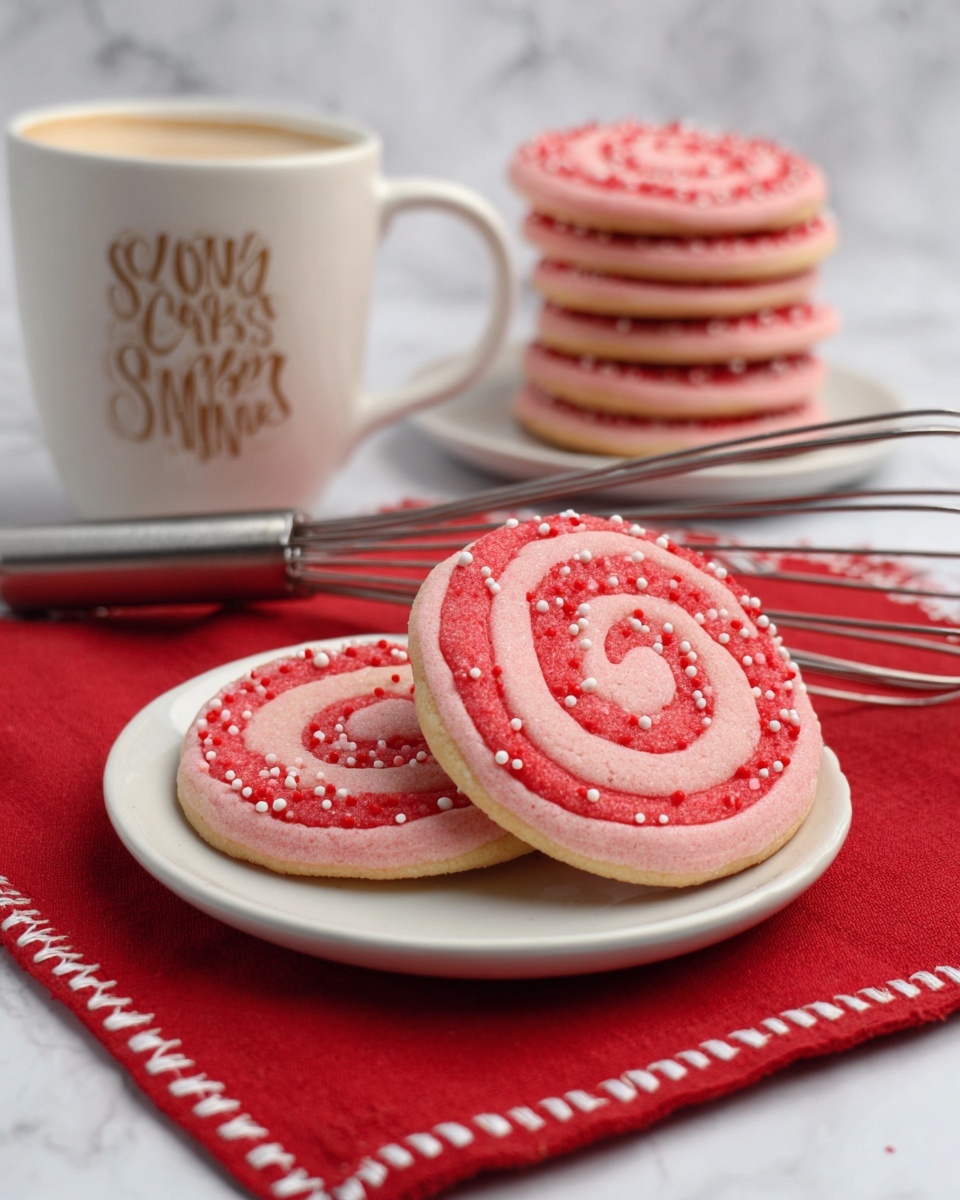
Valentine’s Day Swirl Cookies Recipe
Hey friend, if you’re looking to whip up something festive and utterly charming for the season of love, this Valentine’s Day Swirl Cookies Recipe is just the ticket. These cookies are a delightful swirl of vanilla-rich dough kissed with your choice of color and flavor, which makes them as fun to make as they are to eat. They’re perfect for sharing a sweet moment with someone special, or even for indulging yourself because, hey, treat yourself days are important too!
What I adore most about this Valentine’s Day Swirl Cookies Recipe is how they manage to look so stunning and professional without a ton of complicated steps. Plus, the burst of colorful sprinkles rolling around the edges just captures the holiday spirit beautifully. You’ll enjoy how these cookies come together smoothly, and that short chill time actually builds anticipation — trust me, your patience will be rewarded with melt-in-your-mouth swirls of buttery goodness.
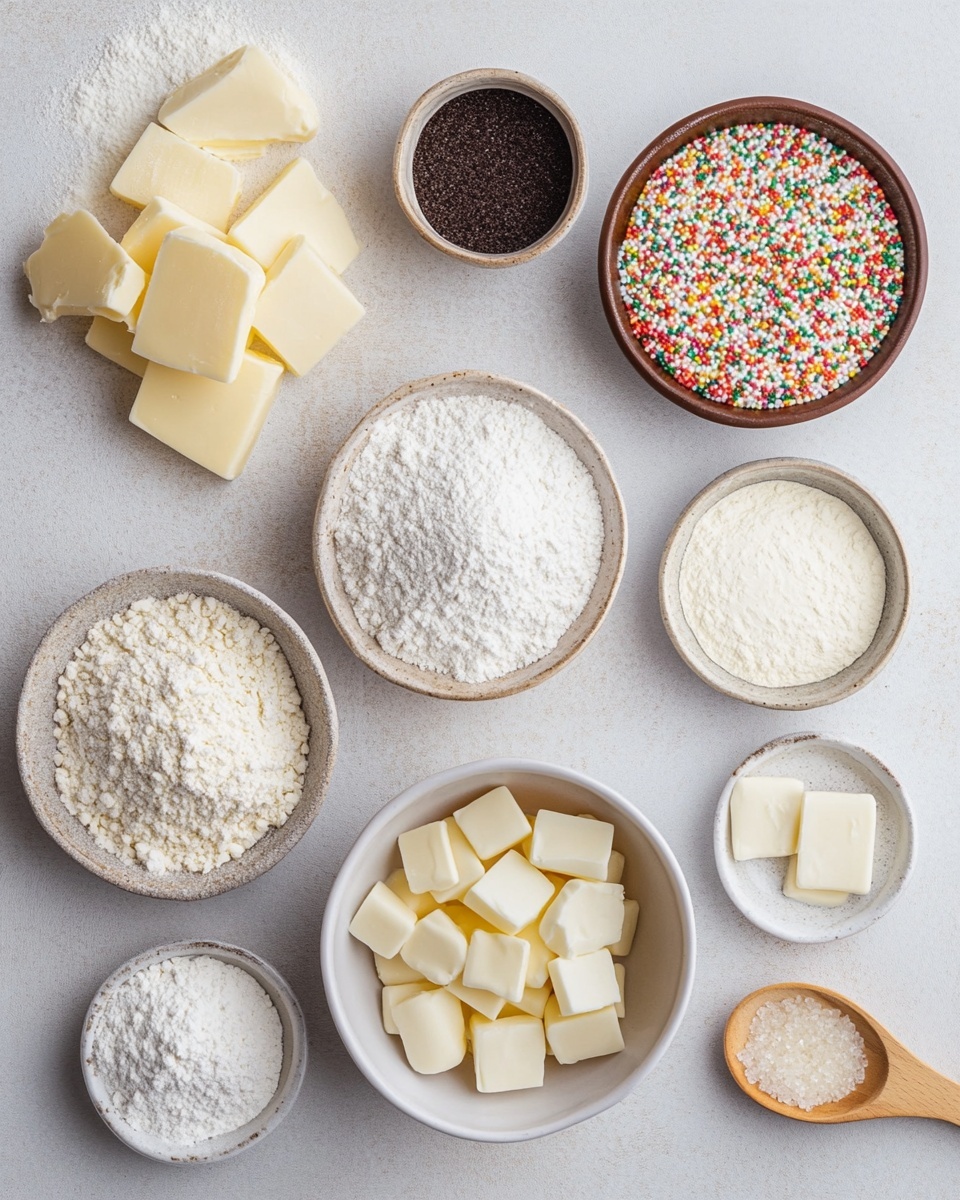
Ingredients You’ll Need
These ingredients strike a perfect balance, giving you a tender cookie dough that holds its shape well while inviting customization through color and flavor. When shopping, fresh butter and quality vanilla really elevate the flavor, so don’t skimp on those!
- Flour: All-purpose flour is the base here. I like to have a couple tablespoons extra on hand because colored dough can get a bit sticky.
- Baking powder: Gives the cookies just a slight lift without making them cakey—important for that perfect tender chew.
- Salt: Balances sweetness and brings out all the buttery flavors.
- Powdered sugar: Adds subtle sweetness and helps with the texture.
- Granulated sugar: For a little extra sweetness and to help with browning.
- Unsalted butter: Cut into chunks for easy mixing — room temperature but slightly chilled butter works best for controlling the dough’s texture.
- Vanilla extract: Classic flavor booster, make sure it’s pure for the best aroma.
- Food coloring: Choose your favorite color to represent your Valentine vibes — red or pink is the obvious go-to, but I’ve personally liked a vibrant purple or soft pastel pink for a twist.
- Extra extracts (optional): Like almond or peppermint to change it up and add even more personality.
- Holiday sprinkles: These are your party starters—mix sizes and shapes for that playful edge on your cookie rims.
Variations
One of the things I love about the Valentine’s Day Swirl Cookies Recipe is how easy it is to make your own. I often tweak it depending on the mood or the people I’m baking for, so feel free to get creative!
- Use cocoa powder: Swap half a cup of flour for cocoa powder in one half of the dough for a chocolate swirl—my kids absolutely devour these when I do this!
- Make it gluten-free: Try a gluten-free flour blend; just watch the texture—you might need a bit more powdered sugar or a touch of almond flour to hold it together.
- Add spices: A touch of cinnamon or cardamom in the vanilla dough creates a cozy Valentine’s vibe.
- Different extracts: Lemon or orange extracts can brighten the dough nicely if you want a fruity note.
- Vegan version: Substitute butter with coconut oil and use a flax egg instead of wetting agents.
How to Make Valentine’s Day Swirl Cookies Recipe
Step 1: Mix the Base Dough Thoroughly
Start by combining your flour, baking powder, salt, powdered sugar, and granulated sugar in a stand mixer fitted with the paddle attachment. Mixing these dry ingredients well ensures an even sweetness and proper leavening across the entire batch. Then, gradually add the chunks of cold butter while the mixer runs on medium — I like to see the mixture turn crumbly before the dough finally comes together. Adding the vanilla extract at this stage infuses a lovely aroma. Keep mixing until the dough forms a smooth ball, but be careful not to overwork it — that keeps your cookies tender!
Step 2: Divide and Color Your Dough
Take your dough out and split it into two equal halves. One half stays plain vanilla – that’s your sweet neutral canvas. The other half gets its Valentine’s glow with food coloring and, if you like, an extra splash of your chosen extract. I sometimes add almond for a lovely nutty twist. Mix the colored side until the color is distributed evenly. If you notice the dough turning sticky or wet after adding color, just sprinkle in a tablespoon of flour and mix gently — this trick saved me more than once.
Step 3: Roll and Chill the Dough Sheets
Now, roll out each half of dough between sheets of wax paper until you reach about 11 by 9 inches and ¼ inch thick. Keeping things even thickness helps with consistent baking. Then, slide your dough sheets onto a cookie sheet and refrigerate for at least an hour to firm up. Pro tip: chilling makes the dough easier to handle and helps preserve that beautiful swirl during baking.
Step 4: Stack, Seal, and Roll into a Swirl
Once chilled, peel off the top wax paper from each sheet. Lightly brush the uncolored vanilla dough with a bit of water (a pastry brush works great here), and then carefully flip the colored dough on top, aligning the edges. Press lightly with your fingertips to seal them. Using a sharp knife, trim the edges for a neat rectangle. When your dough is still cold but flexible, roll it jelly-roll style starting from a long side to form that iconic swirl. Don’t rush; if the dough cracks, give it a few minutes back in the fridge.
Step 5: Sprinkle and Chill the Dough Log
Spread holiday sprinkles on a large platter. Gently roll your dough log across the sprinkles so they stick to the outside edges — this is my favorite part because the sprinkles add that festive pizazz! Wrap the dough tightly in plastic wrap and chill for a few hours or pop it in the freezer for up to three months if you want to prep in advance.
Step 6: Slice and Bake to Perfection
Slice the chilled dough into ¼-inch rounds and arrange them on parchment-lined baking sheets. Bake at 350°F (175°C) for 15-17 minutes, or until the edges just start to turn golden. Keep a close eye near the end — I like to pull them out just before they get too brown to keep them soft and tender. Let cookies cool on the sheet for 5 minutes before transferring to a wire rack to finish cooling. This resting time helps them firm up slightly without losing their delicate texture.
How to Serve Valentine’s Day Swirl Cookies Recipe
Garnishes
I like to keep it simple—sometimes a dusting of powdered sugar or a drizzle of quick white chocolate melts just right over the cooled cookies. But the real magic is those colorful sprinkles on the edges, so I tend not to overdo it. That little crunch and color pop are irresistible.
Side Dishes
Nothing pairs better than a warm cup of tea or my homemade hot chocolate. For a more festive tea party vibe, I serve these with fresh strawberries or a tangy raspberry coulis to cut through the sweetness. It’s elegant, but still cozy.
Creative Ways to Present
For Valentine’s Day, I like to arrange these cookies in a heart-shaped box or tie stacks of three with a pretty satin ribbon. Another fun idea is to serve them on a tiered dessert tray alongside other bite-sized sweets for a colorful spread that’s sure to wow your guests.
Make Ahead and Storage
Storing Leftovers
Once cooled, store your Valentine’s Day swirl cookies in an airtight container at room temperature. They keep well for up to 5 days — though in my house, they usually don’t last that long! Placing a slice of bread in the container helps keep them moist, which is a neat little trick I’ve learned from years of stuffing cookie tins.
Freezing
I often freeze the dough log wrapped tightly in plastic wrap — it’s a total time saver when life gets hectic. When you want to bake, just slice the frozen dough right away, no need to thaw. The cookies bake up just as beautifully and the texture stays perfect.
Reheating
If you ever want to warm these cookies up, a quick 10-second zap in the microwave or a few minutes in a 300°F oven will bring back that fresh-baked softness. I do this a lot when we grab leftovers after school or as a cozy night-time treat.
FAQs
-
Can I use gel food coloring instead of liquid in this Valentine’s Day Swirl Cookies Recipe?
Absolutely! Gel food coloring is actually a great choice because it’s more concentrated and won’t add extra moisture to your dough. Just use a small amount and mix it well, then adjust the flour slightly if the dough feels too soft.
-
What if my dough cracks when rolling into the swirl?
If your dough cracks, it might be too cold or dry. Try letting it sit at room temperature for 5-10 minutes to soften just a bit, then gently press and roll again. You can also patch cracks with a tiny bit of water and dough scraps before rolling.
- Can I make the dough ahead of time?
Definitely! The dough can be made, rolled, and wrapped tightly in plastic wrap, then refrigerated overnight or frozen for up to three months. Just slice and bake when ready—super convenient!
- How do I keep my cookies soft and tender?
Use unsalted butter at the right temperature and avoid overbaking. Cooling the cookies on the baking sheet before moving them helps prevent them from becoming too hard. Adding a slice of bread to the storage container also helps maintain softness.
- What sprinkles work best for this recipe?
I recommend a mix of small round and star-shaped sprinkles for visual interest. Avoid very large or heavy sprinkles that may fall off during rolling. Holiday-themed sprinkles add that perfect festive touch!
Final Thoughts
This Valentine’s Day Swirl Cookies Recipe has become one of my go-to treats whenever I want to celebrate love with something sweet and handmade. It’s approachable, fun, and offers plenty of room for you to make it truly yours. Whether you’re baking for friends, family, or just because, these cookies always bring smiles and a little festive sparkle to the table. Give it a try—I’m pretty sure you’ll fall in love with the process and the results, just like I did!
Print
Valentine’s Day Swirl Cookies Recipe
- Prep Time: 30 minutes
- Cook Time: 15 minutes
- Total Time: 2 hours 45 minutes
- Yield: Approximately 24 cookies 1x
- Category: Dessert
- Method: Baking
- Cuisine: American
- Diet: Vegetarian
Description
Celebrate Valentine’s Day with these delightful Swirl Cookies that combine a soft vanilla base with a vibrant colored dough, creating a beautiful and festive swirl pattern. Easy to prepare and perfect for sharing, these cookies are buttery, sweet, and adorned with holiday sprinkles for extra charm and crunch.
Ingredients
Dry Ingredients
- 2 cups all-purpose flour, plus additional tablespoons as needed
- ½ teaspoon baking powder
- ¼ teaspoon salt
- ⅔ cup unsifted powdered sugar
- ¼ cup granulated sugar
Wet Ingredients
- 2 ½ sticks (about 285g) unsalted butter, cut into chunks
- 1 teaspoon vanilla extract
Additional Flavor & Decoration
- ½ teaspoon food coloring of your choice
- Optional ½ teaspoon extra extracts (such as almond or peppermint)
- 1 ½ cups holiday sprinkles
Instructions
- Mix Dry Ingredients: In the bowl of a stand mixer fitted with the paddle attachment, combine the flour, baking powder, salt, powdered sugar, and granulated sugar on medium speed until evenly blended.
- Add Butter and Vanilla: Gradually add the unsalted butter chunks to the mixer, continuing to mix until the mixture begins to come together. Then add the vanilla extract and mix further.
- Form Dough Ball: Continue mixing until a cohesive dough ball forms, scraping down the sides as needed.
- Divide Dough: Remove the dough from the mixer and divide it evenly into two portions.
- Color One Portion: Return one portion to the mixer, add the food coloring and any extra extracts, then mix until the color is evenly distributed throughout the dough.
- Roll Dough Portions: Roll each dough portion between two sheets of wax paper to a size of about 11 x 9 inches with a thickness of ¼ inch.
- Chill Dough: Place both rolled dough sheets onto a cookie sheet and refrigerate for at least 1 hour until firm.
- Assemble Swirl: Remove the wax paper from both dough sheets. Lightly brush the uncolored vanilla dough with water using a pastry brush, then flip the colored dough on top so they align evenly.
- Seal and Trim Edges: Gently press the edges together to seal, then trim the edges with a small knife to create neat, straight lines.
- Roll Dough Log: Ensure the dough is cold but pliable, then roll the long side jelly-roll style into a swirl log.
- Coat with Sprinkles: Spread sprinkles on a large platter, carefully lift the dough log onto it, and roll to coat the outside surface with sprinkles. Wrap tightly in plastic wrap and refrigerate for several hours or freeze for up to three months.
- Slice and Bake: Preheat oven to 350°F (175°C). Slice the chilled dough into ¼-inch thick slices and place them on parchment-lined baking sheets. Bake for 15 to 17 minutes or until the edges begin to turn golden brown.
- Cool Cookies: Allow the cookies to rest on the baking sheet for 5 minutes before transferring them to a wire rack to cool completely.
Notes
- If the dough feels too wet or difficult to roll after adding the food coloring, add an extra tablespoon of flour at a time to achieve the right consistency.
- Food coloring can sometimes affect dough texture, so adjust flour as needed to maintain rollability.
- These cookies can be frozen at the rolled log stage for up to three months for convenient make-ahead preparation.
- Use a pastry brush to lightly moisten the dough surface to help the two dough layers stick together properly.
Keywords: Valentine’s Day cookies, swirl cookies, holiday cookies, festive cookies, vanilla cookies, sprinkles, rolled cookie dough