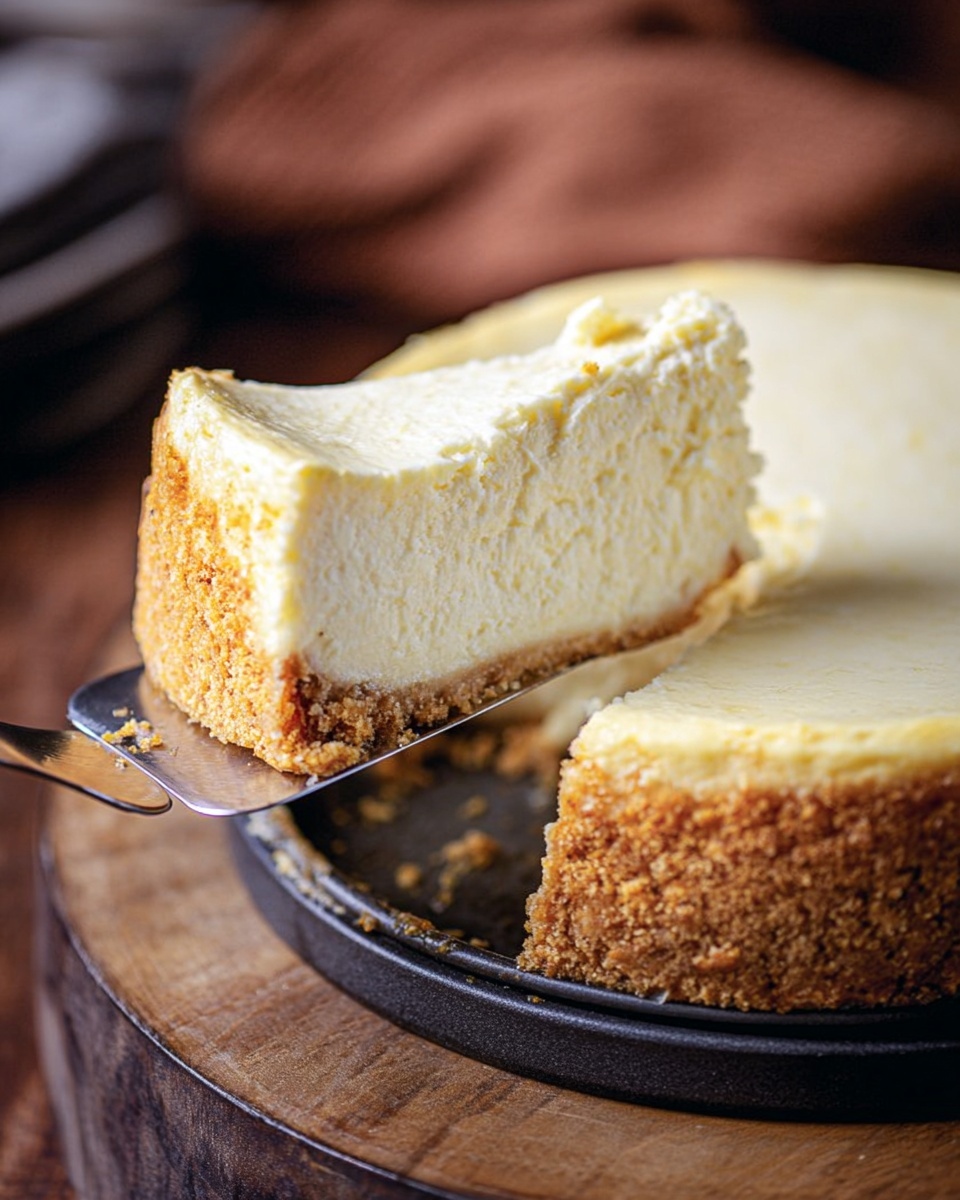
Classic Cheesecake Recipe
There’s something truly magical about a classic cheesecake recipe that just never goes out of style. Creamy, velvety, and perfectly balanced between tangy and sweet, it’s the kind of dessert that instantly impresses without feeling intimidating to make. Whenever I bring this cheesecake to a gathering, people always ask for the recipe, and honestly, it makes me smile knowing I can share something so timeless and delicious.
This classic cheesecake recipe is one you’ll want to keep in your baking arsenal because it’s incredibly versatile. Whether it’s a holiday celebration, a special weekend treat, or just a moment to indulge yourself, this cheesecake delivers that perfect comforting richness. Plus, with a few simple tricks, it’s surprisingly easy to nail the perfect texture and flawless presentation every single time.
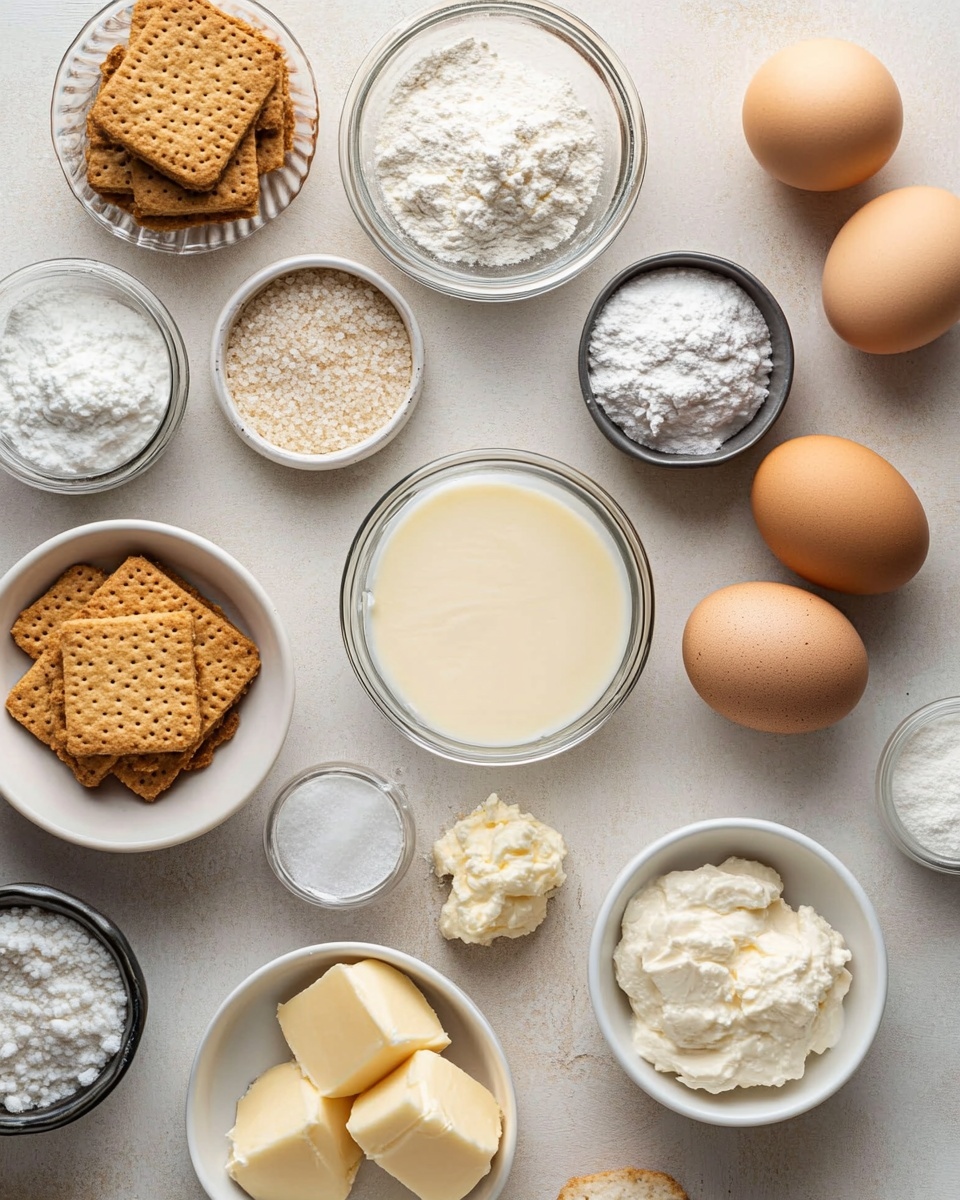
Ingredients You’ll Need
The ingredients here are straightforward but each one plays an important role in creating that luscious cheesecake texture. Using room temperature dairy items ensures everything blends smoothly, and fresh lemon juice adds just the right tartness to keep it from tasting too heavy.
- Graham cracker crumbs: Gives the crust a buttery, crunchy base and that classic flavor we love.
- Granulated sugar: Sweetens both crust and filling just enough without overpowering.
- Butter (melted): Binds the crust crumbs together to hold its shape firmly.
- Kosher salt (pinch): Enhances flavor, balancing sweetness.
- Cream cheese (block, room temperature): The star of the show—make sure it’s soft so your filling comes out smooth.
- Vanilla extract: Adds warmth and depth to the filling’s flavor.
- Sour cream (room temperature): Keeps the cheesecake creamy and gives it a slight tang.
- Fresh lemon juice: Brightens up the filling with subtle acidity.
- Large eggs (room temperature): Helps bind everything together without curdling the batter.
Variations
I love how this classic cheesecake recipe acts as a blank canvas—you can easily tailor it to your cravings and occasions. Over the years, I’ve tweaked it with different add-ins and toppings that make every batch feel fresh and personalized.
- Berry Swirl: Adding a raspberry or blueberry puree swirl before baking gives it a pretty marbled effect and a pop of fruity flavor I adore.
- Chocolate Crust: Swap the graham crackers for crushed chocolate cookies for a richer base—my friends can’t get enough of this twist.
- Gluten-Free: Use gluten-free graham crackers or nuts for the crust to accommodate dietary needs without losing texture.
- Mini Cheesecakes: I’ve made this recipe in muffin tins for individual servings—great for parties and easier portion control.
- Vegan Adaptation: While this classic isn’t vegan, experimenting with vegan cream cheese and egg alternatives can yield surprisingly tasty results.
How to Make Classic Cheesecake Recipe
Step 1: Prepare the Graham Cracker Crust
First things first, let’s talk crust. Pulse your graham crackers into fine crumbs using a food processor—unless you want to go old school and crush them in a bag with a rolling pin. Either way works! Mix in the sugar and melted butter until the mixture feels sandy but sticks together when pressed. I like lining my springform pan with a parchment circle or foil—this little trick makes removing the cheesecake so much easier later. Press the crumbs firmly into the bottom and up the sides of the pan using the flat bottom of a measuring cup; a tightly packed crust is less likely to crumble when slicing.
Step 2: Bake the Crust
Pop your crust into the oven preheated to 350°F (175°C) for about 8-10 minutes. This baking step helps the crust set so it holds up under the creamy filling. Take it out and let it cool on a rack while you whip up the filling. Don’t forget to lower the oven temp to 325°F (160°C) afterward—that’s important for gentle baking of the cheesecake itself.
Step 3: Make the Cheesecake Filling
Beat softened cream cheese and sugar on medium-high speed until silky smooth—this usually takes me about 2 minutes. Then add in the sour cream, vanilla, and fresh lemon juice, mixing just until combined. When you crack in the eggs, do it one at a time on medium-low speed, mixing each in thoroughly to avoid curdling or too much air in the batter (which can cause cracks). I always remind myself: low and slow here is key!
Step 4: Prepare Water Bath and Bake
Wrap the springform pan tightly in heavy-duty foil—water baths are crucial for avoiding cracks and baking evenly. Place your pan in a roasting pan, then carefully pour boiling water into the roasting pan until it reaches about 1 inch high. This steam gently bakes the cheesecake. Bake at 325°F for about 55 to 70 minutes until the edges are set but the center still jiggles slightly when you gently shake the pan. When done, switch off the oven, slightly open the door, and let the cheesecake rest in the water bath for an hour—this cool-down step is a little secret that really improves texture.
Step 5: Chill and Serve
After the water bath cooling, take the cheesecake out and let it sit at room temp until fully cooled. Then chill it for at least 4 hours or overnight—this chilling phase is when the cheesecake sets into that perfect creamy consistency. When you’re ready to serve, run a knife around the pan’s edge, unlock the springform rim, and slice carefully with a sharp knife. Fun tip: dip your knife in hot water before slicing for clean cuts without sticking.
How to Serve Classic Cheesecake Recipe
Garnishes
I keep it simple with fresh berries—strawberries, raspberries, or blueberries work beautifully—and a light dusting of powdered sugar. Sometimes I add a dollop of whipped cream for extra indulgence. If you’re feeling adventurous, a drizzle of chocolate ganache or a spoonful of fruit compote adds amazing flair and flavor.
Side Dishes
Cheesecake is rich, so I often balance it with light sides like fresh fruit salad or a citrusy sorbet. If it’s a party, I’ve served it alongside espresso or dessert wines, which really complements the creamy texture and sweetness.
Creative Ways to Present
For special occasions, I love topping the cheesecake with edible flowers for a fresh, elegant touch. Another favorite is making mini cheesecakes in decorative molds or jars for gifting or party favors. And layering cheesecake bites between crushed cookies and fruit in clear cups makes for a stunning parfait-style presentation.
Make Ahead and Storage
Storing Leftovers
I always cover leftover cheesecake tightly with plastic wrap and keep it in the fridge, where it stays fresh and creamy for up to 5 days. Pro tip: store it on a plate so it’s easier to serve again and keep slices intact.
Freezing
If you want to enjoy this classic cheesecake recipe later, it freezes really well. I slice it first, then wrap each piece in plastic wrap and aluminum foil before popping into the freezer. When thawed slowly overnight in the fridge, it’s nearly as delicious as fresh!
Reheating
Generally, I serve cheesecake chilled, but if you prefer it a little less cold, take it out of the fridge about 20 minutes before serving. Avoid microwaving as it changes the texture, but a room temperature slice is perfect for that melt-in-your-mouth goodness.
FAQs
-
Can I make this classic cheesecake recipe without a springform pan?
A springform pan is definitely recommended because it makes removing the cheesecake easier without damaging its sides. While you technically can bake it in a regular cake pan, you’ll likely have to invert or slice it inside the pan for serving, which can be tricky and messier.
-
Why do you use a water bath for baking cheesecake?
The water bath gently and evenly distributes heat, preventing the cake edges from cooking too fast and cracking. It keeps the cheesecake moist and smooth by creating steam, which is why it’s a key step in a successful classic cheesecake recipe.
- How do I avoid cracks on my cheesecake?
To avoid cracks, be sure to use room temperature ingredients, mix gently especially after adding eggs, and bake in a water bath to maintain even heat. Also, letting the cheesecake cool gradually in the oven with the door slightly open helps minimize cracks.
- Can I add flavors like chocolate or fruit to this classic cheesecake recipe?
Absolutely! You can fold in melted chocolate, swirl fruit purees, or add zest to customize the cheesecake. Just remember that adding extra ingredients can affect baking times and texture, so adjust baking and cooling times as needed.
- How long does the cheesecake need to chill?
For the best texture and flavor, chill your cheesecake for at least 4 hours, but overnight chilling is ideal. This allows it to fully set and makes slicing cleaner and easier.
Final Thoughts
This classic cheesecake recipe has been a cherished favorite in my kitchen for years, and it really feels like the ultimate comfort dessert that brings people together. With a bit of patience and love, you’ll find it’s incredibly rewarding to make, and even more satisfying to enjoy. So, grab your ingredients and give it a go—I promise you’ll impress everyone with your perfectly creamy cheesecake, every single time.
Print
Classic Cheesecake Recipe
- Prep Time: 20 minutes
- Cook Time: 1 hour 15 minutes
- Total Time: 9 hours 35 minutes
- Yield: 12 servings 1x
- Category: Dessert
- Method: Baking
- Cuisine: American
Description
This classic cheesecake recipe features a rich and creamy filling atop a buttery graham cracker crust. Baked in a water bath to ensure a smooth texture and prevent cracks, this cheesecake is perfect for any occasion. It can be served plain or with your favorite toppings, making it a versatile dessert loved by many.
Ingredients
Graham Cracker Crust
- 2 cups graham cracker crumbs
- ¼ cup granulated sugar
- 7 tablespoons butter, melted
- Pinch kosher salt
Cheesecake Filling
- 4 (8-ounce) blocks cream cheese, room temperature
- 1 cup granulated sugar
- 1 teaspoon vanilla extract
- 1 cup sour cream, room temperature
- 2 teaspoons fresh squeezed lemon juice
- 3 large eggs, room temperature
Instructions
- Making the Graham Cracker Crust: Preheat your oven to 350 degrees Fahrenheit and adjust the rack to the lower middle position to accommodate a roasting pan. Process the graham crackers into fine crumbs using a food processor or crush them manually using a rolling pin inside a ziplock bag. Combine the crumbs with sugar and melted butter until the mixture is sandy in texture. Press the crumbs firmly into the bottom and up the sides of a 9 or 10-inch springform pan using the bottom of a measuring cup. Optionally, line the bottom with parchment paper or foil for easier removal later.
- Pre-baking the Crust: Bake the crust in the preheated oven for 8 to 10 minutes. Remove and allow it to cool slightly on a cooling rack while preparing the filling. Then reduce the oven temperature to 325 degrees Fahrenheit.
- Preparing the Cheesecake Filling: In a stand or handheld mixer fitted with a paddle attachment, beat the cream cheese with granulated sugar on medium-high speed until smooth and creamy, about 2 minutes. Add sour cream, vanilla extract, and lemon juice, mixing until combined. On medium-low speed, incorporate the eggs one at a time, mixing each just until blended. Avoid over-mixing to prevent cracking during baking.
- Setting Up the Water Bath and Baking: Boil water in a kettle or large pot to prepare a water bath. Wrap the springform pan securely with heavy-duty aluminum foil to prevent leaks. Pour the cheesecake batter evenly over the crust, smoothing the top with a spatula. Place the wrapped pan into a roasting pan and carefully pour the hot water into the roasting pan until it reaches about 1 inch up the sides of the springform pan. Bake for 55 to 70 minutes, or until the center jiggles slightly when gently shaken.
- Cooling the Cheesecake: After baking, turn off the oven and slightly open the door, allowing the cheesecake to cool in the water bath for 1 hour. Then remove the pan from the water bath and cool it completely at room temperature. Refrigerate the cheesecake for at least 4 hours or overnight to set fully.
- Serving: Run a knife around the edges of the chilled cheesecake to loosen it from the pan. Unlock and remove the springform ring. Slice with a clean, sharp knife and serve plain or with your favorite toppings. Store any leftovers covered in the refrigerator for up to 5 days.
Notes
- Use room temperature ingredients to ensure a smooth batter and even baking.
- Do not overmix eggs into the batter to avoid cracks on the surface.
- Wrapping the springform pan carefully prevents water from seeping into the crust during baking.
- The water bath helps maintain moisture and temperature for a silky cheesecake texture.
- Allow the cheesecake to cool gradually to prevent sinking or cracking.
- Chilling the cheesecake overnight enhances flavor and firmness.
Keywords: classic cheesecake, graham cracker crust, creamy cheesecake, water bath cheesecake, baked cheesecake, traditional cheesecake dessert